
When you create a new Flow, you’re prompted to select the type of Flow you wish to create. There are 5 types of flows:
- Screen Flow
- Schedule-Triggered Flow
- Autolaunched Flow
- Record-Triggered Flow
- Platform Event-Triggered Flow

1- Screen Flow
This flow type supports screen elements, which can be used to display or collect data. Screen Flow can be called from a button or action, or displayed in a Lightning Page or the Utility Bar, but it cannot be automatically called from Process Builder. To pass the record id to the screen flow from an action, you have to create an input text variable called recordId in your flow. This way, action button knows to pass the current record's Id to this variable.
This is the only flow type that supports screens, and to do so, drag and drop the screen element from the toolbox.
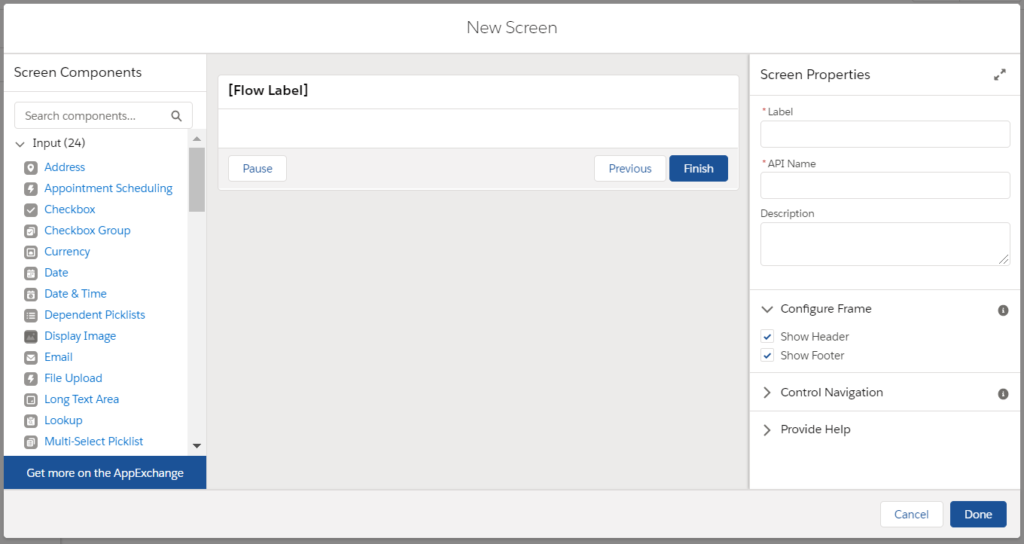
There are many standard input components that you can put on your screen. These components include text, number, email, checkbox, date, lookup, file upload, etc. These components are used for data input, which means fields that users can enter some data. If you want to display information, then you can use display image and display text components, which allows you to display an image from static resources or display a rich text.
Screen components are not limited to these standard options. You can develop Lightning Components, install them from AppExchange or install from other sources that you trust.
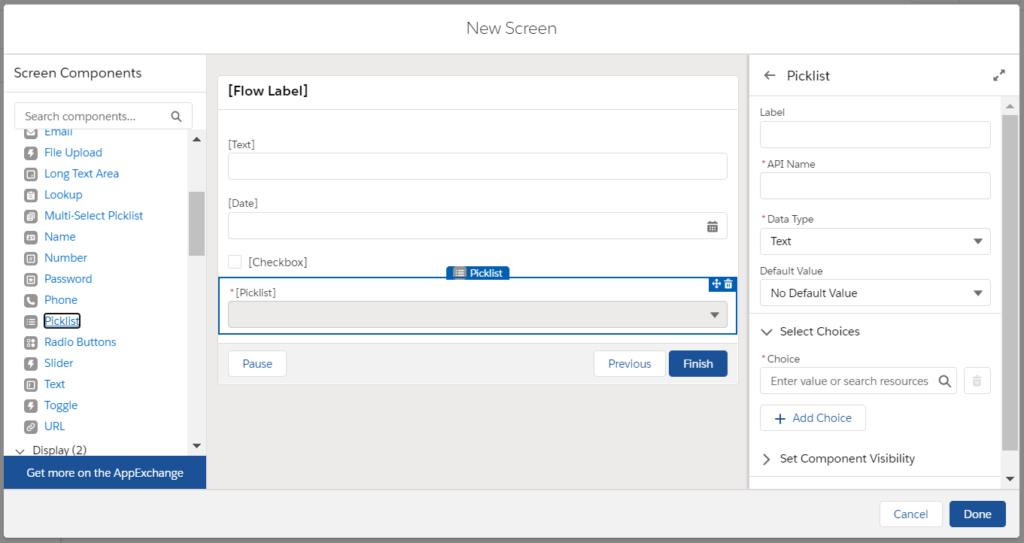
Each component has its own configurations. For instance, picklist component needs a label, API Name, data type, and choices. You can create choices manually, create them directly from an existing picklist field, or you can display records as choices (which is a great feature). If you defined the choices manually in your flow, then you can select one of them as the default value, however it is not mandatory.
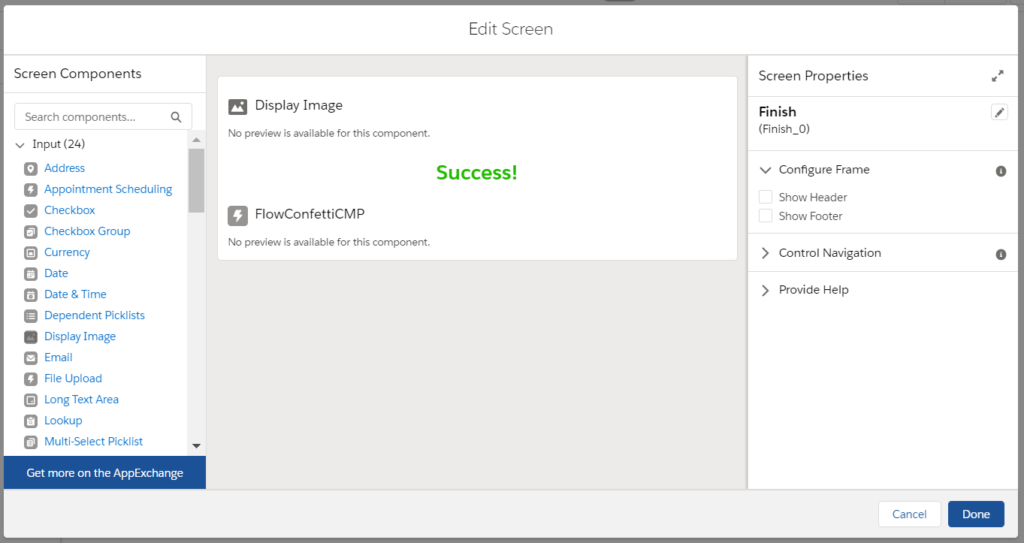
Here is an example of a screen that displays a success message with an image and confetti effect. It is a great way to display a final success message at the end of a flow. Here, display image and display text are standard component, but FlowConfettiCMP is a custom component that was installed as an unmanaged package.
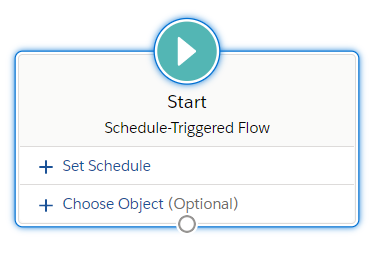
2- Schedule-Triggered Flow
This flow type launches at a specified time and frequency for each record in a batch. It runs in the background by the Automated Process user. Since it is an autolaunched flow, it does not support screens.
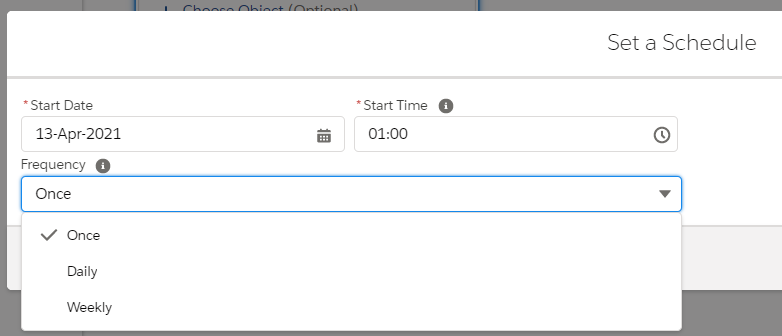
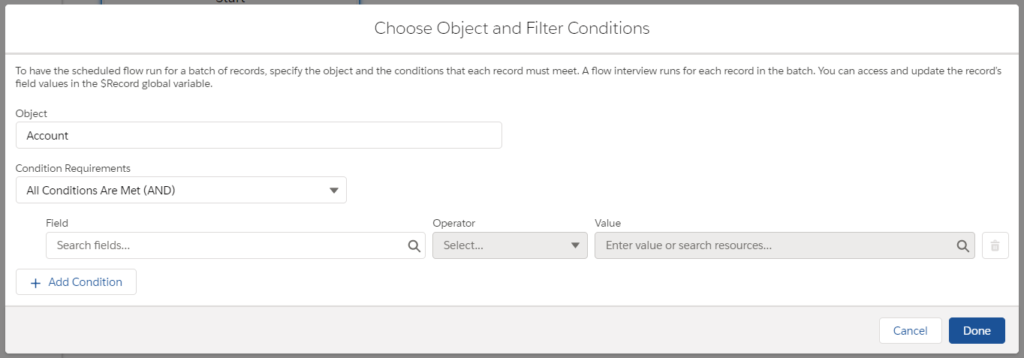
You have to set the schedule in the start element of the flow, and optionally you can choose the object and a condition to filter the records. This way, flow will run only for those records that meet your conditions.
Frequency options for a schedule-triggered flow are once, daily, and weekly. If you select once, flow will run only on the start date time that you defined. To run the flow every day on the selected time (starting from the date you defined), you have to select the frequency option of daily. To run the flow once a week (on the selected week day), you have to select the frequency option of weekly.
If you select the frequency as once but enter a start date time from past, flow will not run.
As you can see, there is no frequency option for monthly. However, you can schedule the flow to run daily and put a decision element in the flow to check the day of the month and if it is the 1st (or any other) day of the month, then the flow will continue to run its actions. This way, flow will run every day but only one day it will do the actions that you defined.
Optionally, you can select an object and conditions to filter the records. This way, flow interview runs for each record in the batch. You can access and update the record’s field values in the $Record global variable.
If a scheduled flow is removed/deleted from the Scheduled Jobs then all future recurrences of that flow type would be canceled. To activate it, you need to deactivate and reactivate the flow again.
3- Autolaunched Flow
This flow type can be called from Apex, Process Builder, button, or another Flow. It can be used to perform actions automatically in the background. It does not support screens.
To pass a value from the tool that is triggering the flow (lets say Process Builder), you have to create an input variable. You can pass a single value like a text or Id of the record, or you can pass the whole record. If you pass the whole record, then flow can access all the fields from that record and not just the Id (unlike calling the flow from an action).
Even though there is an option to call a subflow from an autolaunched flow, you can call only an autolaunched flow but not a screen flow. The reason is that autolaunched flow runs in the background, so it does not support any type of user interaction.
4- Record-Triggered Flow
This flow type runs automatically when a record is created, updated, or deleted. It does not need to be called from anything. Since it is a type of autolaunched flow, it runs in the background, so it does not support user interaction with screen elements.
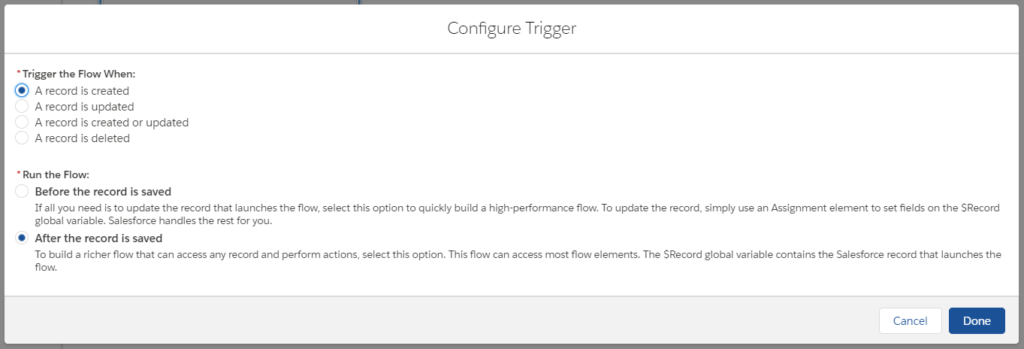
There are a few trigger options in this type of flow. It can run before/after a record is created, before/after a record is updated, or before a record is deleted. There is no option to run the flow after a record is deleted.
If all you need is to update the record that launches the flow, select the "before" option to quickly build a high-performance flow. To update the record, simply use an Assignment element to set fields on the $Record global variable. Salesforce handles the rest for you. If you choose this option, you will not see the options to update, create, or delete records.
To build a richer flow that can access any record and perform actions, select the "after" option. This flow can access most flow elements. The $Record global variable contains the Salesforce record that launches the flow.
If you choose to run the flow before a record is deleted, the flow can access any record and perform actions before the triggering record is deleted from the database. To create, update, or delete other records, add Create Records, Update Records, and Delete Records elements to your flow. The $Record global variable contains the Salesforce record that launches the flow.
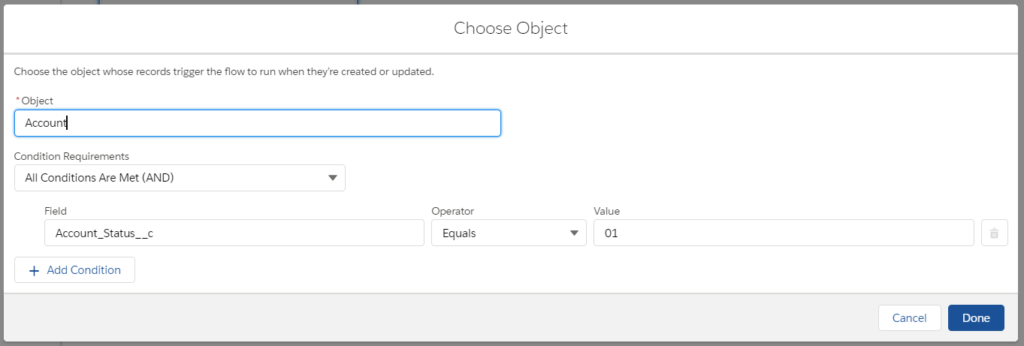
After selecting the trigger option, you have to select the object and criteria to run this flow.
5- Platform Event-Triggered Flow
This flow type launches when a platform event message is received. It does not need to be called from anything. Since it is a type of autolaunched flow, it runs in the background, so it does not support user interaction with screen elements.
Platform events are part of Salesforce’s enterprise messaging platform. The platform provides an event-driven messaging architecture to enable apps to communicate inside and outside of Salesforce.
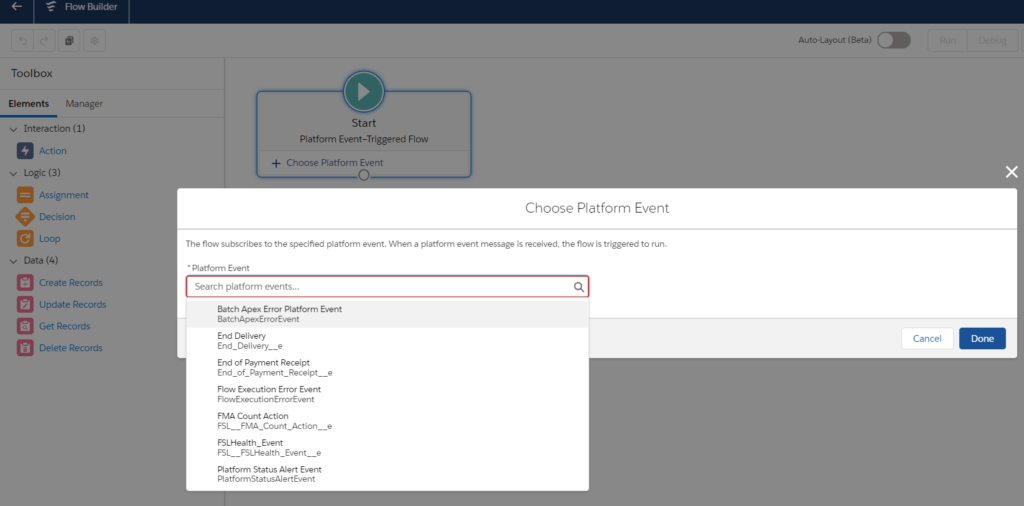
From the Start element, choose the platform event whose event messages trigger the flow to run. Then the flow will run once that type of message is received.
In a platform event–triggered flow, the $Record global variable contains the field values from the platform event message. You can use those values throughout the flow.
Leave a Reply