
Custom notifications are customized notifications that can be sent to users both to mobile and desktop devices. The notification bell icon displays these notifications.

Salesforce automation tools like Flow and Process Builder can send custom notifications. It is a great way to let the users know that something important happened. When it is sent to a mobile device, users get it as a push notification like the other applications that we know. More importantly, when the users click on the notification, system takes them to a target page that is defined. Most of the time, it is a record page.
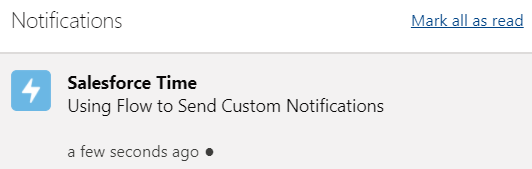
As you can see from this picture, a notification contains a title and a body. This is what the recipient sees. However, there are more parameters that should be populated. Such as Recipient IDs, Sender ID, Target Record ID, Target Page Reference, and Custom Notification Type ID.
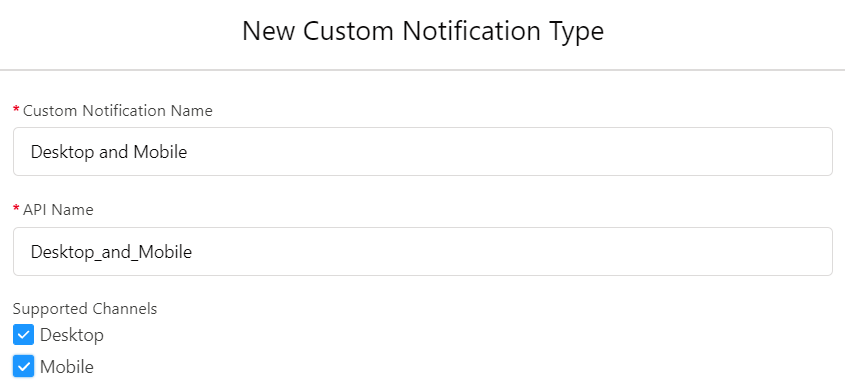
Before creating an automation to send custom notifications in Salesforce, you have to create a custom notification type. In order to do so, go to Custom Notifications in setup and create a new Custom Notification Type. Don't forget to select the channels that you want to use for this notification type.
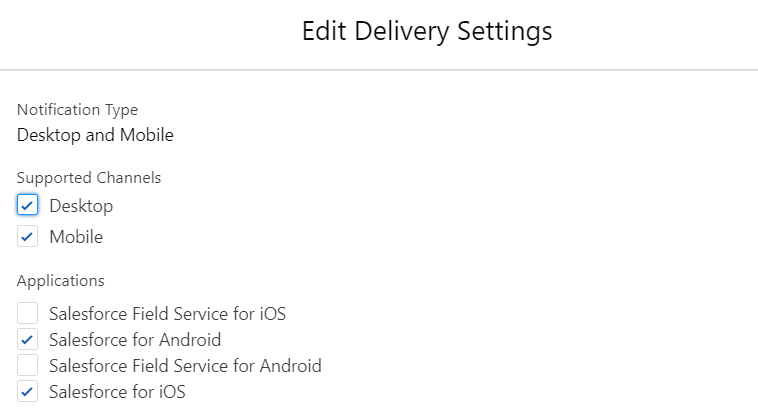
After creating the Custom Notification Type, go to Notification Delivery Settings in setup to select the supported applications for the notification type.
Read this article to learn more about creating custom notification types, its limitations, and the parameters.
How to Send a Custom Notification?
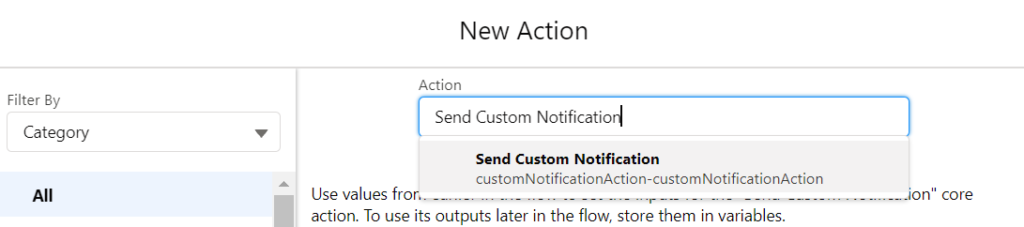
To send a custom notification using flow, you have to add the Action element from the toolbox and select "Send Custom Notification".
After selecting the action, you will see the input parameters. There are a few parameters that you need to provide and it is important to understand what each one means.
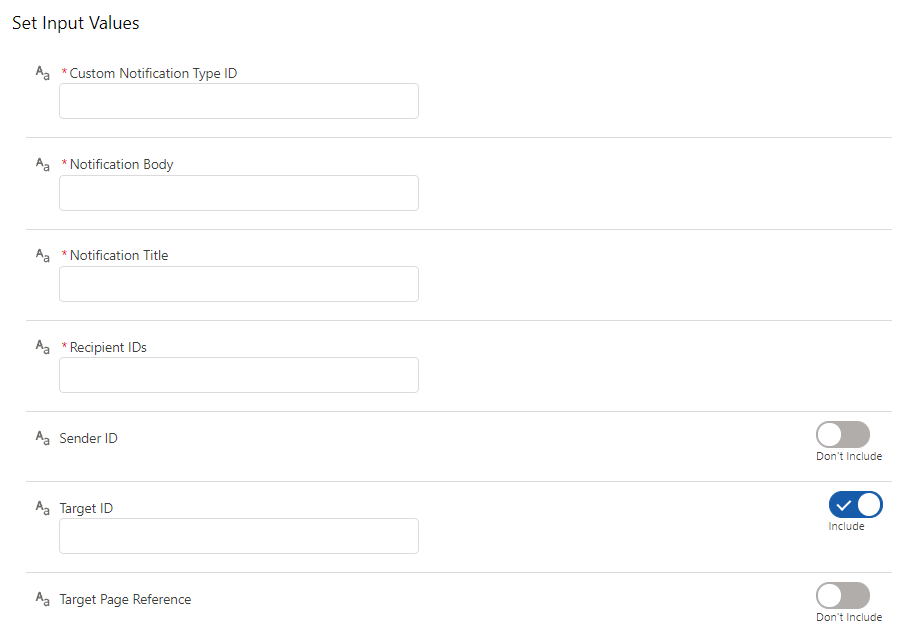
1. Custom Notification Type ID
This is a text value that stores the record Id of the custom notification type that you created. You can use the developer console to find the Id and then enter it to this parameter. However, I do not recommend hardcoded Ids since they can be different in your sandbox and production environments. Because of this, perform a get for the Custom Notification Type object/table in order to get the right Id value. It is mandatory to enter a value for this parameter.
2. Notification Body
It is the text body that recipients will see. You can create a variable to store a dynamic content using other variables, or you can simply type the message. It has a limit of 750 characters and it is mandatory to enter a value for this parameter.
3. Notification Title
It is the bold title that recipients will see. Like the notification body, you can create a variable to store a dynamic content using other variables, or you can simply type the message. It has a limit of 250 characters and it is mandatory to enter a value for this parameter.
4. Recipient IDs
You have to provide the recipient Ids using a text collection variable. If you want to send the notification only to one user, you still need to create a text collection variable and store the Id inside it. You cannot simply enter the Id or use a single-value resource that stores the Id. It has a limit of 500 values and it is mandatory to enter a value for this parameter.
Recipient ID input parameter can work with a few types of Ids:
User ID: Provide the Id of the active user(s).
Group ID: Provide the Id of a group and the notification will be sent to all active users who are members of this group.
Queue ID: Provide the Id of a queue and the notification will be sent to all active users who are members of this queue.
Account ID: If Account Teams are enabled in your org, provide the record Id of an account. All the active users from the Account Team of this account record will receive the notification.
Opportunity ID: If you are using team selling in your org, provide the record Id of an opportunity. All the active users from the Opportunity Team of this opportunity record will receive the notification.
5. Sender ID
It is an optional input parameter that stores the User Id of the sender.
6. Target ID
It is an optional text parameter that should store the record Id of the target record. When user clicks on the notification, system will take the user to this record. Even though it is optional, you must specify Target ID or Target Page Reference. Because of this, in most of the cases, you will need to populate this input parameter.
7. Target Page Reference
It is an optional text parameter that should store the navigation target of the notification. Read this article to learn how to navigate to pages.
You can check this article to learn more about the input values and the limitations.
Let's create a flow to send a custom notification to account owner when the Account Status field value is changed.
Creating a Record-Triggered Flow to Send a Custom Notification
Since Salesforce announced that Process Builder will be retired in the near future, it is better to build a record-triggered flow that sends a custom notification. Let's see how to build the flow step by step. Read this post if you don't know what record-triggered flow is.
1. Create a record-triggered flow that will run when there is a change on the Account Status field. In order to do so, select Account as the object and add the criteria.
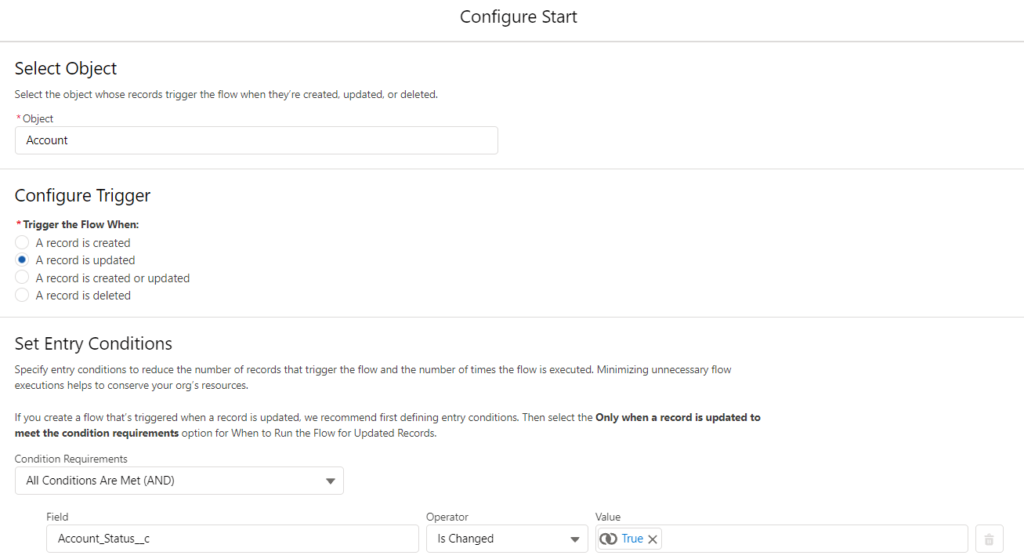
Since you will use an Action, it must be an after save flow. In order to do so, select "Actions and Related Records".

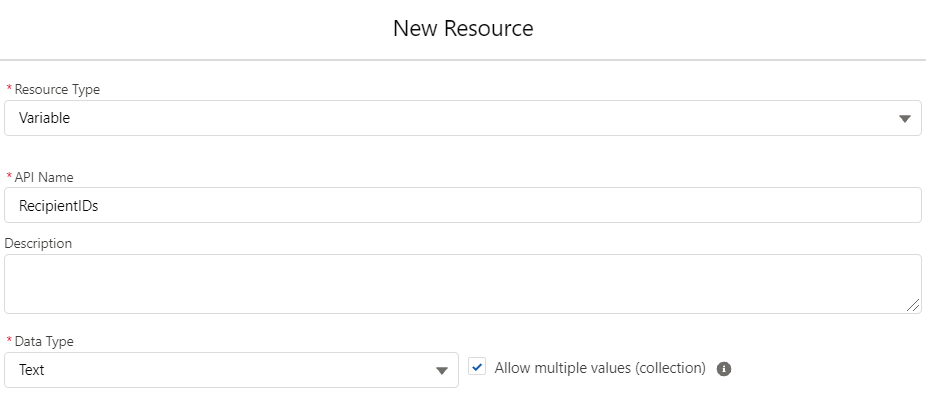
2. You have to create the resources that you will use in the action. Create a text collection variable for RecipientIDs and create a Text Template for the Notification Body. You can create more variables but let's assume that you will type them manually or select a field value.
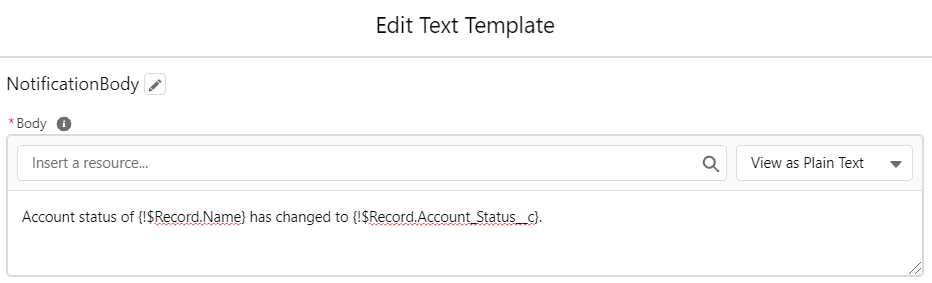
As you can see in the picture above, use field values to display a meaningful text to the recipients.
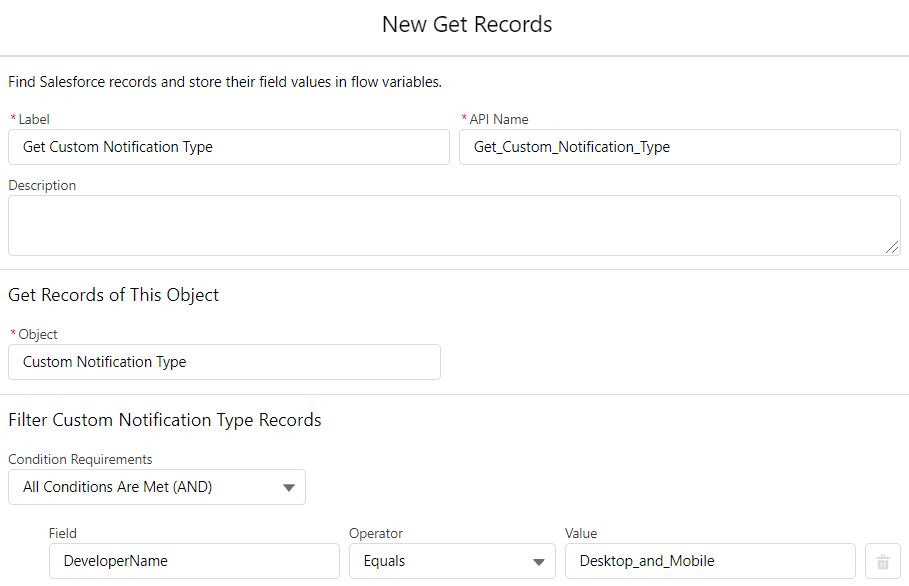
3. Do not put a hardcoded Id value for the Custom Notification Type ID. Add a Get Record element from the toolbox and get the Id of the Custom Notification Type using the API Name of it.
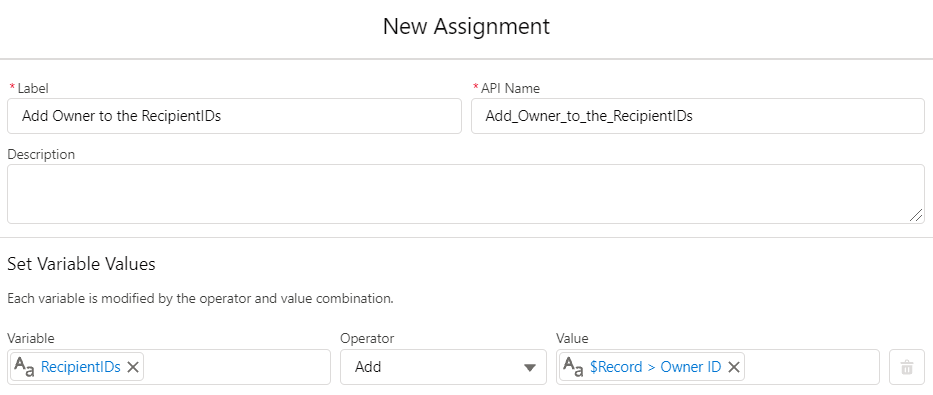
4. You have to assign the user Id to the RecipientIDs text collection. In order to do so, add an Assignment element and add the OwnerId to RecipientIDs collection using the Add operator. If you want to send the notification to more users, you can use the Assignment element to add more Id values to the same text collection.
5. Add an Action element from the toolbox and select Send Custom Notification. Fill the input parameters as shown below.
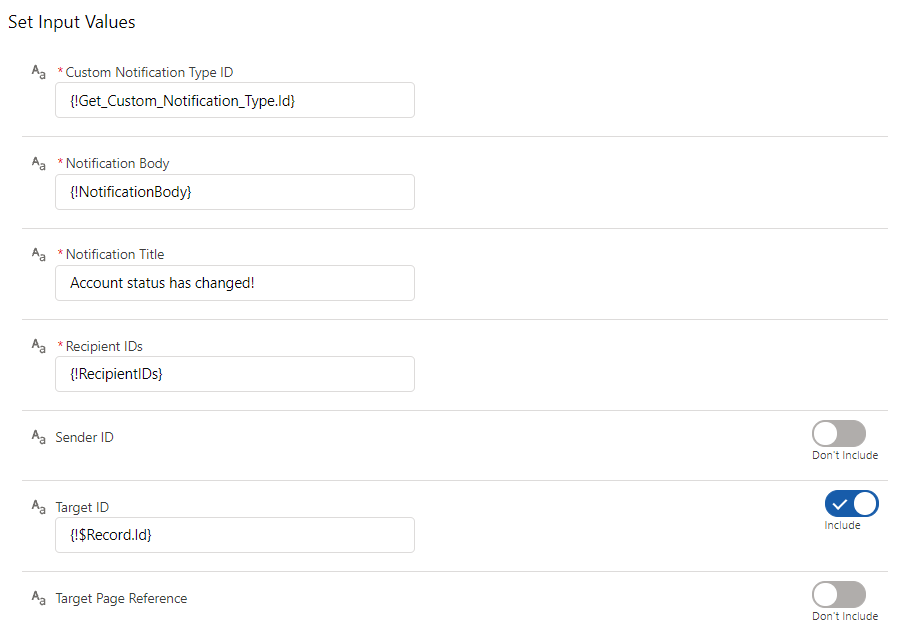
As you can see, Target ID is the record Id of the account. It means that if the user clicks on the notification, system will take the user to the account page.
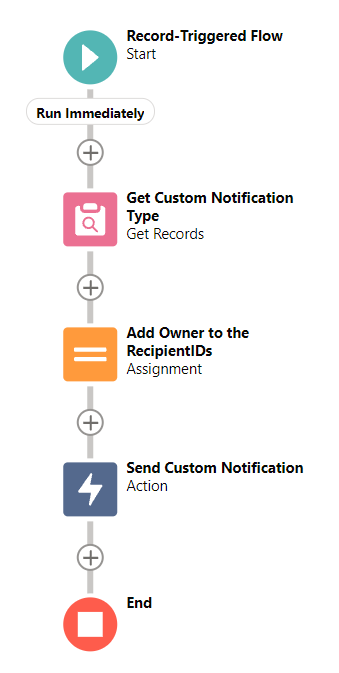
At the end, your flow should look like this. It is a very simple flow but it should help you understand how to send custom notifications.
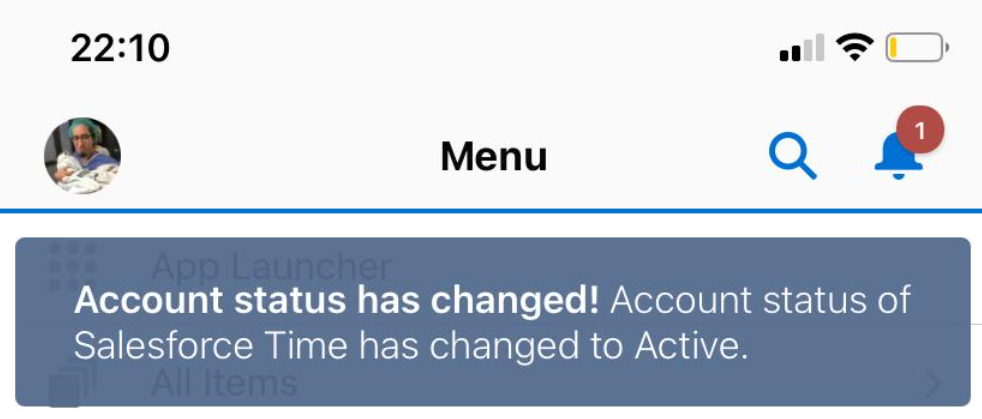
Action Time
When you change the Account Status value of an account, the flow will send a custom notification to the account owner. After changing the Account Status to Active, this is what happens in the Salesforce mobile app.
What Else Can Be Done?
It is a very powerful feature that can be used in many scenarios.
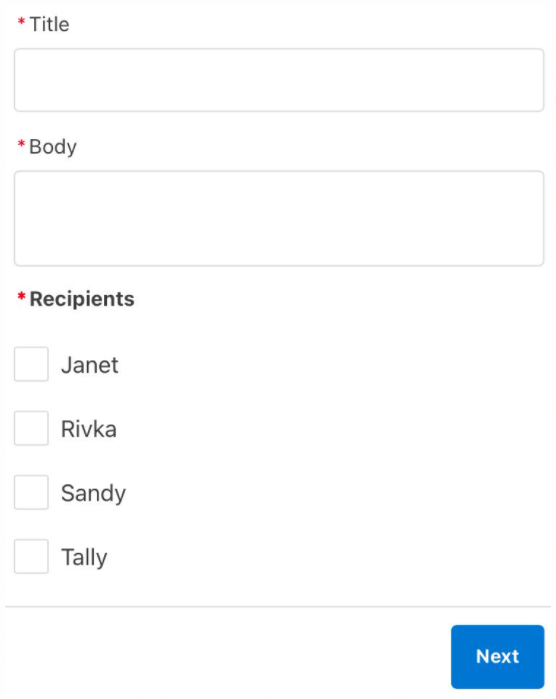
You can send a custom notification also in a Screen Flow. It is possible to let the user select multiple recipients from a screen, type a message and send it to the selected recipients. It is a great way for the managers to notify their team. However, if you are willing to use a Screen Flow, make sure that the running user has the Send Custom Notifications permission. You can run the Screen Flow also in the system context, so that it will not check the permissions of the running user. I believe this would be the best practice for this use case.
Another point is that you can create an autolaunched flow that sends a custom notification. Use variables for each input value and mark them as available for input. Then you can use it as a subflow in any flow that you want. This way, you won't need to do the same actions in each flow.
I'm trying to figure out how to setup send notification using the FLOW and I know how to configure but I have read and seen lots of youtube video talks about sending to the owner of the record, but what I want to do is to:
how can you send notification to number of users
how to leverage groups, say if I create a group and I can add few users to the group
but I have not found any resources that talks about the above two criteria.
I have seen the in Process Builder you have options to choose the group and you define the group name but why can not have the similar in Flow ? unless I'm not looking at the right place.
Any help?
Hi, you can put the group Id or queue Id to the Recipient Ids parameter. Then it will send the notification to all the members of this group/queue.
This is a great help. I have one issue with the Recipient Id. When I follow your steps I do not get the Variable I created as a value to select as it only shows global variables. Any thoughts on why my variable is not showing up as a selection?
Thanks
Sorry, scratch my question. Thank you again for this information.
For anyone else having this issue make sure your variable is a collection or check the box to allow multiple values. I did not the first time and it did not show.
Right. Even if you want to send a notification to one user, you still have to create a text collection variable and assign the user's Id to this collection.
Hi Yumi,
I'm trying to configure a custom notification for group members but struggling. I keep getting the message: Invalid parameter value for: recipientIds
Group members are assigned to a group using their name and a unique sequence number.
I can't find any resources to help on this so hoping you can! Thank you
Hi Rachel,
RecipientIds should be a text collection variable and you should assign the Id of the group. The notification will be sent to all active users who are members of this group.
Hello sir,
Thanks for wonderful article.
When implemented the same I found in the first time not getting notification until I refresh my page. Is it a known behavior?
Hi,
Is it happening only on the first time? I am not sure if there is a known issue or limitation like this but I think it happened to me as well.
This was super helpfull. Thanks a lot!
Thanks a lot for replying to the question about the Recipient id for sending to more than one user.
I used the group Id in the assignment element and it worked
You can run this query to know the group ID's
SELECT Id, Name, Type FROM Group
Or this for public groups
SELECT Id, Name, Type FROM Group WHERE Type = 'Regular'
Bonjour,
Merci pour cet article très utile.
Je n'arrive pas à saisir l'ID du groupe dans le champ valeur de l'attribution, pouvez vous m'aider?
Hi,
Please make sure that you are using a text collection for the group ID (even though it is only one value).
Hello, I have an existing record triggered flow that sends an email to a users everytime an evidence record has been uploaded. I want to change this to only be send once based on upload session; which can be one or multiple evidences. When user updates evidence record in one upload session it is marked by an unique evidence session ID. So the flow needs amending to only send one email per session id , but really struggling to understand how to amend this to make it work.
How can I identify this session id is unique across multiple evidence records?