
File Upload component in Screen Flow enables users to directly submit files while navigating through a flow. It presents a user-friendly interface, allowing users to choose and submit various file types. This functionality proves beneficial when gathering files within Salesforce for specific scenarios. Although it is a great component, it lacks some important configurations and features. For instance, there is no standard option to make the file upload component required. Moreover, it doesn't have an indication that shows if you uploaded a file. This might be confusing and may cause uploading the same file multiple times.
There can be multiple ways of making the file upload component required. Here are some workarounds.
Using a Decision Element to Check the Output
File Upload component has output values of Content Document Ids, Content Version Ids, and File Names. After the user clicks the Next button, it is possible to use a Decision element to verify whether the user has successfully uploaded a file.
Here is how to use a Decision element to make the file upload required.
1- After the screen that has the File Upload component, add an Assignment element to assign the size of the Content Document Ids collection.
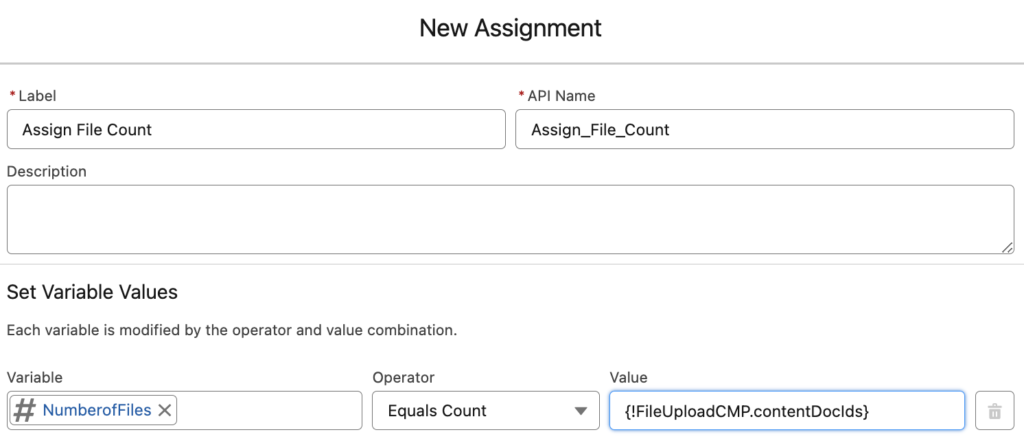
2- Add a Decision element to check if the number is greater than 0.
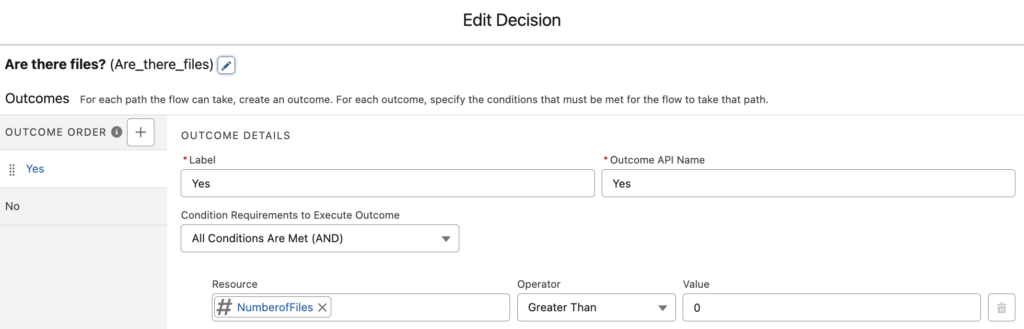
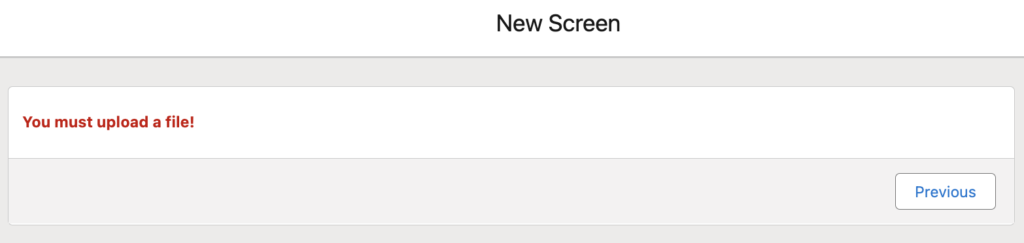
3- If there are no files, go back to the main screen or to another screen that has an error message.
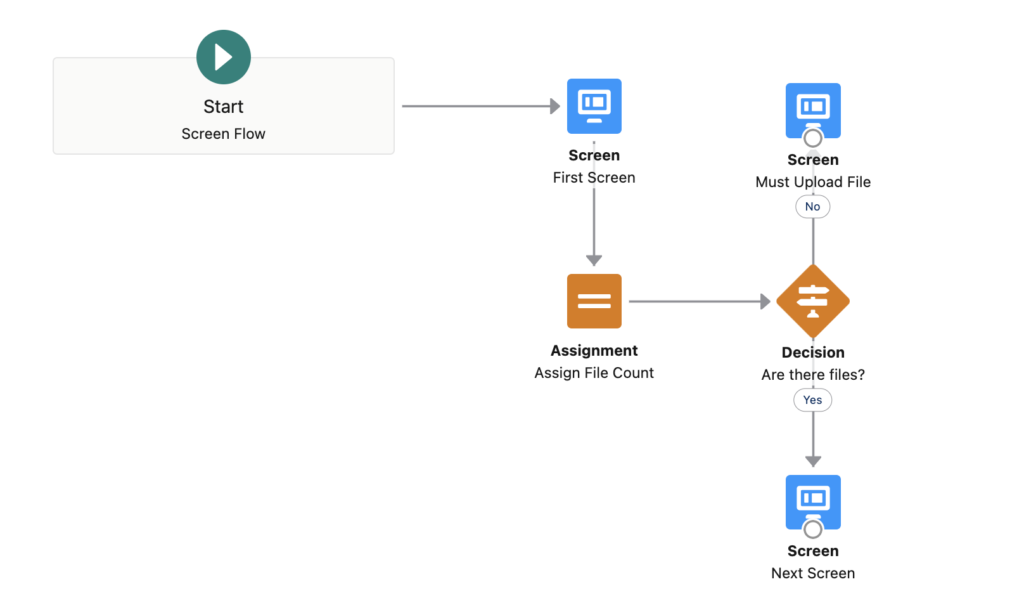
At the end, your flow should look like this.
Although this solution works well, you may want to solve it even before clicking the Next button. Here is a workaround using a custom screen component for the buttons.
Using Custom Flow Buttons
The main idea of this workaround is to hide the Next button if the user didn't upload a file. Since it is not possible to add visibility conditions to the standard flow buttons, you have to use custom buttons. In this example, we will use Flow Button Bar from UnofficialSF.
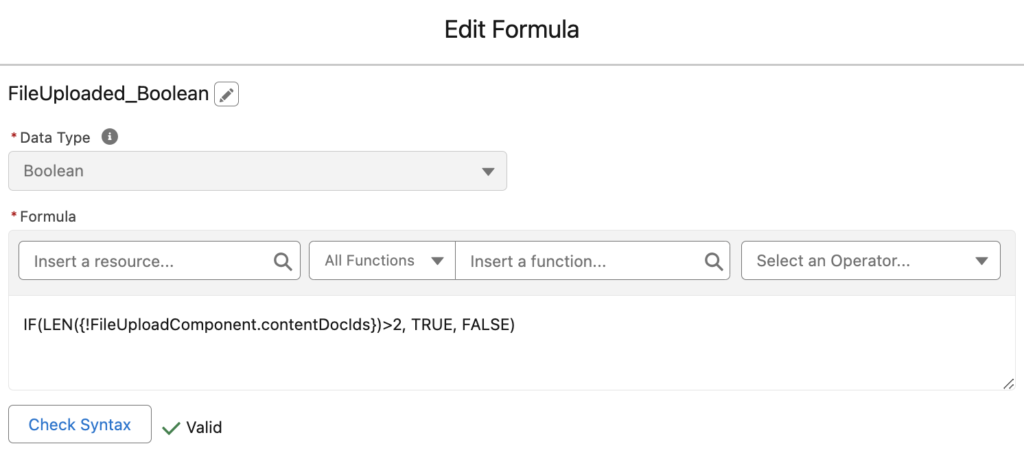
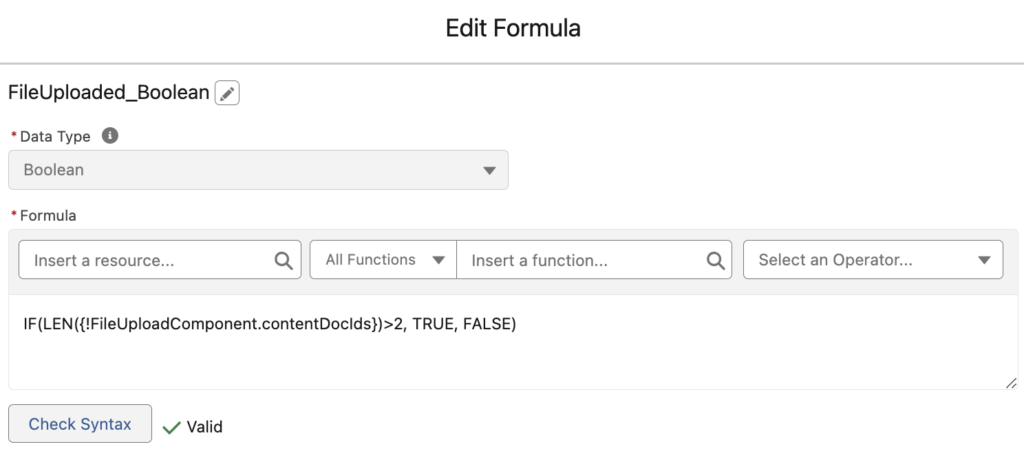
1- Create a new boolean formula resource. It should return true if there are files. In order to check if there are files, you can check the length of contentDocIds.
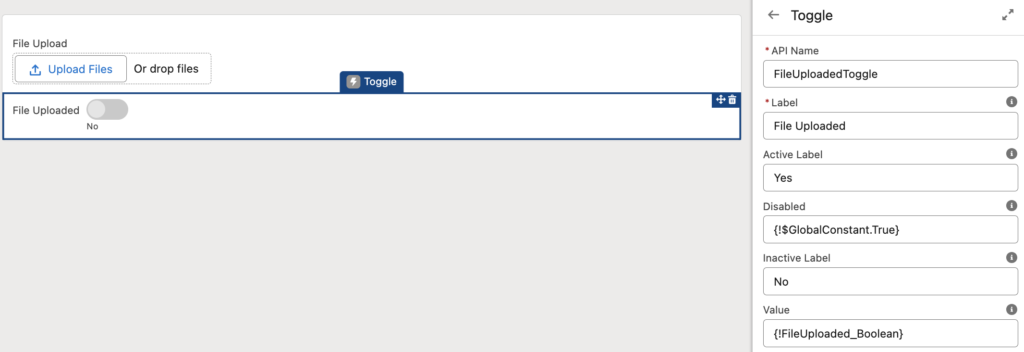
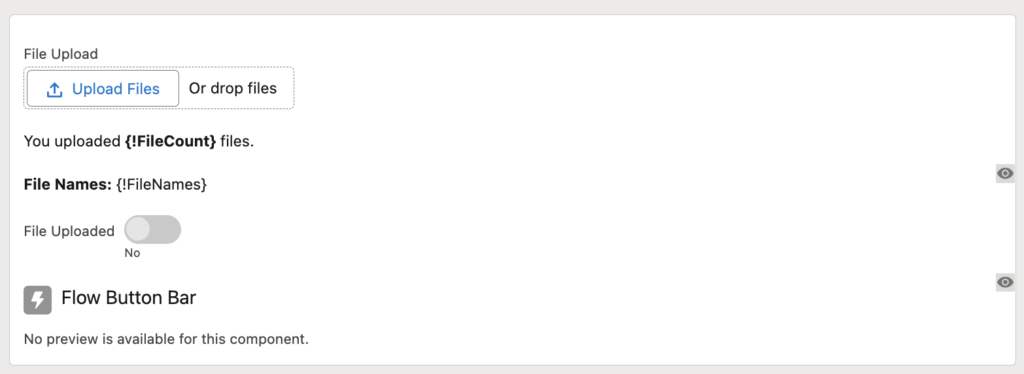
2- We will use reactive screen components in this workaround. Add a toggle component and use the formula as its default value. Make it disabled, so that it will be an indication only.
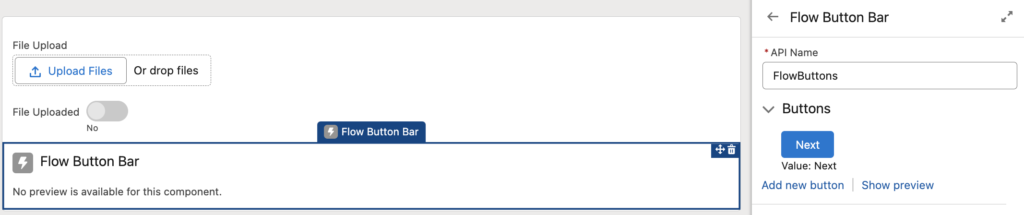
3- Hide the footer and add the Flow Button Bar that you installed. Add a new Next button and then add a visibility condition to the component.
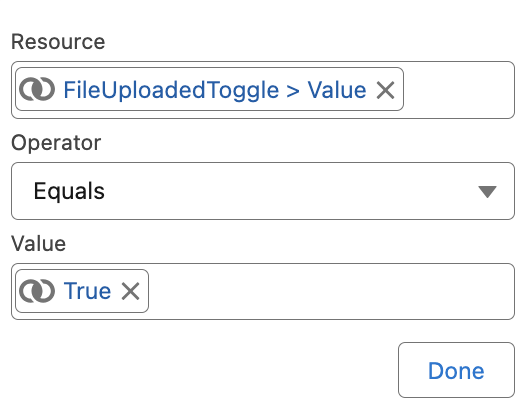
This visibility condition will make sure that the button will not appear if the user didn't upload a file. Therefore, file upload will be required.
Adding More Indications
In the previous example, we added a toggle for indication. You can use reactive screen components to display more indications.
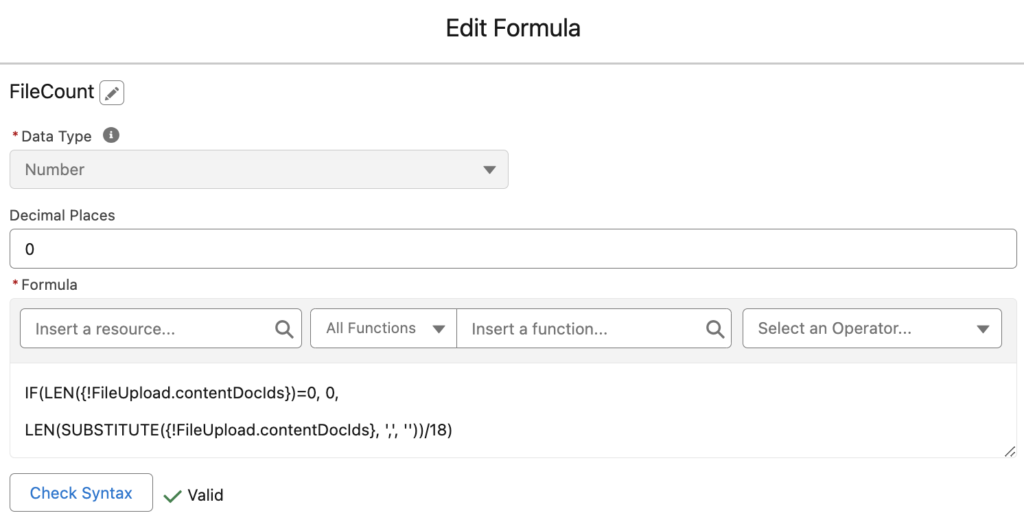
Create a new formula that returns the file count. Output of the File Upload component is a comma separated list of Ids. Therefore, if there is only one file, the length will be 18. However, if there are two files, the length will be 37 (18+18+1 for the comma). So, you have to remove the commas and divide the result by 18.
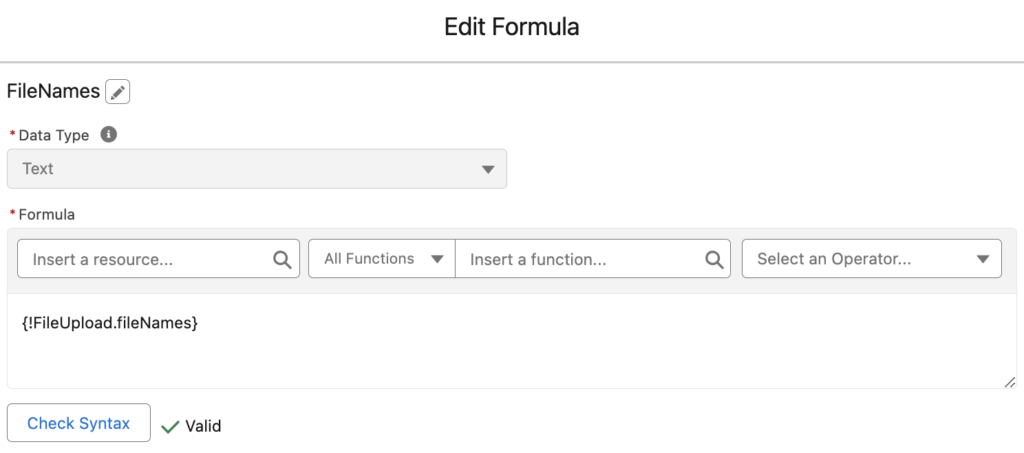
Create another text formula that returns the file names from the output of the component.
Then, add display text components to display these formulas. Pay attention that file names has a visibility condition, so that it appears only when the user uploads a file.
It is always possible to improve the user experience. For instance, let's use SLDS for a better UI. Create a formula resource with this code:
'<div class="slds-scoped-notification slds-theme_success" role="status">'Add a red error message that says "You must upload a file!". This should be visible if the toggle's value is false.
Then, add another display text component with the formula that you created (SuccessCode). Add the count of files and file names to the same display text. Make sure that it will be visible only if the toggle's value is true.
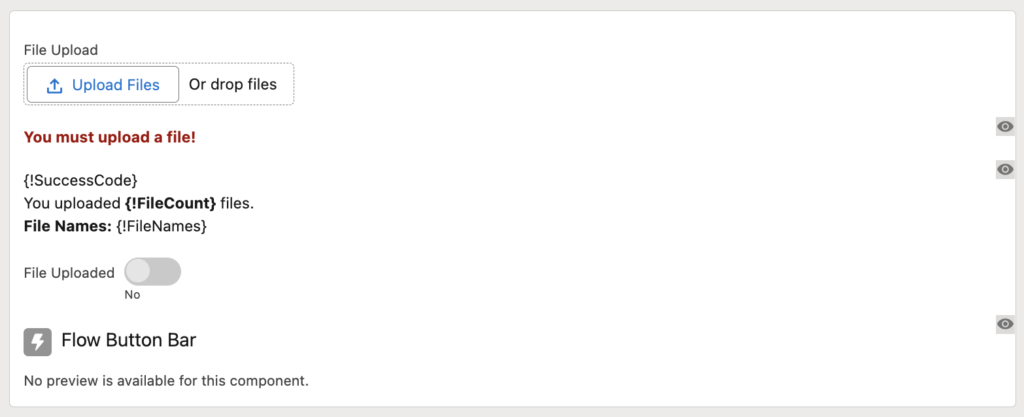
Here is a demo of our solution. User experience is much better, right?
Using Flow Input Validator
Here is the shortest and easiest way to make the File Upload component required.
Flow Input Validator is a screen component that you can use to validate screen flow input components that do not support input validation.
Add the Flow Input Validator component below the File Upload. Enter an error message and a boolean formula that returns true for the valid condition.
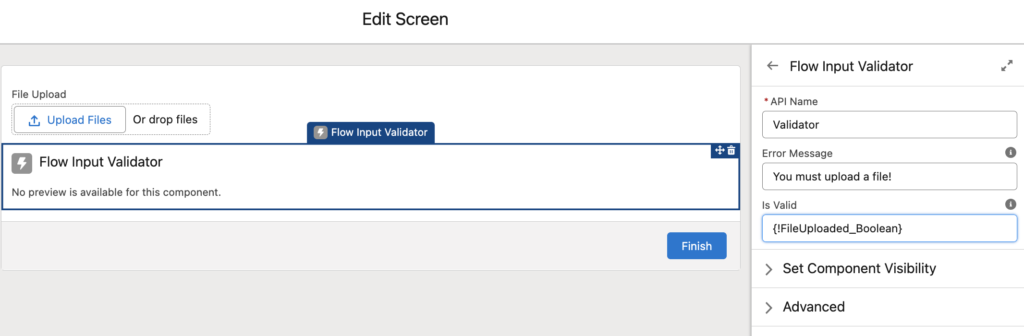
That's it, there is nothing else that you have to do. This component will not let you continue without uploading a file.

Using a Custom Solution for File Upload
In this post, we saw some workarounds to make the standard File Upload component required. However, instead of all these workarounds, you can use a custom solution for uploading files. For instance, you can install File Upload Improved from UnofficialSF. This custom screen component has a configuration to make file upload required. Moreover, it has more features including indications that show what user uploaded.
Using File Upload Enhanced
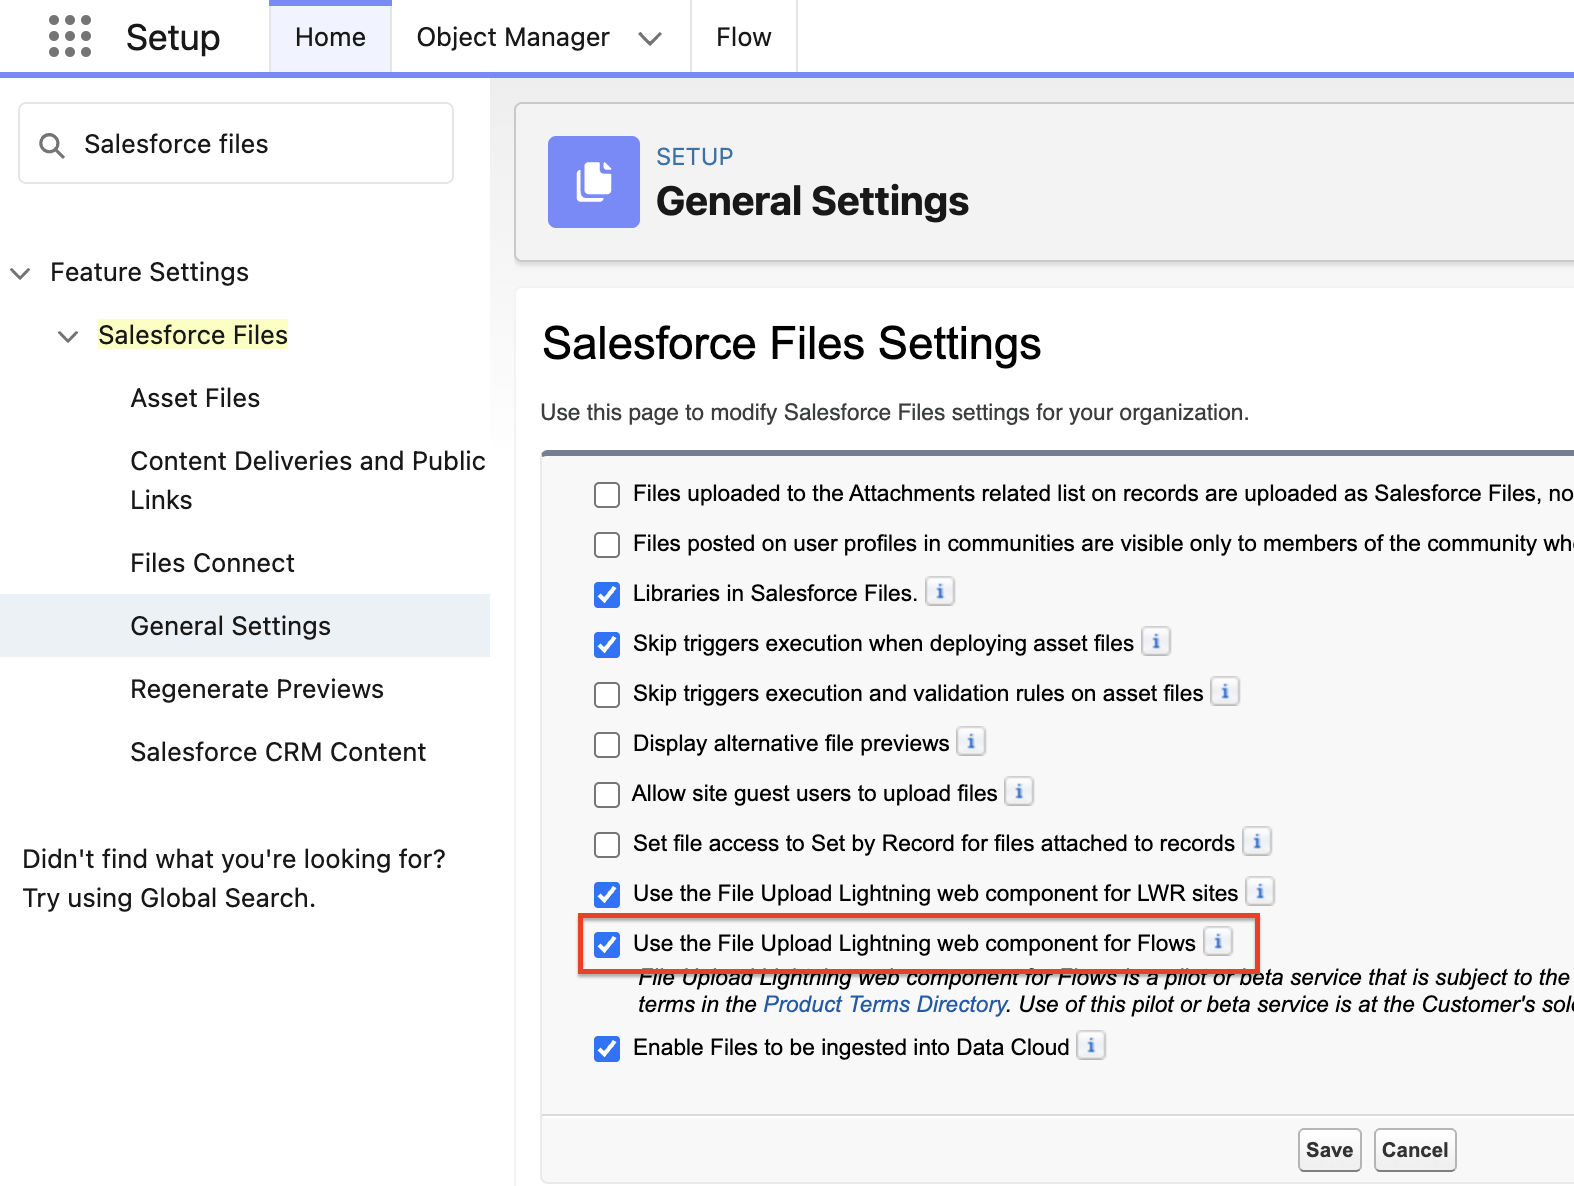
Salesforce has released a new component for uploading files. Since File Upload Enhanced is a beta feature, you first need to enable it in the General Settings under Salesforce Files.
This component has an additional parameter that allows you to make file upload required.
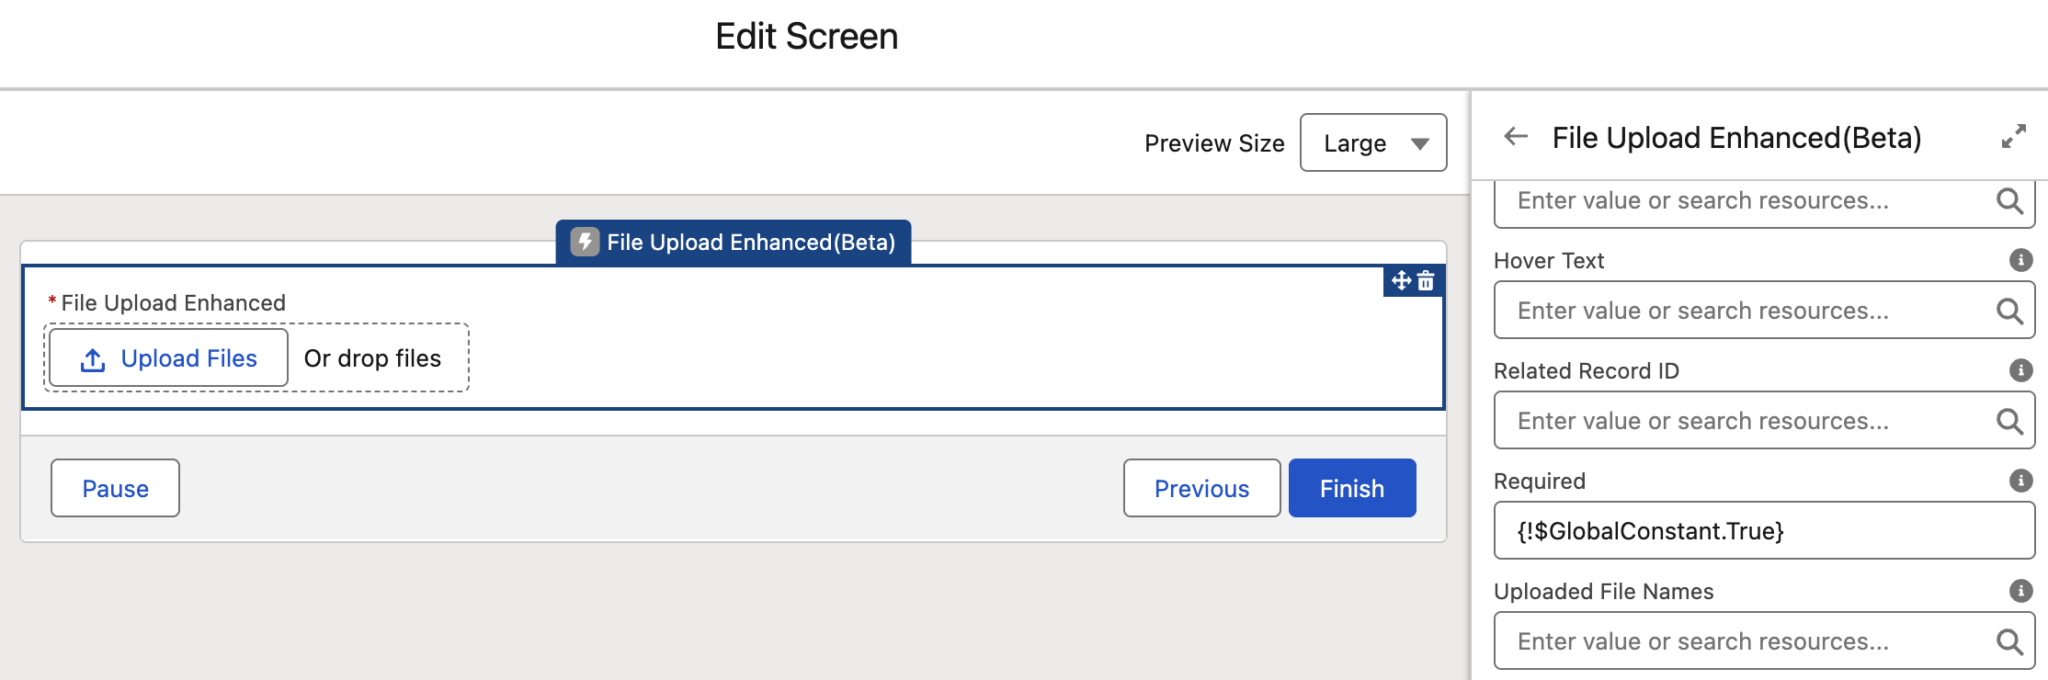
This way, you can make file upload required without relying on any custom solutions or workarounds.
I am trying to upload files with file names and number of count on same screen, but file names and count not updated on same screen. i am also using Toggle component and allow reactive feature on my org. Can you please assist me.
Hi,
Please make sure that you opted in to display text reactivity from process automation settings.
Thanks for this!
Works great to me with a custom button.
The reactive works great if they upload all of their files in one go even if they don't leave the screen. If they upload one file, then click Upload again and upload another, it wipes out the first File Name. Any thoughts on how to get around this?
Yes, that's right. This component stores output values for the last file(s) that were uploaded.