
The File Upload component in Screen Flow allows users to upload files directly within a flow. It provides an interactive interface where users can select and upload files, such as images, documents, or other media. It's valuable when you collect files in Salesforce as part of a data-gathering process within certain scenarios.
Here is the configuration of the File Upload component in Screen Flow.
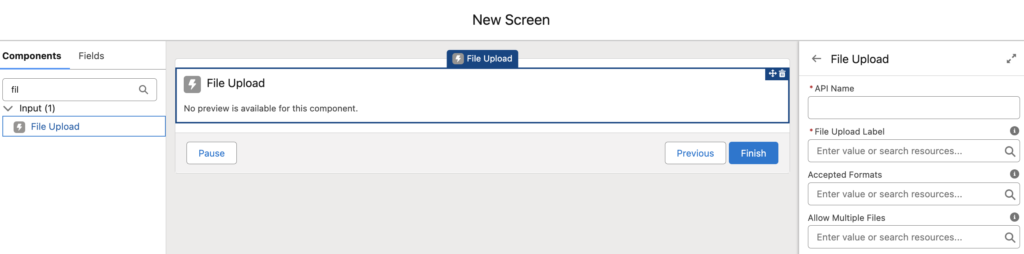
Configuration of the File Upload Component
Input Values
There are a few input parameters that you have to provide when configuring the file upload component.
- API Name: It is a required parameter that becomes the API name for the file upload component. It must be unique within the flow.
- File Upload Label: It is a required parameter for the label that appears above the upload button.
- Accepted Formats: This is an optional parameter for the accepted file types. You can enter a comma-separated list of the file extensions (such as .png) that the user can upload.
- Allow Multiple Files: It is an input parameter to allow the user to upload multiple files. If you set to $GlobalConstant.True, the user can upload multiple files.
- Disabled: You can set this parameter as $GlobalConstant.True to make the file upload component disabled.
- Hover Text: It is an optional tooltip that appears when the user hovers over the component.
- Related Record ID: It is the Id of the record to associate the files with. It means that the uploaded files will be located under this record.
Output Values
Here are the output values of the File Upload component.
- Content Document IDs: It is a text collection of the content document Ids of the files that the user uploaded.
- Content Version IDs: It is a text collection of the content version Ids of the files that the user uploaded.
- Uploaded File Names: It is a text collection of the uploaded files' names.
How to Use the File Upload Component
Let's see how to upload files with an example. We have an existing screen flow for creating case records. Now, let's enhance it to include file uploads.
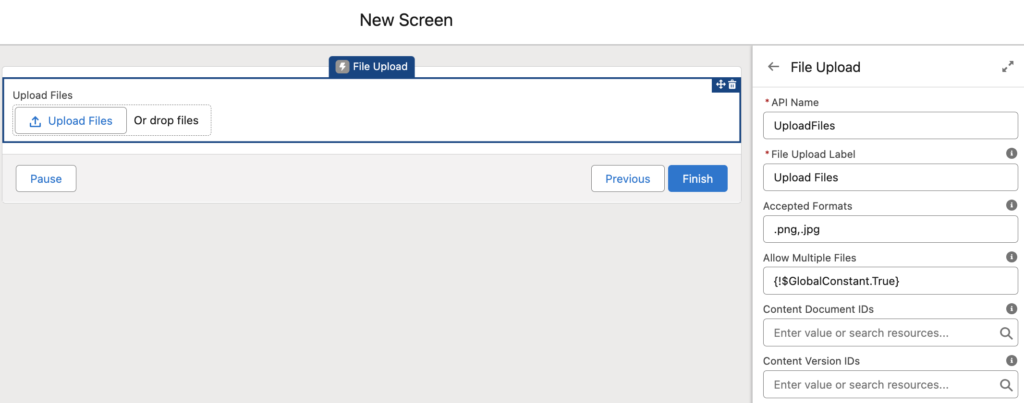
Add a screen element with a file upload component. Then enter the input values. For instance, this File Upload component allows the user to upload multiple png and jpg files.
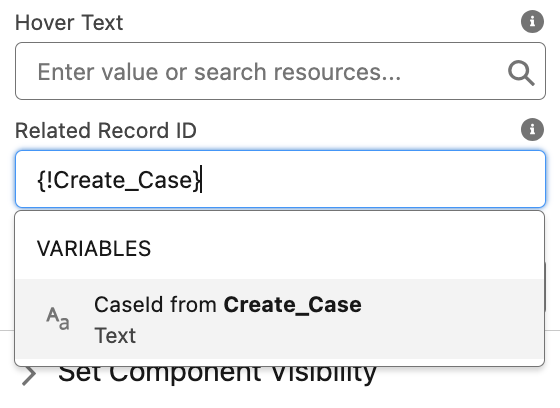
In order to associate the files with the case record, put the Id of the case record to Related Record ID.
As you can see, it lets you upload multiple png and jpg files. Although other type of files are still visible, it is not possible to choose them.
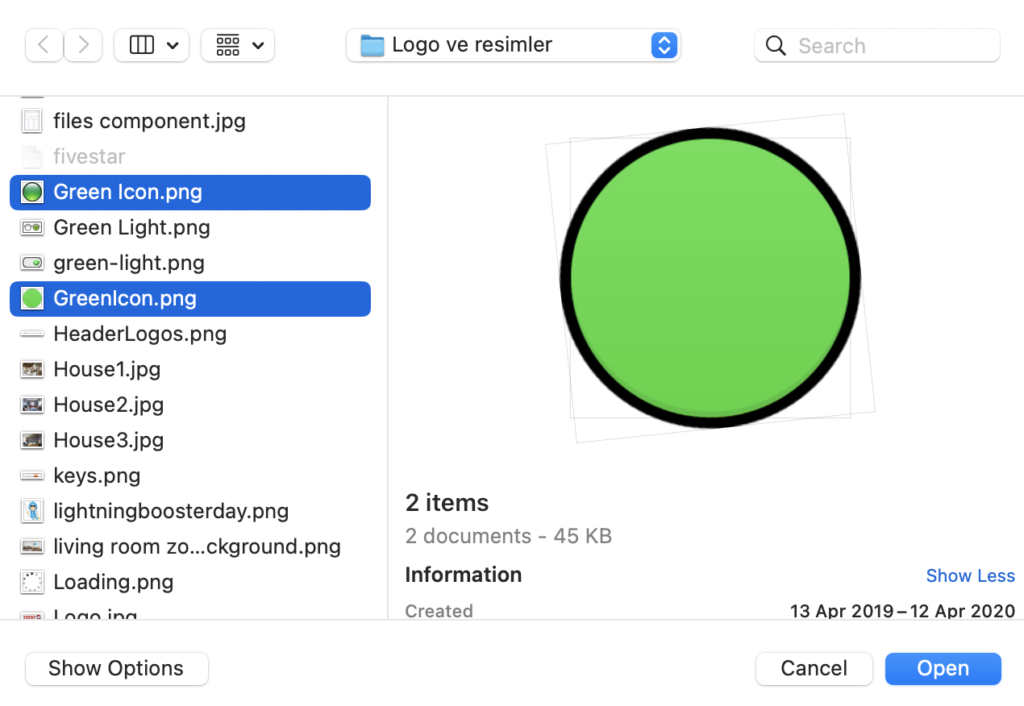
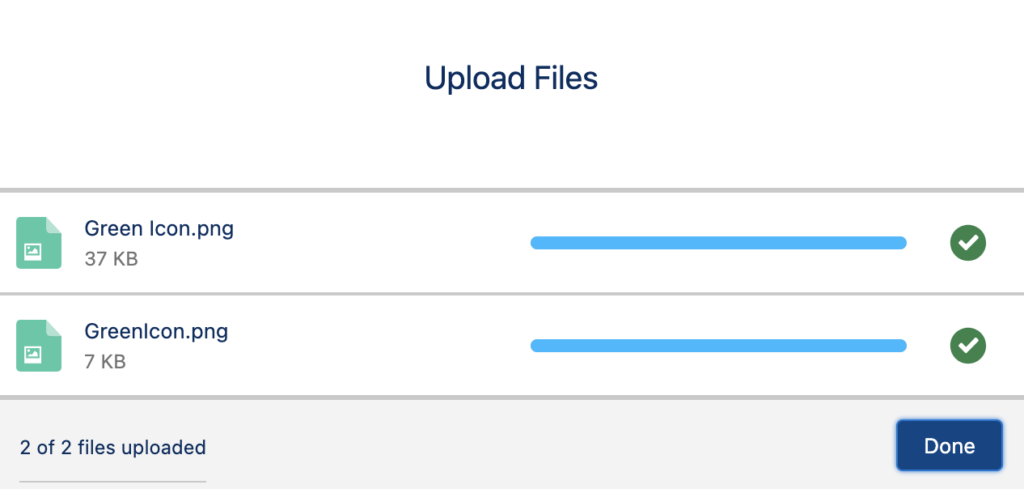
After choosing the files, you will see this popup. Click "Done" in order to finish uploading files.
Then, click the next/finish button to finish the process.

At the end, here are the output values of the component. As you can see, it stores the file names, content document Ids and content version Ids in text collection variables. Pay attention that you don't need to use a Create Records element. This component already creates the records.
contentDocIds = [0691Q00000YO42LQAT, 0691Q00000YO42MQAT]
contentVersionIds = [0681Q00000cCwlCQAS, 0681Q00000cCwlDQAS]
fileNames = [Green Icon.png, GreenIcon.png]
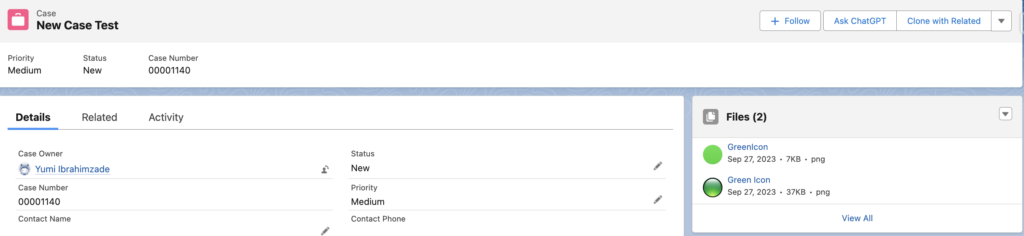
If you navigate to the new Case record, you will see the uploaded files under it.
How to Upload Files Without a Related Record ID
In certain cases, you may not yet have a record Id available for associating the files. Here is how to handle file associations in such scenarios.
Here is a screen element to create a new case record. As you can see, there is a File Upload component too. It means that the users can create a case and upload files from one screen. Since there is no Case yet, you cannot provide its Id to the Related Record ID.

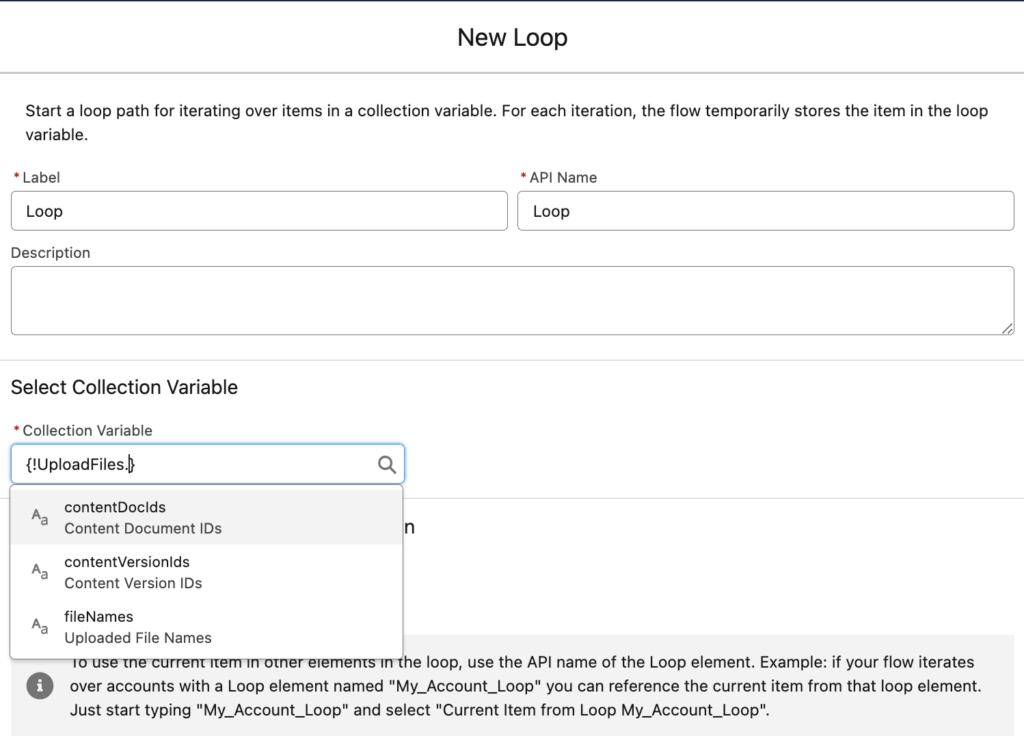
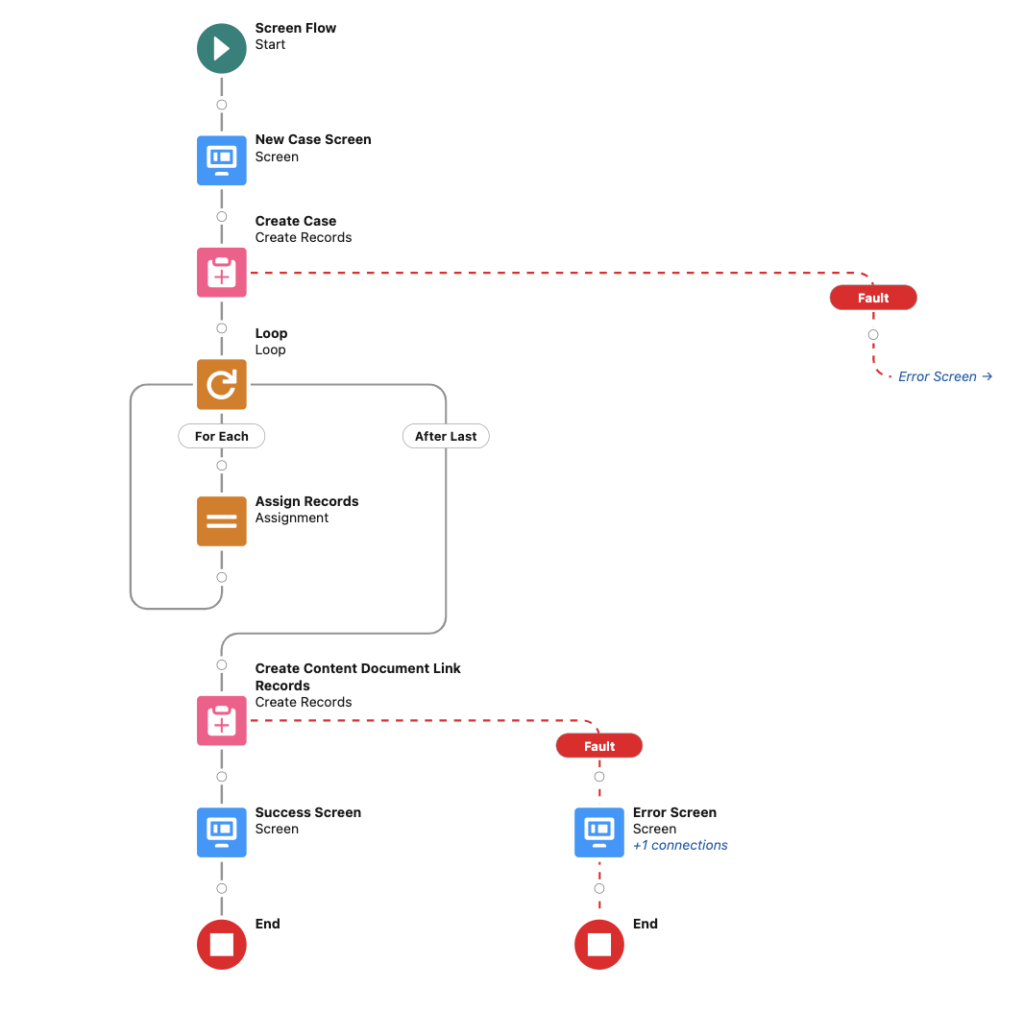
1- Add a loop element in order to loop through the uploaded files' Ids (contentDocIds).
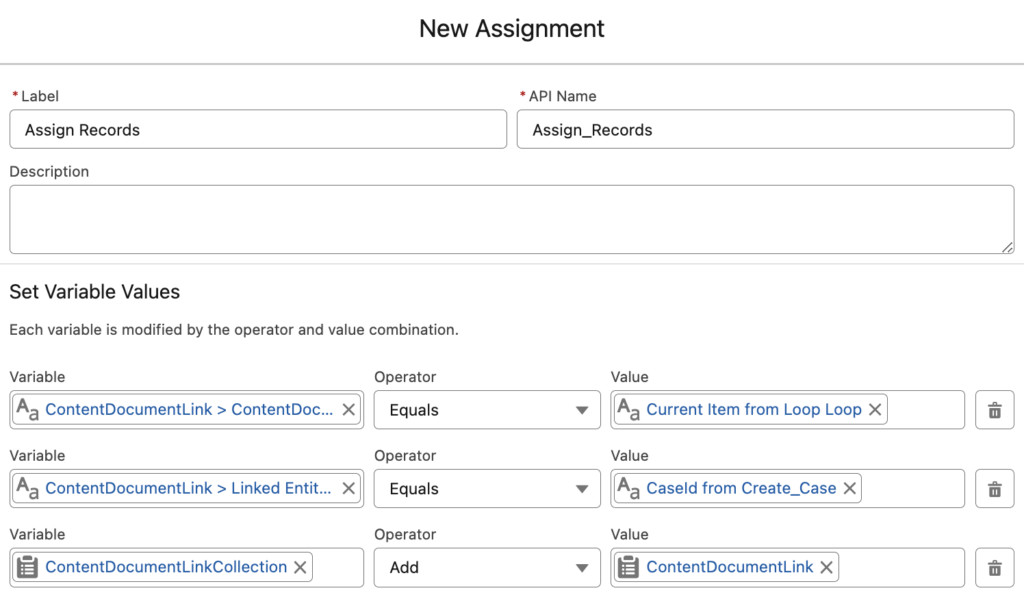
2- Content Document Link object associates files (content documents) with records. Therefore, you have to create Content Document Link records for each uploaded file. Add an assignment element to assign a Content Document Link record variable and then add it to a record collection variable. Make sure that you map the ContentDocumentId (file's Id) and LinkedEntityId (related record's Id) fields.
Read this post to learn how to use flow to share files with records.
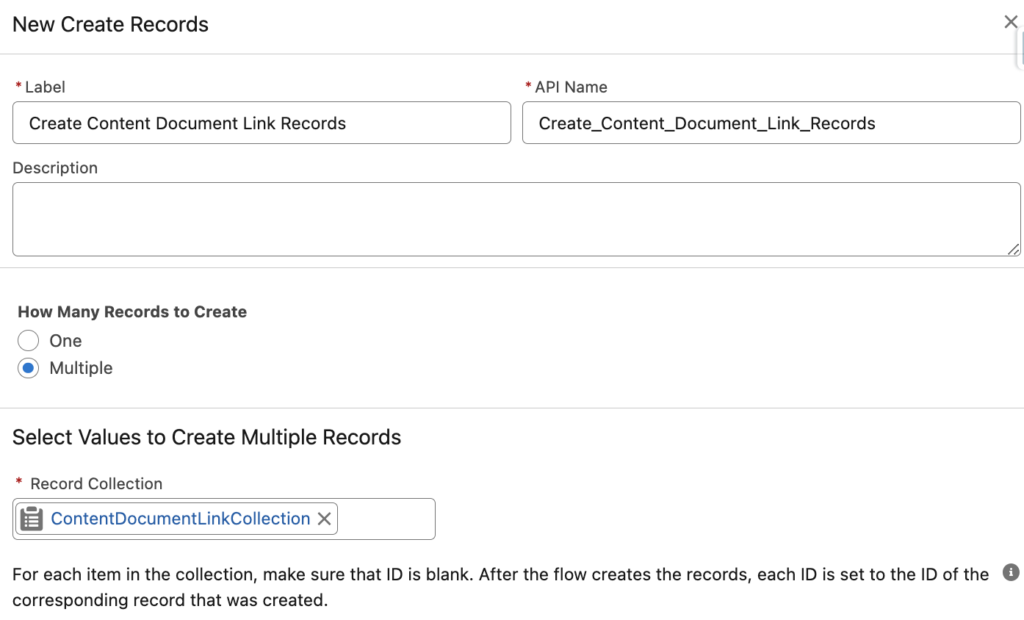
3- Add a Create Records element to create the Content Document Link records at the end of the loop.
4- Add a final screen to display a success message. Optionally (but recommended), add another screen for error handling.
At the end, your flow should look like this.
File Upload Component Limits
- Unless Salesforce changes the limit, by default, you can upload up to 10 files simultaneously.
- The maximum file size for upload is 2 GB.
- By default, guest user file uploads are restricted, but administrators can modify these settings to permit guest users to upload files.
File Upload Component Considerations
- This component uploads the files immediately. This means that if the user closes the flow or if something else fails, the files will still be successfully uploaded to Salesforce. This can be an issue, potentially resulting in files that are not linked to any records.
- Although it is possible to upload multiple files, you have to upload them at once. It means that if you upload 2 files and then upload another 3 files, the output will have only the last uploaded 3 files. Moreover, all of the 5 files will be uploaded to Salesforce, you just won't have the Ids of the first 2 files.
- File Upload component doesn't have an indication that shows if you uploaded a file. This might be confusing and may cause uploading the same file multiple times.
- There is no standard way to make the File Upload component required.
Thanks for this! Is it possible to link an uploeaded file to more than one record? I want to be able to see the upleaded file on the record i created with the flow, and also on the parent record. I have managed to link it to the parent record, but Idont know if I can also link it to the newsly created (child) record simultan
Yes of course. You have to create a Content Document Link record. ContentDocumentId = Id of the new file and LinkedEntityId = Id of the new child record.
Hi! Thanks for the explanation on how this component works - it all makes sense except I am having an issue with the component outputs.
I can see in debug that the Content Document & Version ID's get set, and refer to the uploaded files (can view them by manually copy/pasting the IDs) but I have no way to actually access the outputs...
When I add a text collection variable and set this for the ContentDocument or ContentVersion params the collection ends up blank so I can't use it to loop and assign any ID's. Any idea what is going on or what I'm missing?
Thanks!
Dan
Hi Dan! I'm having the same issue! Was you able to solve this by any chance?
This component uploads the files immediately. This means that if the user closes the flow or if something else fails, the files will still be successfully uploaded to Salesforce. This can be an issue, potentially resulting in files that are not linked to any records.
If flow fails doesn't transaction rollback
Correct. That's the behavior of this standard component.
Thank you for the great info.
Is there a way to add the File to SharePoint for example?
Hello, this seems like a great tutorial but doesn't fully cover what I'm looking for and haven't been able to find something that does.
I want my users to be able to upload an image that goes to the File Object in Salesforce where it's not associated to a record yet. Specifically in a library. So Main Salesforce page, File Object --> Libraries --> "Name of Library"
This is the location we upload our images we use on an Opportunity field. Ideally, I want the button to be in the Opportunity they are associating the image with too but we do not store the image in the Opps associated file as we do not want everyone to be able to see the image.
This has been a headache for me because I am not the one who set it up and it's done strangely in its current set up. The previous admin has a flow that is full of decision trees for every image name with an “if Opportunity name is…” with an update record to the field “Extrusion_Profile__c” with the url link associate with the image we uploaded to the File Library. Every time we need a new image, someone adds a new decision tree to the flow. Then our Profile field in the Opportunity where the image gets displayed has a formula with "IMAGE(Extrusion_Profile__c,"Profile Error")".
So the field Profile either displays the image that is linked in Extrusion Profile field or displays “Profile Error”
It has been giving me a headache trying to wrap my head around this one and there has to be a better way to do this.
I’ve been trying to figure out how to create a screen flow where you can upload the image, name it, and then update the Extrusion Profile field with the link to the image. But Screen Flows among many things are still very new to me.
Any help would be so greatly appreciated!
How to update the contentVersion custom fields from here. It looks like it is not possible.
I am having trouble with Guest Users being able to create the Document Link.
yes same here, Did you find any solution on this.
Ramiro and Dan,
If on one Flow screen you have multiple File Upload components the ContentDocument or ContentVersion text colletion variables will be null. Try to upload one File on each Flow Screen.
Hi,
Do you think there is a way to present the files picked on the screen itself with an opportunity to erase or to add more, after closing the upload popup screen?
Thanks
I think you can simply use File Upload Improved (from UnofficialSF) for that.