The Winter '24 release is approaching, and it will soon be available in our environments. Just like the previous few releases, this release will introduce numerous exciting features for Salesforce Flow. Here are the key highlights.

1- Auto-Layout User Interface Changes
The element configuration will now appear on the right side instead of as a popup. However, some of the elements (e.g., Decision, Assignment, Roll Back Records, and Screen) still appear as a popup.
If you have an error in a specific element, you can still continue in Draft Mode.
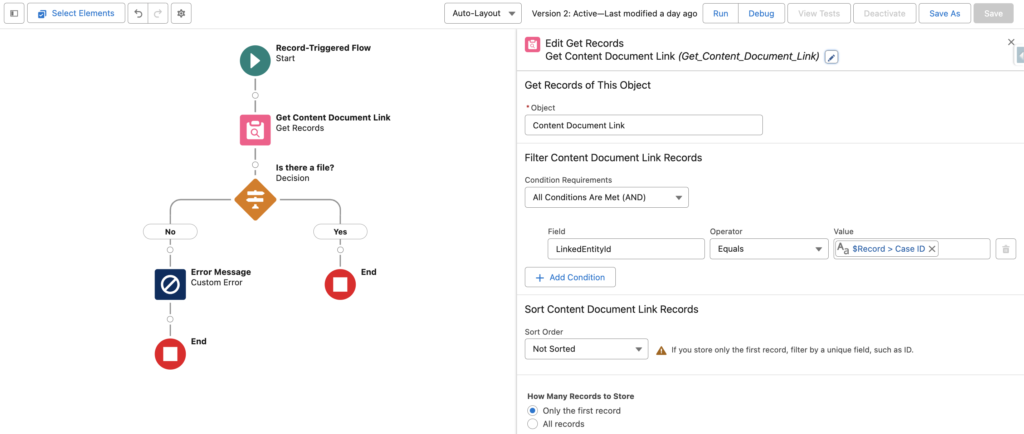
2- Display Custom Error Messages in Record-Triggered Flows
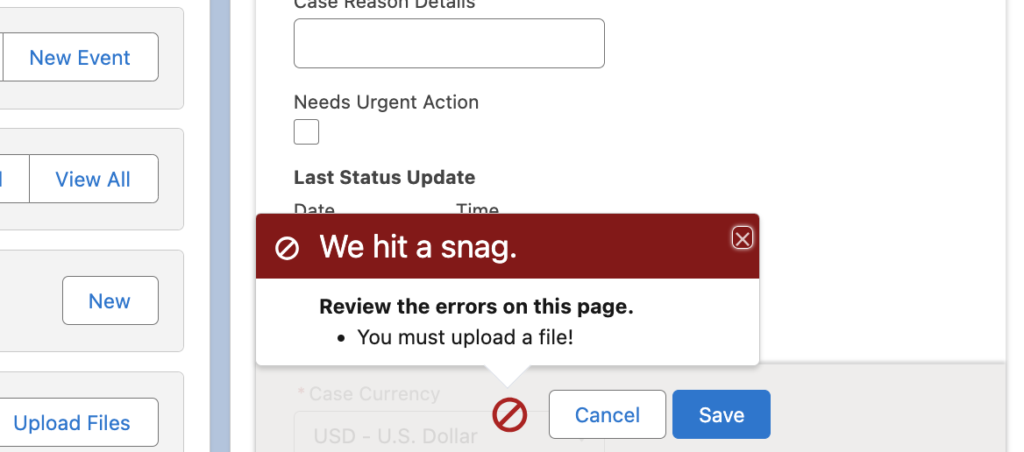
Salesforce introduced a new element called Custom Error. Using this new element, you can display custom error messages in record-triggered flows. It is possible to use this element to build complex validation rules, display error messages in fault paths, and even block deleting records.
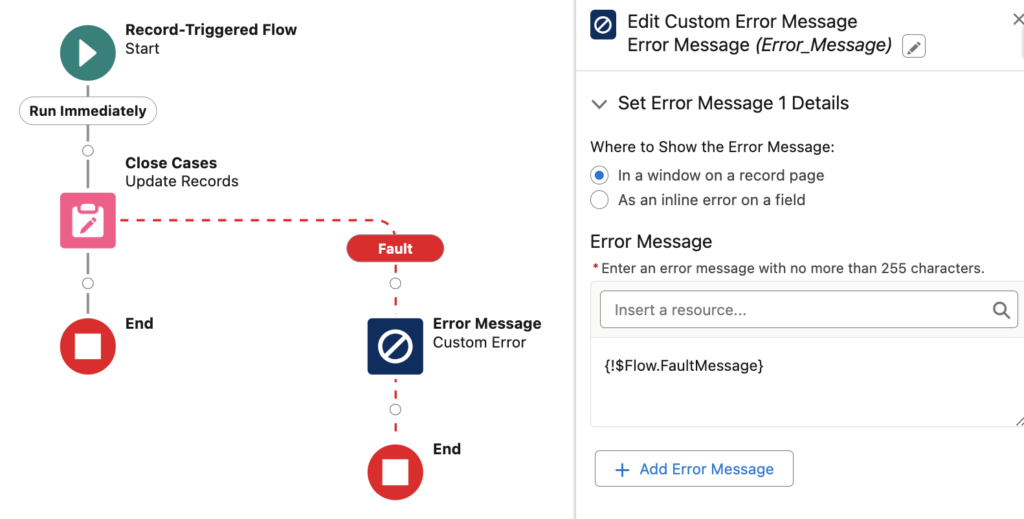
There are many use cases and it solves many problems that admins had for a while. It is safe to say that this new element is a game changer. Read this post to learn more about this element.
3- Filter Flows in Flow Trigger Explorer
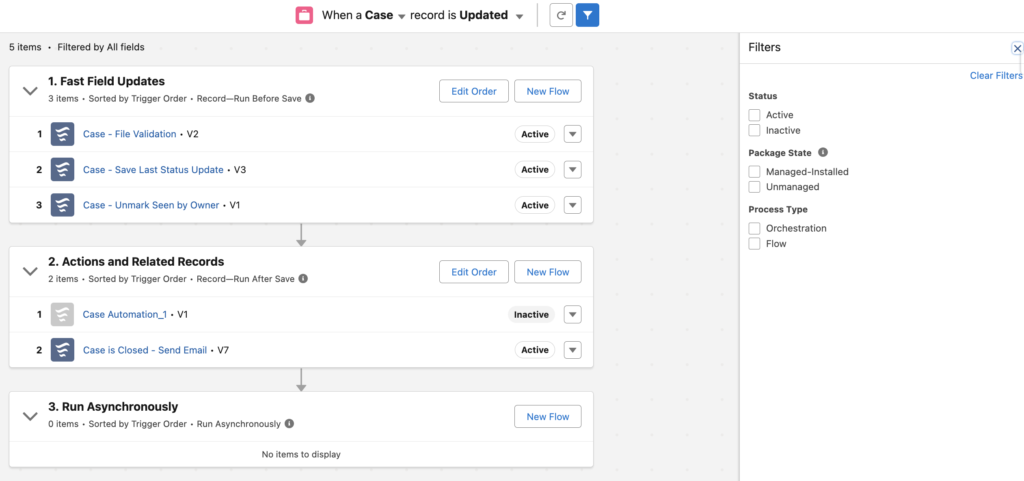
To help you easily view all of your record-triggered flows by the object, Salesforce introduced Flow Trigger Explorer in the Spring '22 release. It is a great tool that displays record-triggered flows in a single place.
If you have a lot of flows (active or inactive), it can be hard to see them in a single place. In the Winter '24 release, Salesforce added an option to filter flows in Flow Trigger Explorer. Using this feature, you can filter flows by their status, package state, or process type.
4- HTTP Callout Supports More Methods
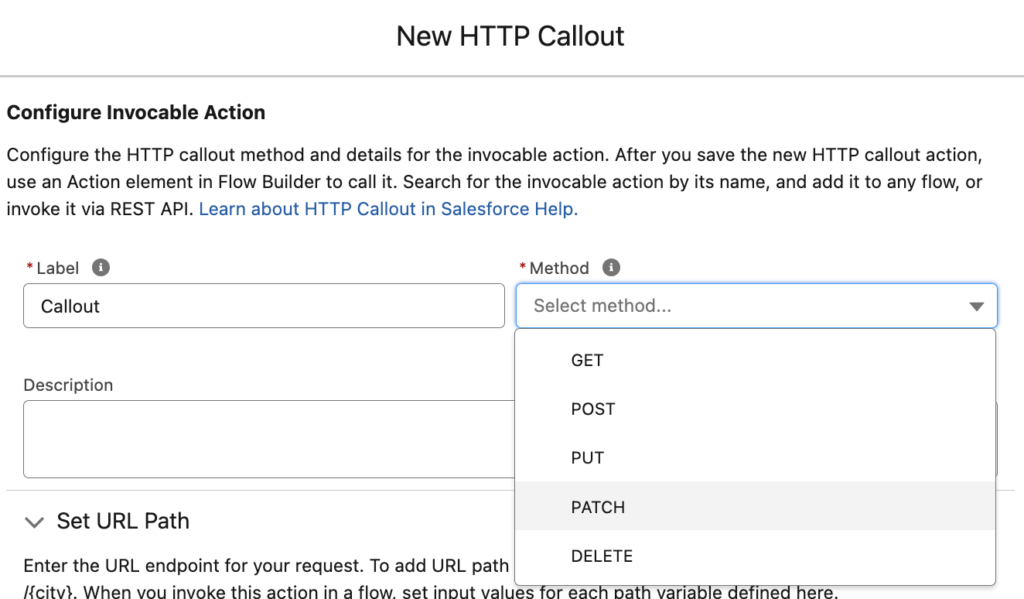
HTTP Callout is an amazing feature that Salesforce introduced in the Spring '23 release. In the previous release, they added POST method as well. Starting with the Winter '24 release, HTTP Callout supports other methods as well (PUT, PATCH, DELETE).
5- Transform (Beta) Element
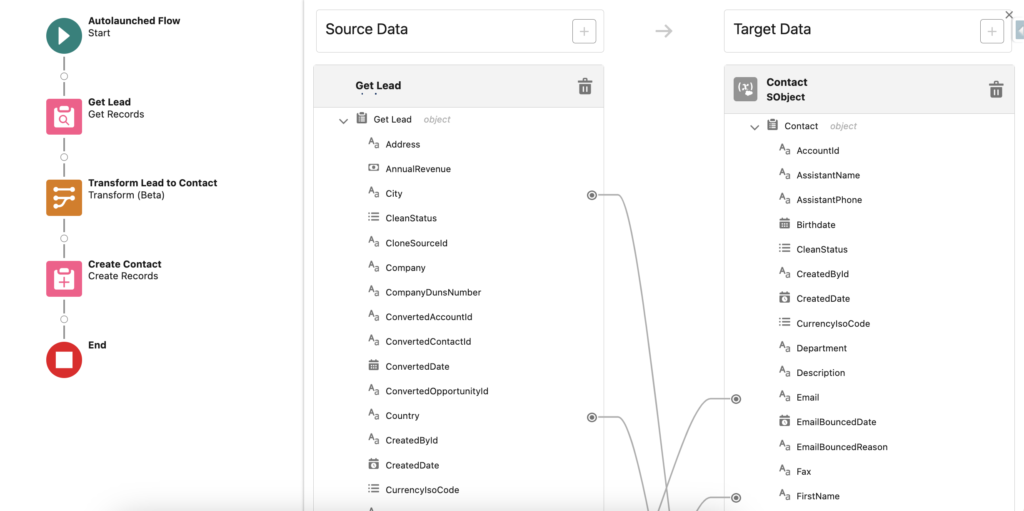
Salesforce introduced a new element called Transform (Beta). This element transforms source data to target data. For source and target data, you can select resources like outputs from actions, record variables, and Apex-defined variables. Then, map the data using the circled bullet icons.
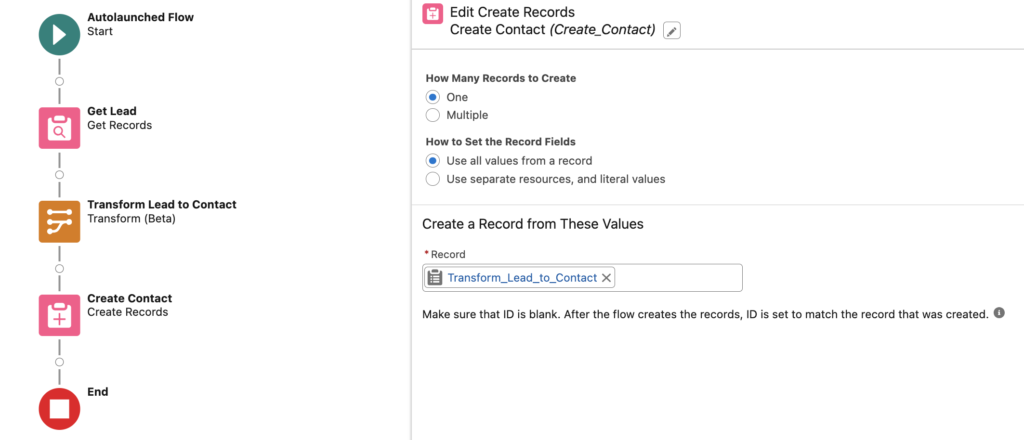
In the screenshot below, this element transforms a lead record to a contact record.
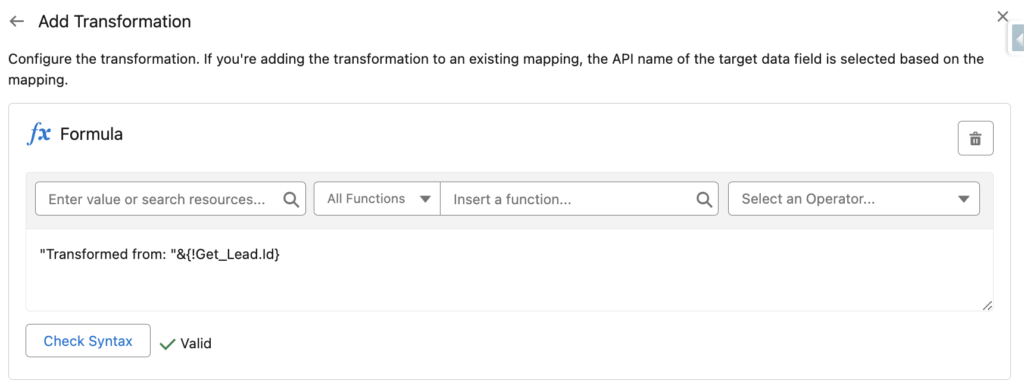
It is also possible to use a formula for the mapping.
Output of this element is a variable (single or collection). For example, here the output is a Contact record variable and then it is used to create a Contact record.
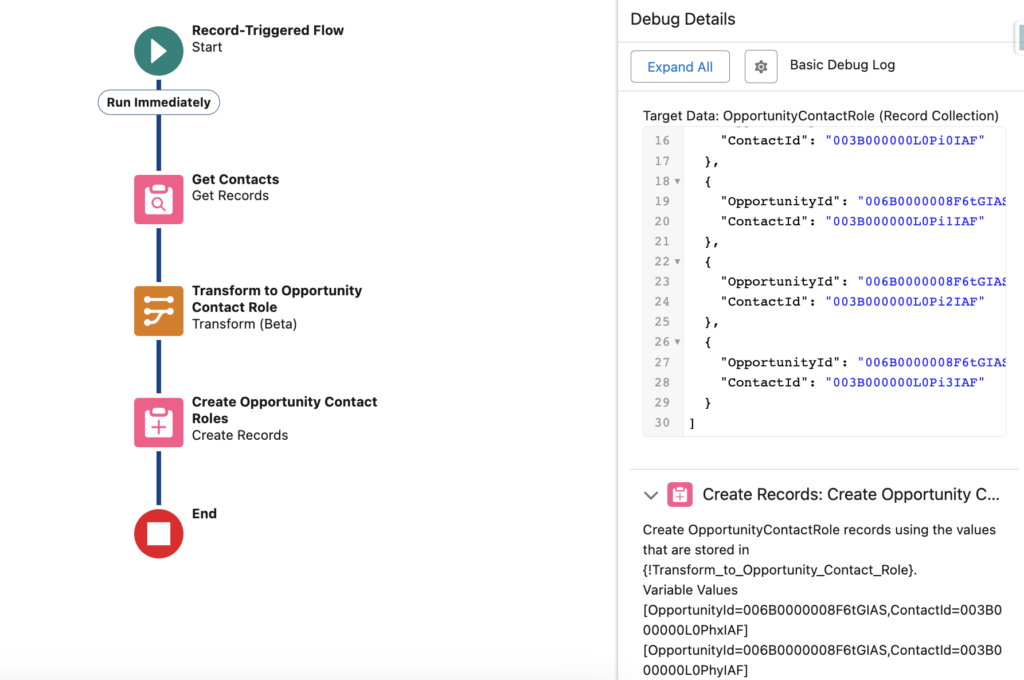
Here is another example that transforms Contact records to Opportunity Contact Role records. It transforms a record collection to another type of record collection. Before this release, you had to use Loop and Assignment elements in order to achieve this.
6- More Components Are Reactive
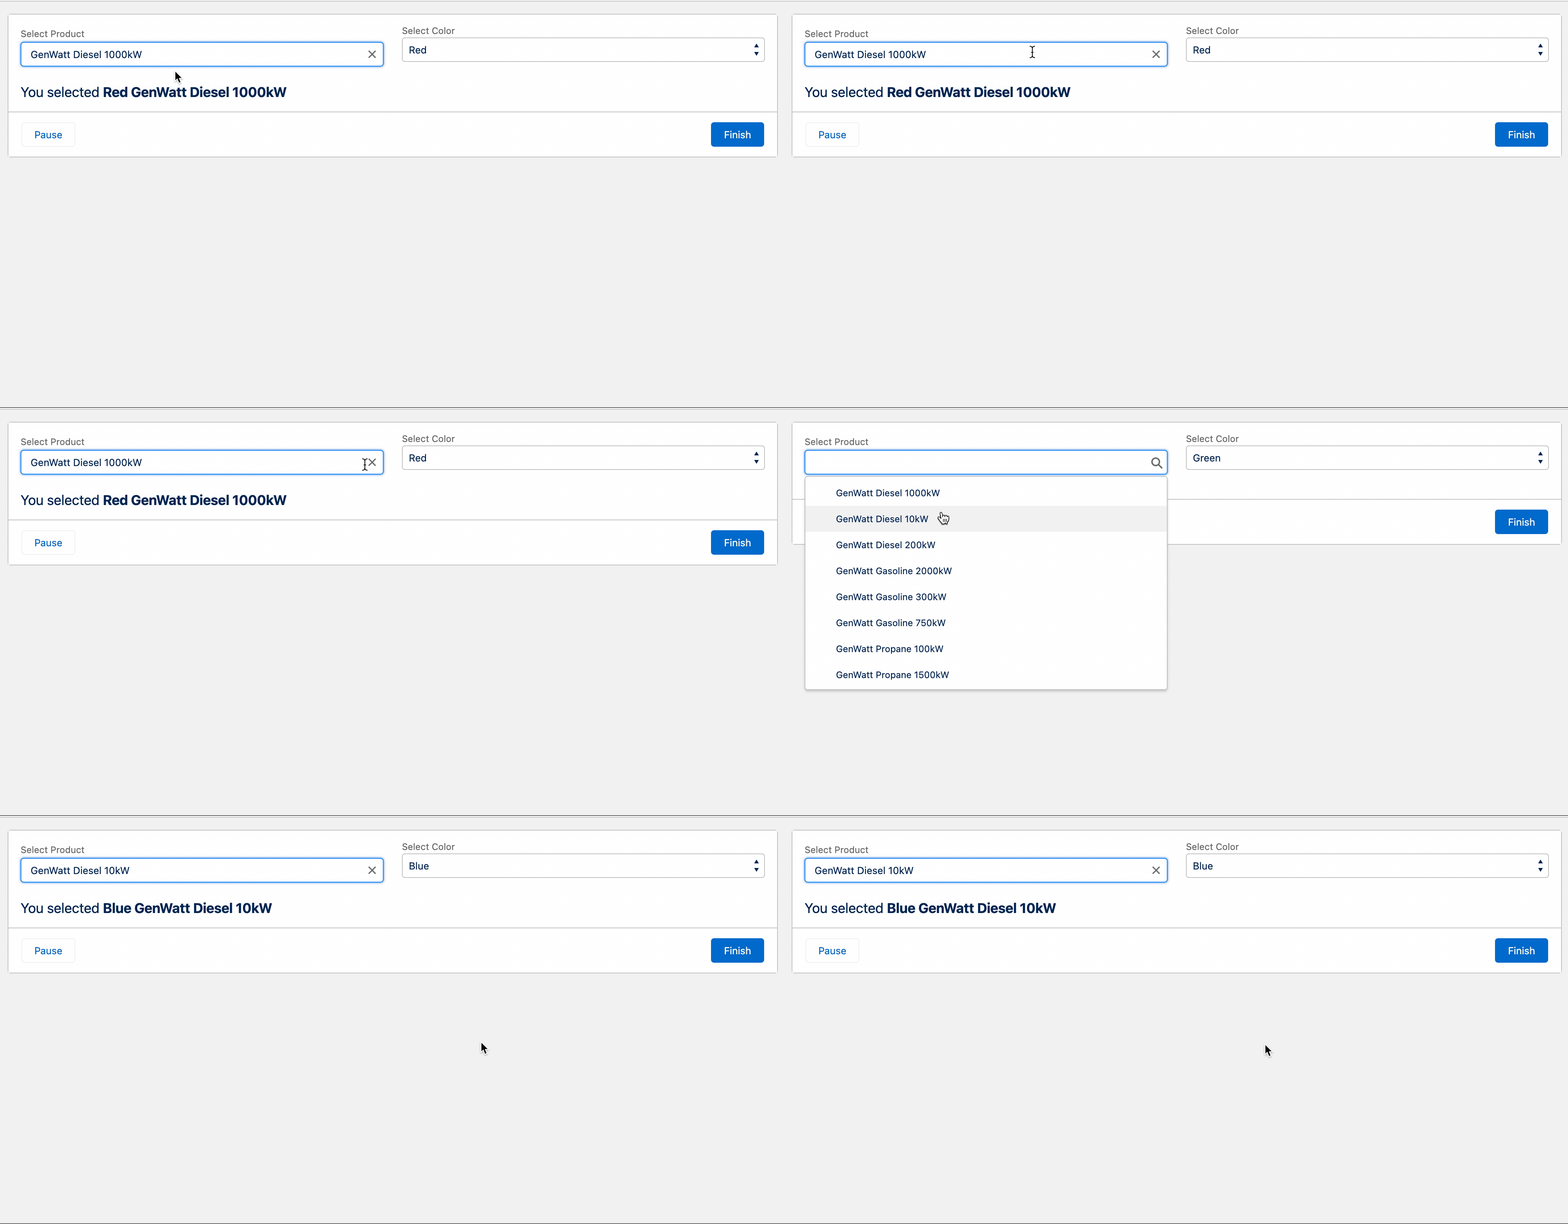
Salesforce introduced reactive screen components in the Spring '23 release. With reactive screen components, your screen components can react to a user’s actions on the same screen. However, some of the standard screen components were not reactive. In the Winter '24 release, more components start to support reactivity. For instance, selection components are now reactive. On the other hand, display text component starts to be reactive too. However, it is a beta program and you have to opt in from Process Automation Settings in Salesforce setup.
As you can see from the screenshot below, reactive screen components is not a beta program anymore. If you are using API version 59, you don't need to enable reactive screen components.

Here is a reactive screen. Pay attention to the color selection and the display text. They are both changing according to the product selection.
7- Pause Element is Replaced By Wait Elements
Salesforce introduced 3 new Wait elements to replace the Pause element.

Wait for Conditions element replaces the Pause element, there is nothing different here.
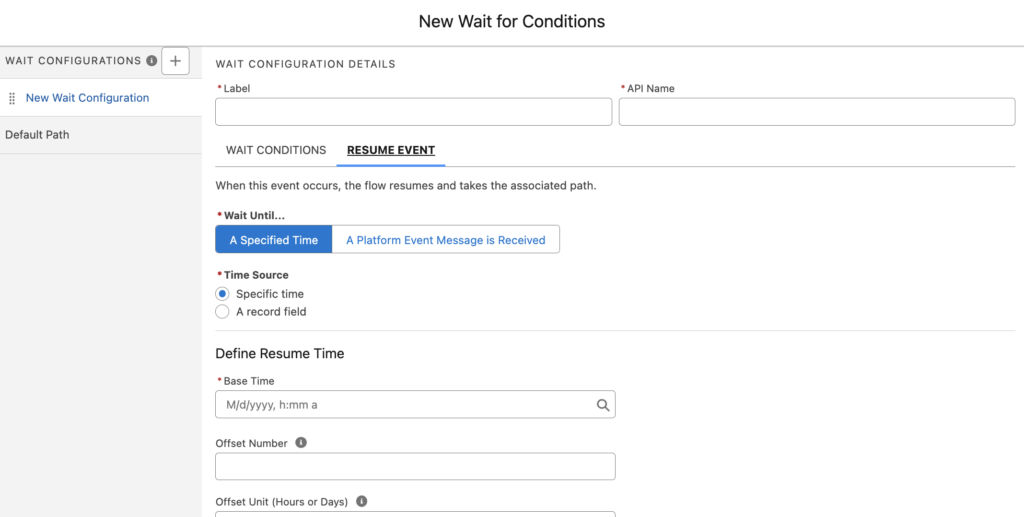
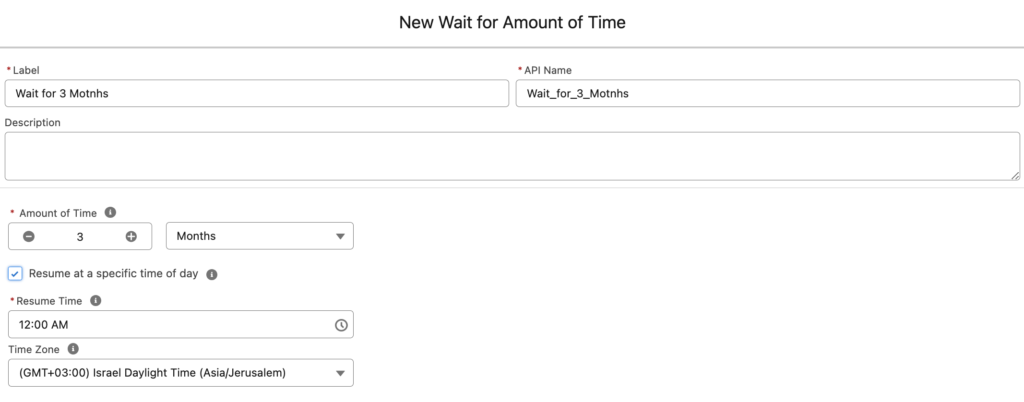
Wait for Amount of Time element lets you wait for a specified amount of time. Valid values are Minutes, Hours, Days, and Months. Moreover, you can resume at a specific time of day.
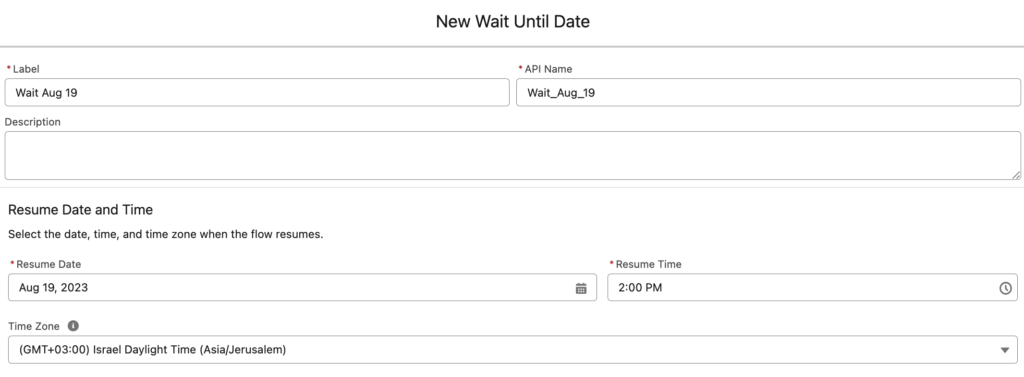
Wait Until Date element lets you wait until a specific date and time.
These were all possible to do with the old Pause element (there were workarounds). However, it is much easier to configure these now.
8- Product Selector Screen Component
There is a new screen component called Product Selector. This input component lets you select products with quantities. In order to configure this component, you have to provide the available products and price book entries.


This element stores the output in an Apex-defined collection variable.
It is important to mention that this component is specifically designed for CPQ and will be hidden upon release.
9- Extended Support for Revisited Screen Values
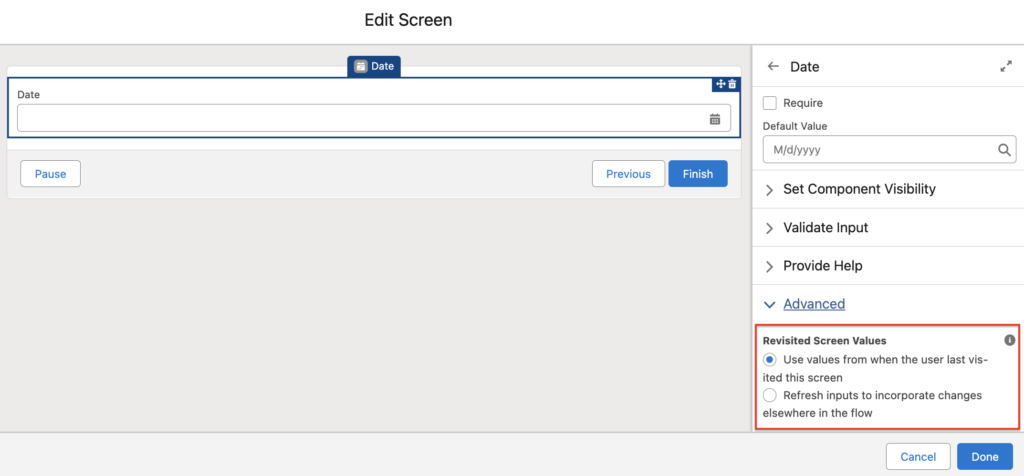
You can use the Revisited Screen Values to control the behavior of screen components when the user returns to a screen. In the Winter '24 release, Salesforce added this option to Choices, Text, Number, Currency, Long Text Area, Date, and DateTime components as well.
What is the value of the transform element? Weren’t we able to do this before with the create and assign elements?
Hi Jack,
I added another example to the post. I was able to transform a contact collection to an opportunity contact role collection. Before this release, you had to use Loop and Assignment elements for this. Now you can do it with one element only.
Fantastic, Thank you for the great post (as always)!
the Winter '24 release unveils a multitude of new flow features that are set to reshape the way we navigate tasks. With streamlined automation and enhanced user experience, these updates herald a season of heightened efficiency and seamless workflows.