
Salesforce has required MFA for a while, but the security standard is now getting stronger. Salesforce will enforce phishing-resistant MFA for admins and other privileged users. This means some MFA methods that worked before may no longer be enough for high-access users. This post explains what phishing-resistant MFA means, who is affected, which verification methods are supported, and how to configure a built-in authenticator such as Face ID.
What is Phishing-Resistant MFA?
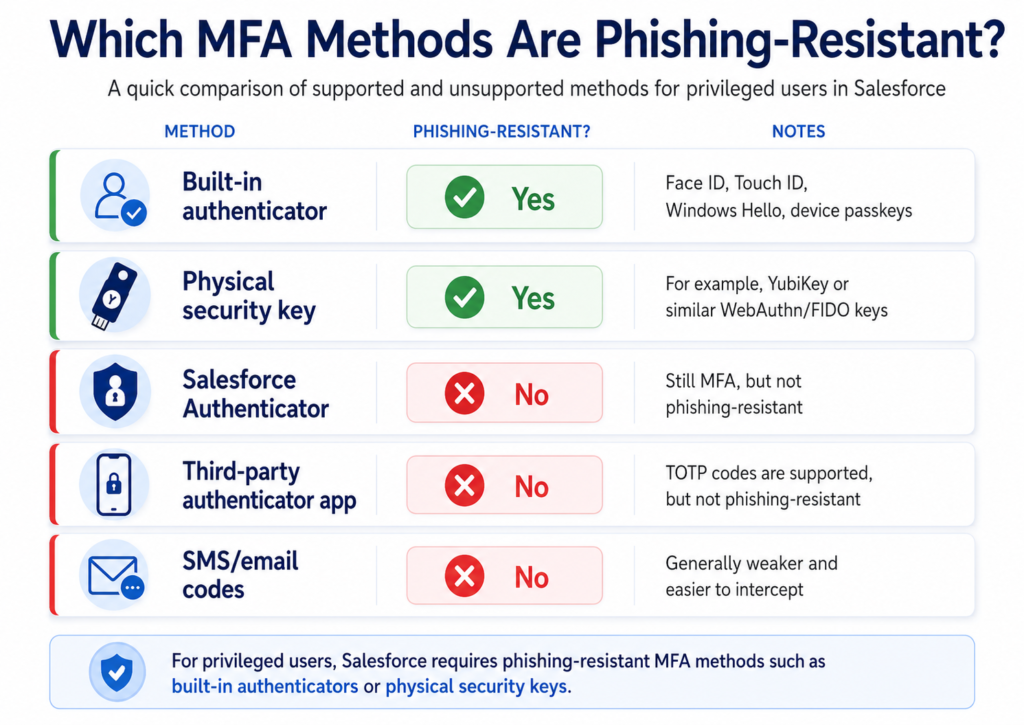
Phishing-resistant MFA is a stronger form of multi-factor authentication. It protects users from attacks that can steal or trick them into sharing verification codes. Instead of relying on one-time passwords or push approvals, it uses methods that are tied to the real login page. This makes it much harder for attackers to use fake websites or man-in-the-middle attacks. In Salesforce, phishing-resistant MFA usually means using a built-in authenticator, such as Face ID or Touch ID, or a physical security key.
What is Changing and Who is Affected?
Salesforce is raising the security requirement for user logins. Every authorized user will be required to use multi-factor authentication when logging in from the user interface.
However, this specific policy focuses on privileged users. These are users who have powerful access in Salesforce and can make major changes to data, automation, code, or configuration.
A user is in scope if they have one of the following profile or permission:
- System Administrator profile
- Modify All Data
- View All Data
- Customize Application
- Author Apex
For these users, standard MFA methods may no longer be enough. Salesforce is moving away from mobile TOTP apps and push notifications for high-privilege access. Methods such as Salesforce Authenticator or Microsoft Authenticator in TOTP mode can still be vulnerable to Adversary-in-the-Middle phishing attacks.
In these attacks, attackers can intercept session cookies in real time. To reduce this risk, privileged users will need phishing-resistant methods, such as built-in authenticators or physical security keys.
• Sandbox orgs: starting July 6, 2026 (staggered over a 2-day window)
• Production orgs: starting July 20, 2026 (staggered over a 15-day window)
Note that after the enforcement, the user permission "Waive Multi-Factor Authentication for Exempt Users" will not work for targeted users. Users with this permission will be prompted to enroll and use MFA in the Salesforce UI.
This change applies to all users logging in to Salesforce, whether through the direct UI or SSO, in production and sandbox orgs.
However, the requirement is enforced only for paid Production and Sandbox orgs. Developer Edition orgs, trial orgs, scratch orgs, and other non-paid org types are not included in this enforcement.
Here is a query you can use to identify privileged users:
SELECT Assignee.Id,
       Assignee.Name,
       Assignee.Email,
       Assignee.Username,
       Assignee.IsActive,
       PermissionSet.Name,
       PermissionSet.Profile.Name,
       PermissionSet.PermissionsModifyAllData,
       PermissionSet.PermissionsViewAllData,
       PermissionSet.PermissionsCustomizeApplication,
       PermissionSet.PermissionsAuthorApex
FROM PermissionSetAssignment
WHERE Assignee.IsActive = TRUE
AND (
     PermissionSet.PermissionsModifyAllData = TRUE
     OR PermissionSet.PermissionsViewAllData = TRUE
     OR PermissionSet.PermissionsCustomizeApplication = TRUE
     OR PermissionSet.PermissionsAuthorApex = TRUE
)
Note that if a user has multiple permission sets that grant privileged permissions, their name will appear multiple times. To get a unique list of users, use this query:
SELECT Id, Name FROM User WHERE Id IN
(SELECT AssigneeId
   FROM PermissionSetAssignment
WHERE Assignee.IsActive = TRUE
AND (
     PermissionSet.PermissionsModifyAllData = TRUE
     OR PermissionSet.PermissionsViewAllData = TRUE
     OR PermissionSet.PermissionsCustomizeApplication = TRUE
     OR PermissionSet.PermissionsAuthorApex = TRUE
)
)
Phishing-Resistant MFA Methods
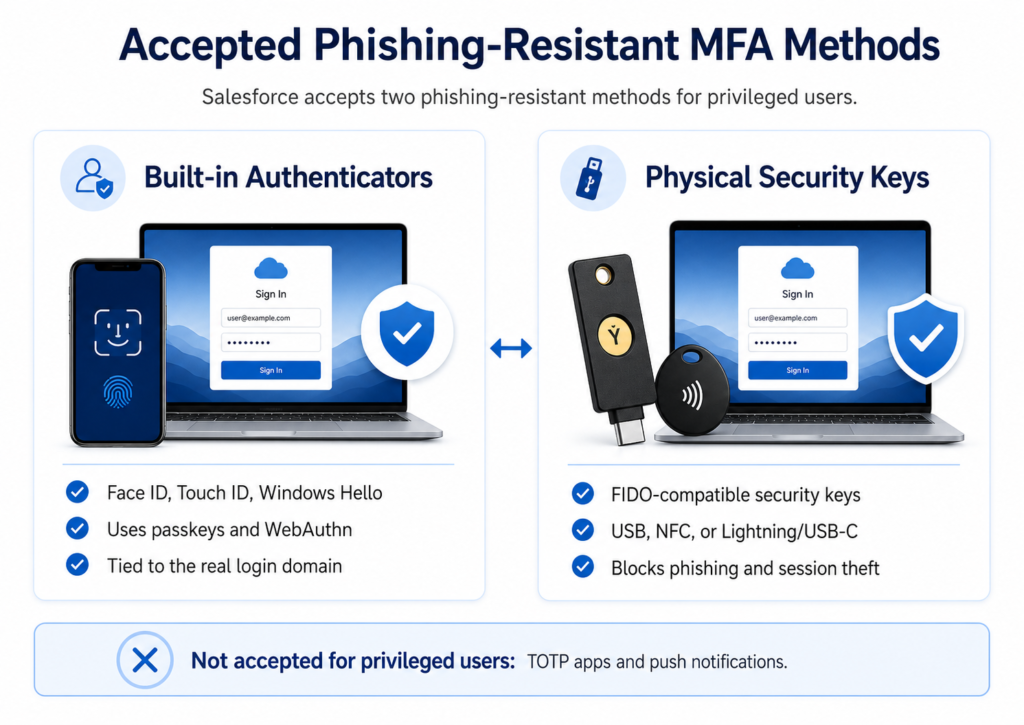
For privileged users, Salesforce requires MFA methods that can protect against phishing attacks. These methods are based on WebAuthn and FIDO standards. They verify the real login domain before completing the authentication process.
Built-in Authenticators
Built-in authenticators use the security features already available on the user’s device. Examples include Face ID, Touch ID, Windows Hello, and other passkey-based login methods.
This is often the easiest option for users. They can verify their identity with their face, fingerprint, device PIN, or password. Since the authentication is tied to the real Salesforce login page, it helps prevent fake login pages from stealing access.
Physical Security Keys
Physical security keys are external devices that you use during login. Examples include YubiKey and other FIDO-compatible security keys.
The user connects the key to the device or taps it using NFC. Then, the key verifies the login request. This method is also phishing-resistant because it only works with the legitimate Salesforce domain.
Both options provide stronger protection than one-time codes or mobile push notifications. For admins and other privileged users, these methods help reduce the risk of stolen sessions and phishing-based account takeover.
What If You are Using SSO?
If users log in to Salesforce through SSO, the requirement still applies. Privileged users must complete phishing-resistant MFA through the identity provider, or they must enroll in Salesforce phishing-resistant MFA.
SSO alone does not prove that you are using a phishing-resistant method. The identity provider must pass the right authentication claims to Salesforce in the SAML payload. These claims usually use standard AMR or ACR values.
AMR stands for Authentication Methods References. ACR stands for Authentication Context Class Reference. These values help Salesforce understand which authentication method was completed during login.
For privileged users, the SAML response must prove that it is using a phishing-resistant method. This usually means a built-in authenticator, passkey, or hardware security key was successfully used during authentication.
If Salesforce does not receive a valid phishing-resistant MFA signal, the user may be prompted to enroll in Salesforce MFA instead. Admins should review their identity provider configuration and confirm that it is sending the correct AMR or ACR values to Salesforce.
How to Configure Phishing-Resistant MFA in Salesforce
After understanding the requirement, the next step is configuration. Salesforce admins must first enable the supported verification methods. Then, each privileged user must register their own phishing-resistant method.
Step 1: Enable Phishing-Resistant Verification Methods
Go to Setup and open Identity Verification.
In the Verification Methods section, enable the following options:
- Let users verify their identity with a built-in authenticator (passkey) such as Touch ID or Windows Hello
- Let users verify their identity with a physical security key (passkey) such as U2F or WebAuthn
After selecting these options, click Save.

This makes phishing-resistant verification methods available in the org. However, users still need to register their own device or security key.
Step 2: Register a Built-in Authenticator or Security Key
Each privileged user must register their phishing-resistant method from their personal settings.
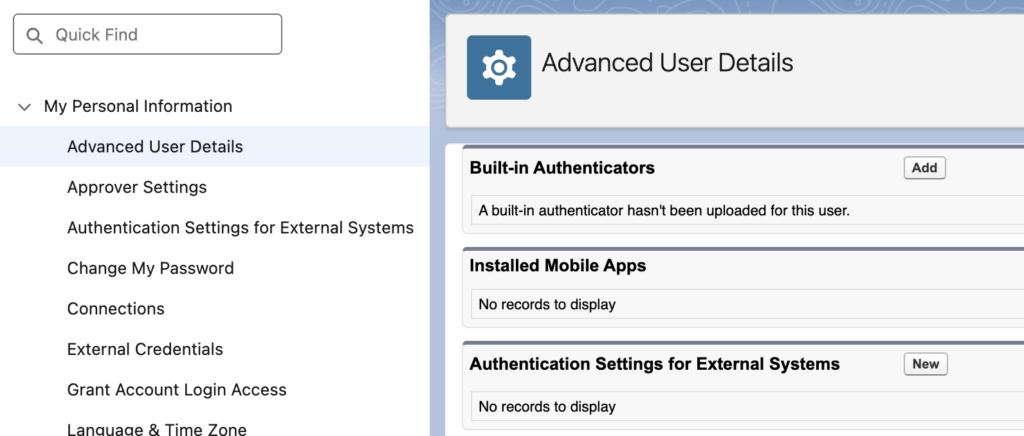
Open Personal Settings and select Advanced User Details from the left panel.
Then, scroll to the Built-in Authenticators row.
Click Add to pair the device hardware. This can be a biometric method, such as Face ID, Touch ID, or Windows Hello. It can also be a physical USB or NFC security key.
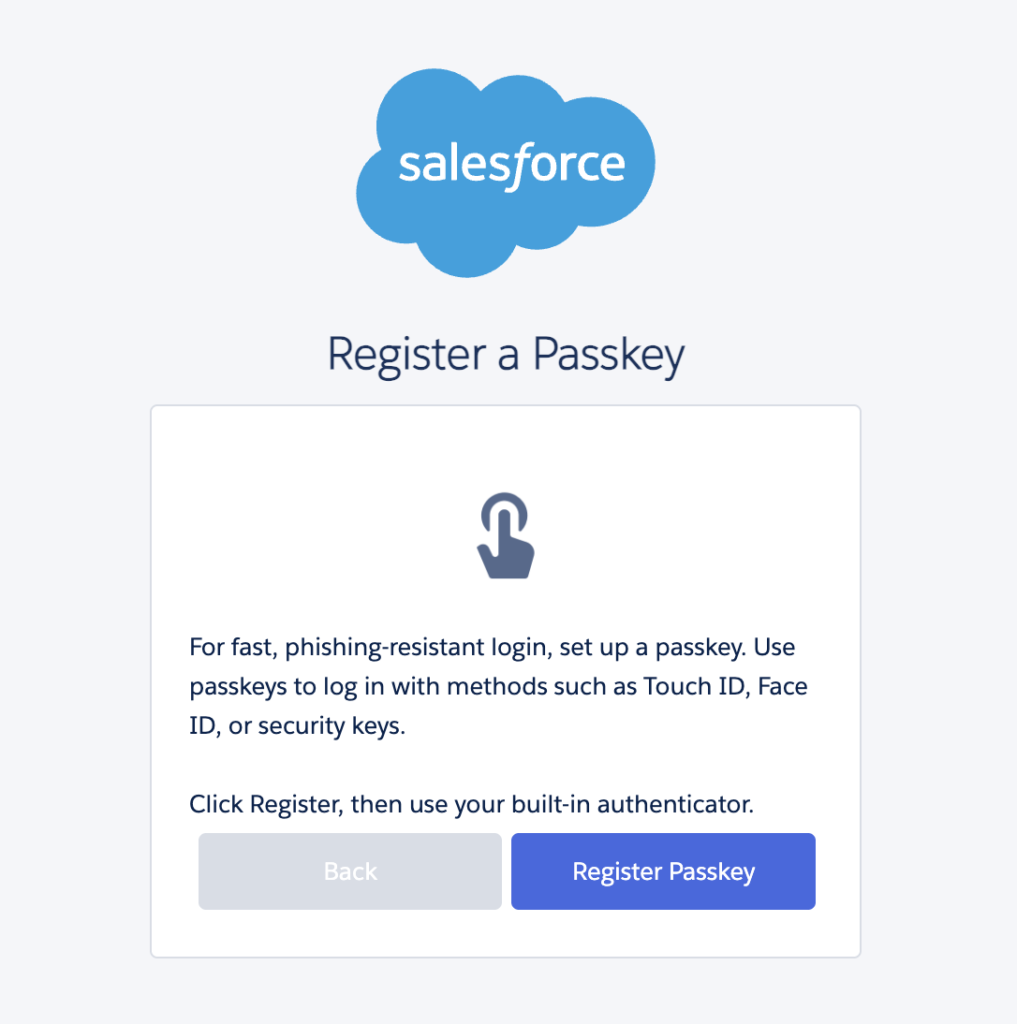
Let's register Touch ID. As the first step, Salesforce will send you an MFA approval request.
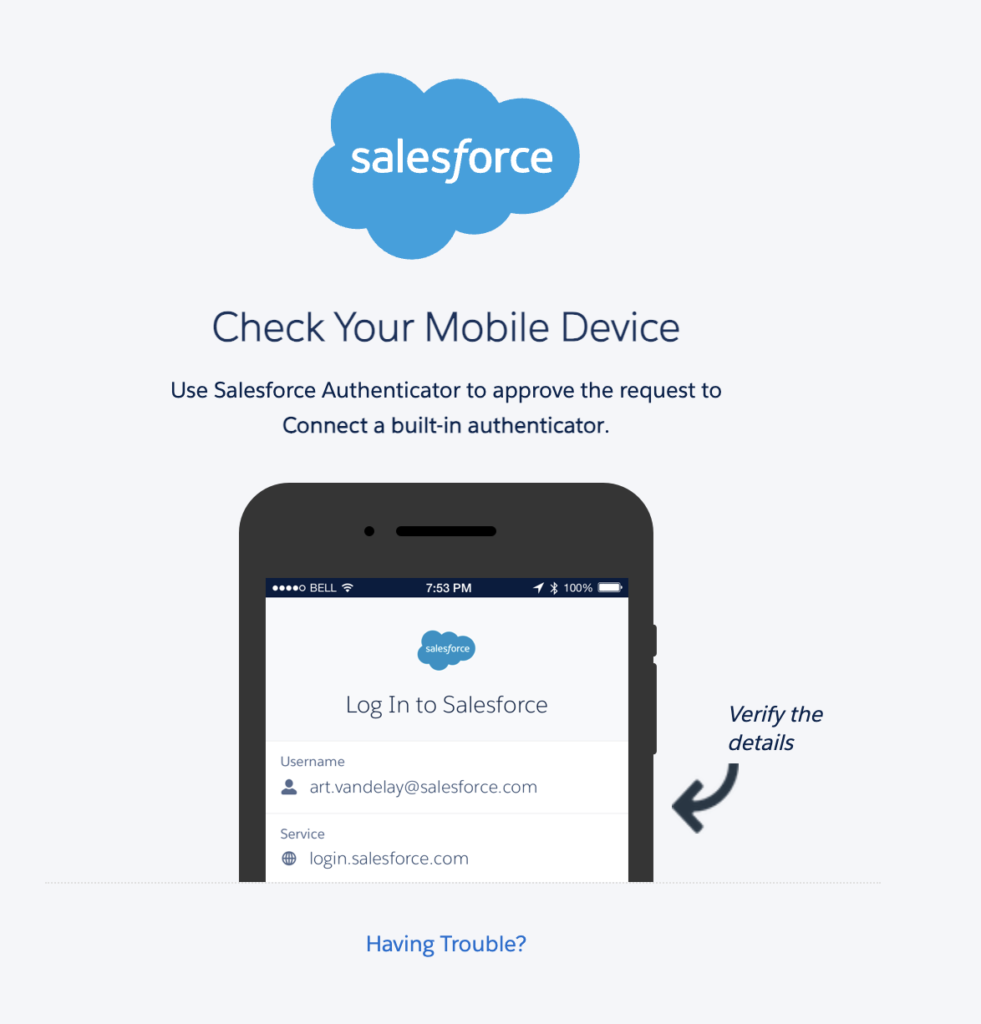
After approving the request, click Register Passkey to start setting up a passkey. In this example, the passkey uses Touch ID.
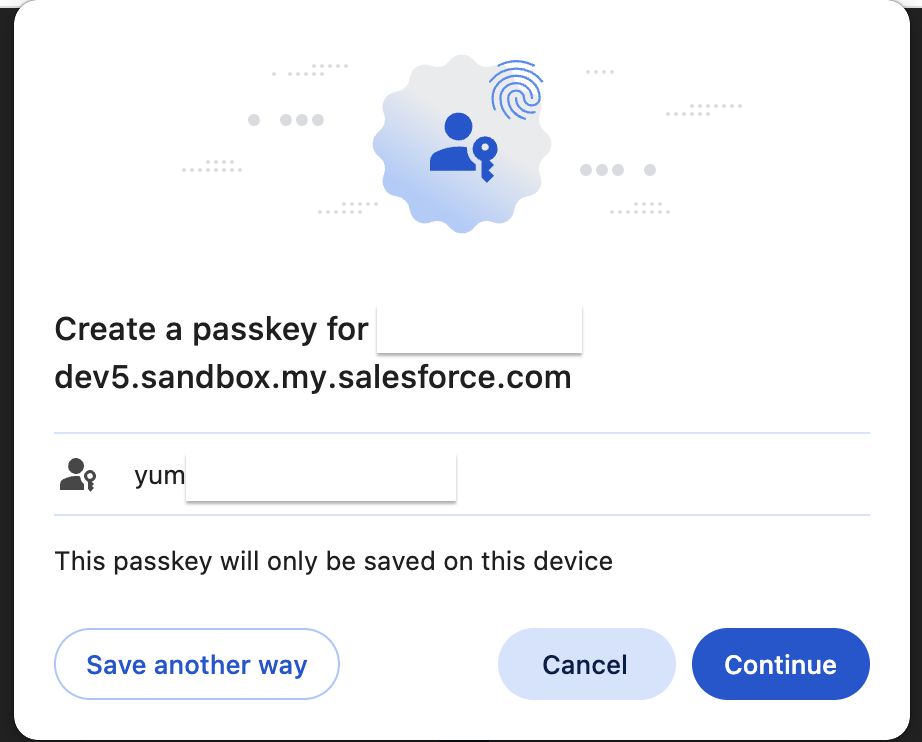
Click Continue to create a passkey for your user.
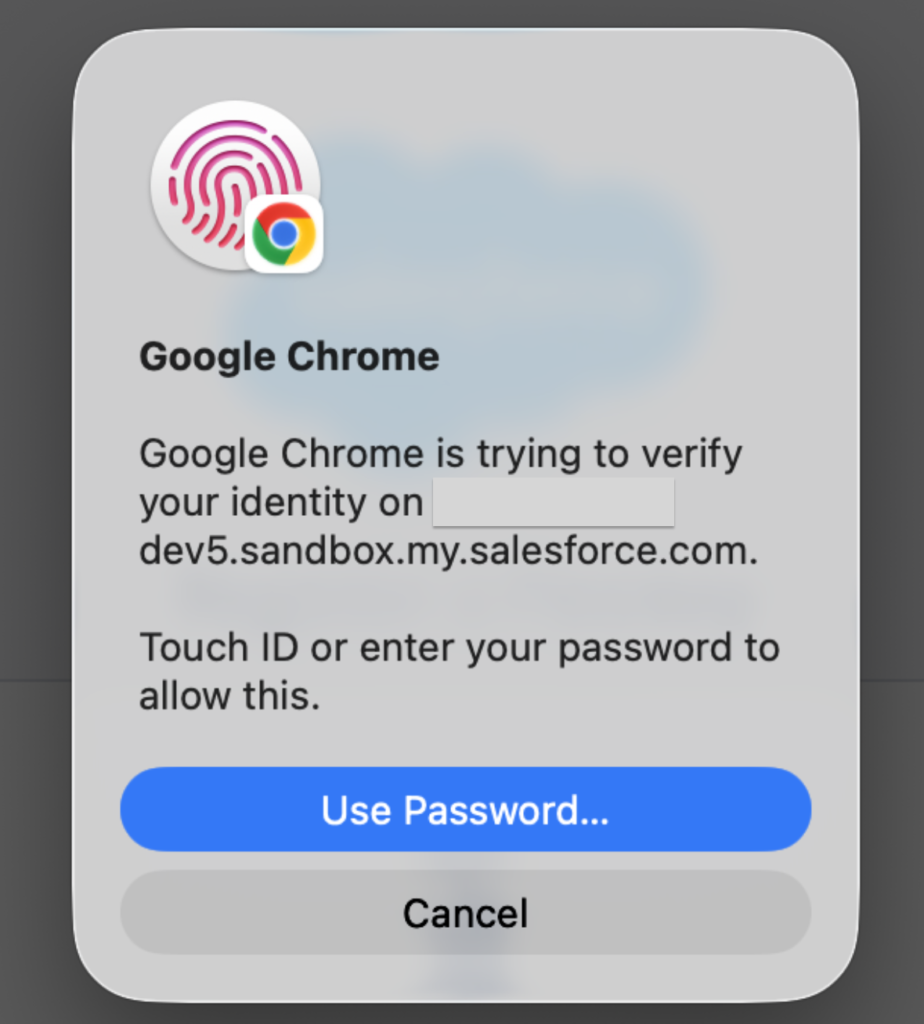
Then, enter your password or use Touch ID to allow Salesforce to create the passkey for your user.
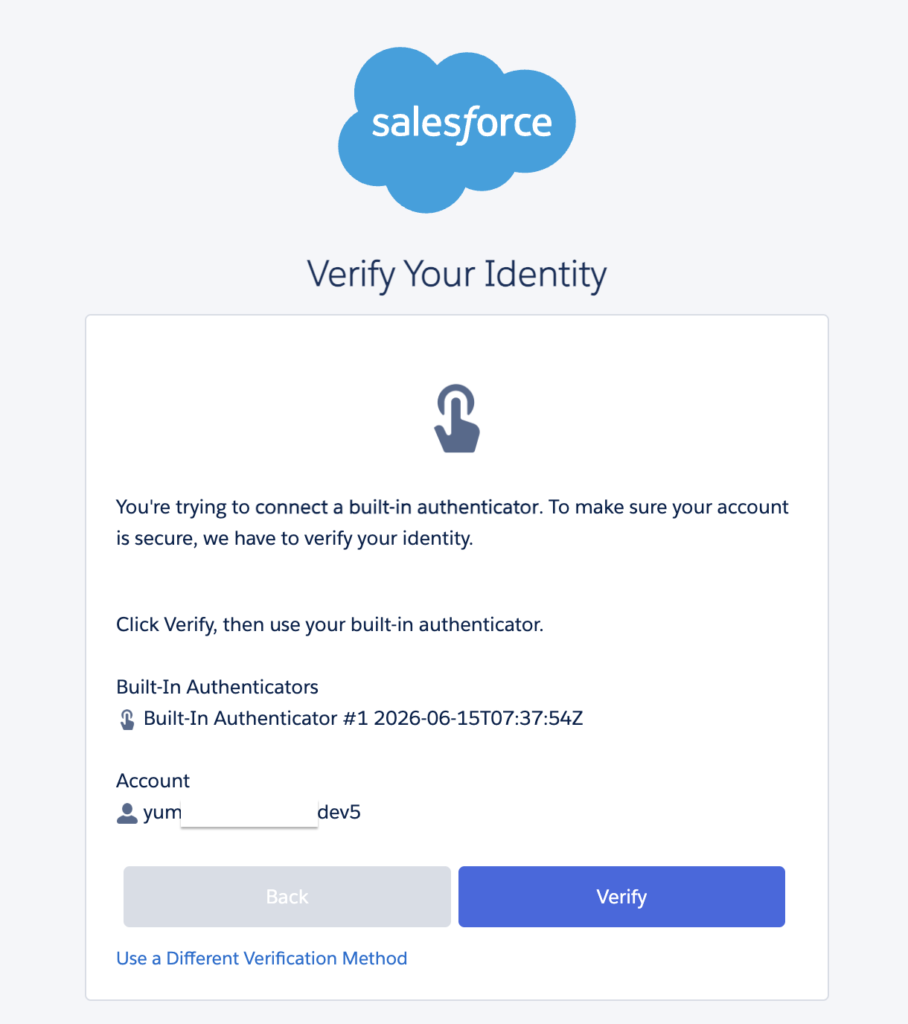
Then, click Verify and use Touch ID to verify your identity.
This completes the configuration. You can now see the registered passkey here. In this example, the passkey uses Touch ID.

The next time you log in to the environment, Salesforce will ask you to verify your identity after you enter your credentials. You can use one of your registered built-in authenticators. In this example, it is Touch ID.
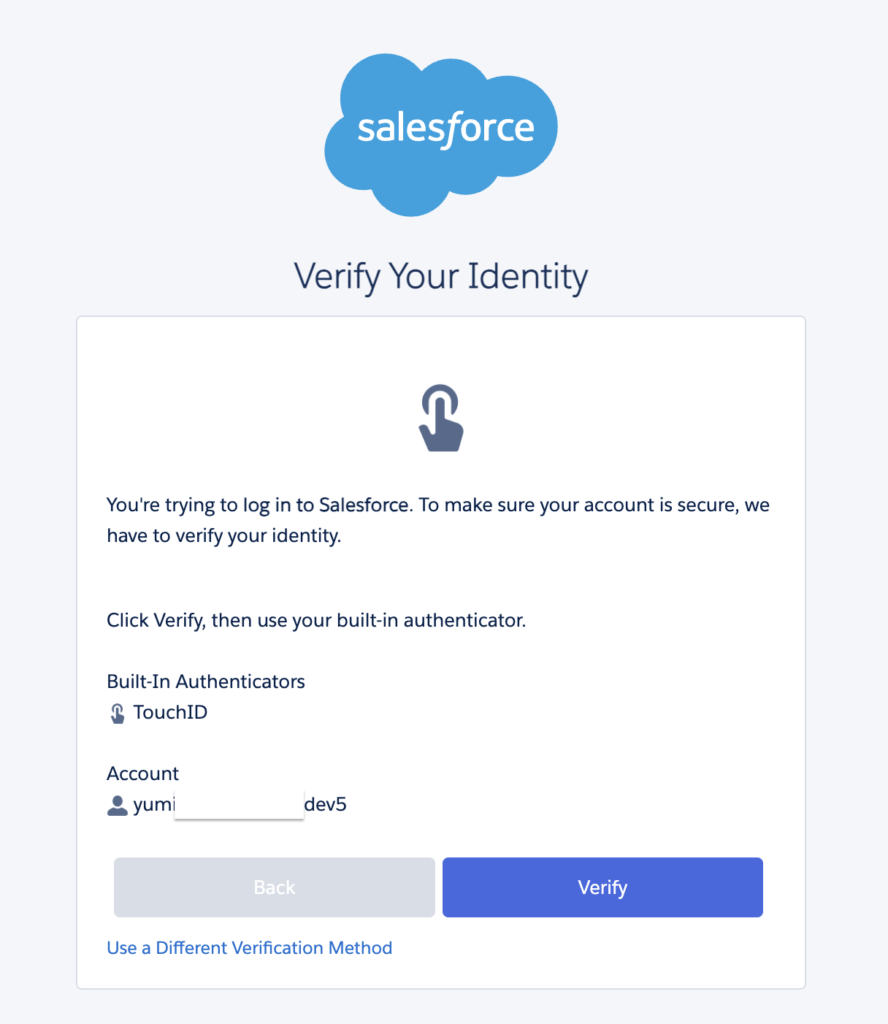
Click Verify, use Touch ID, and you are in.
How to Register a Physical Security Key
Registering a physical security key, such as a YubiKey, is similar to the previous steps. However, instead of using the Built-in Authenticators list, you need to start the process from the Security Key (U2F or WebAuthn) field.
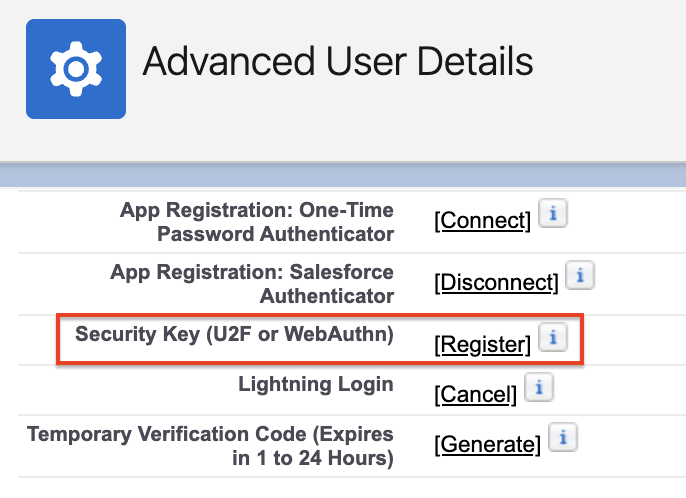
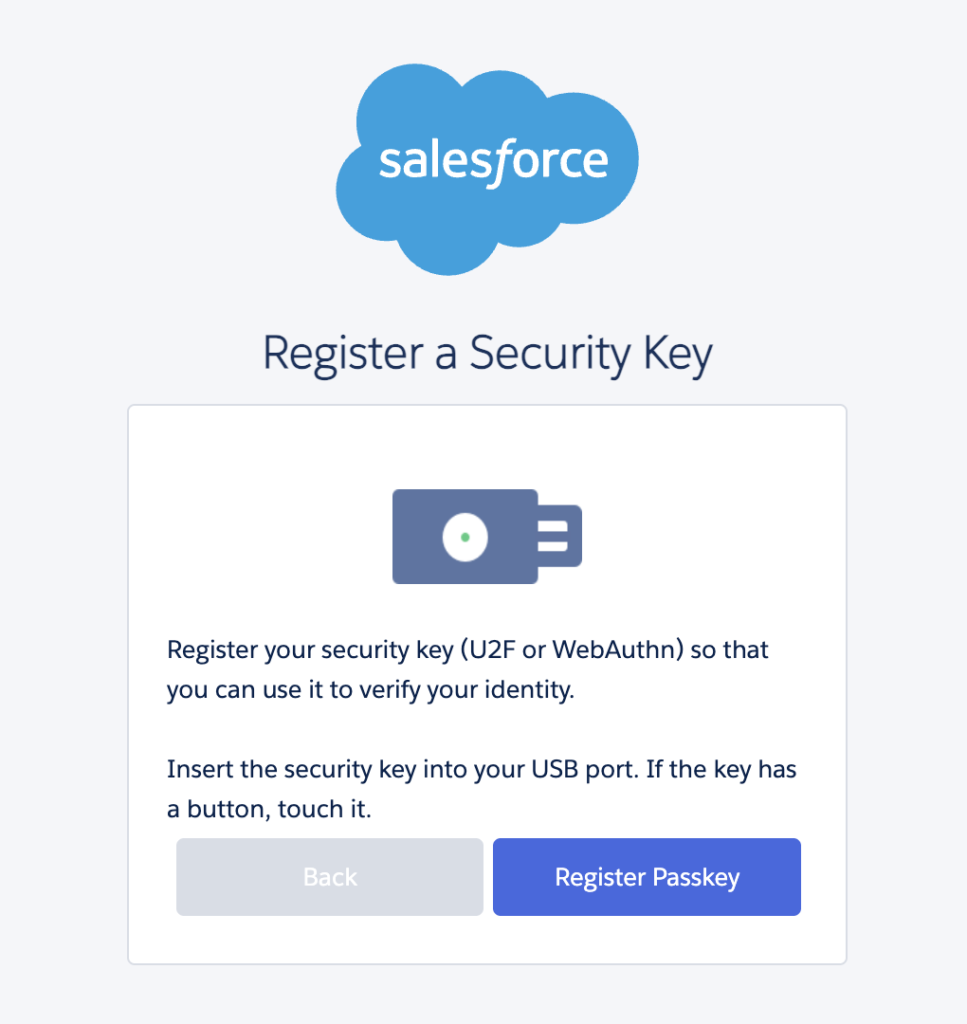
Click Register to start the process. Then, insert the security key into your USB port. If the key has a button, touch it.
Useful Tips
- Register at least two phishing-resistant methods whenever possible. For example, users can register their work computer and mobile device. This helps prevent login issues if one device is unavailable, replaced, or temporarily inaccessible.
- Use clear names when registering authenticators. Instead of generic names, use names like MacBook Pro Work, Dell Latitude 5455, or iPhone 15. This makes it easier to manage registered methods later.
- Do not wait until enforcement starts. Ask privileged users to register their methods early. This gives admins enough time to solve device, browser, or identity provider issues before users are blocked.
- Review privileged users regularly. Remove unnecessary permissions when users no longer need them.
- Test the process in a sandbox first. This helps admins understand the user experience before enabling or enforcing changes in production.
This whole security upgrade is gonna break a lot of integrations too, right. There doesn't seem to be a answer for this yet.
This is for the UI logins only. You don't need to do it for integration users.
Much Awaited Security Enforcement from Salesforce...
Nice Explanation!!!