
Salesforce introduced the Action Button component in the Summer '24 release. This game-changing feature allows you to run autolaunched flows directly from flow screens. Unlike running subflows, it is possible to run autolaunched flows without leaving the screen. Moreover, you can get outputs from the flow and use them within your screen.
Game-changing features often come with complex configuration requirements. Surprisingly, configuring this component takes just a few clicks. Here's a guide on how to use the Action Button component in a screen flow.
Let's use the Action Button to get the related Case and Contact records of the selected Account.
Configuring the Action Button Component
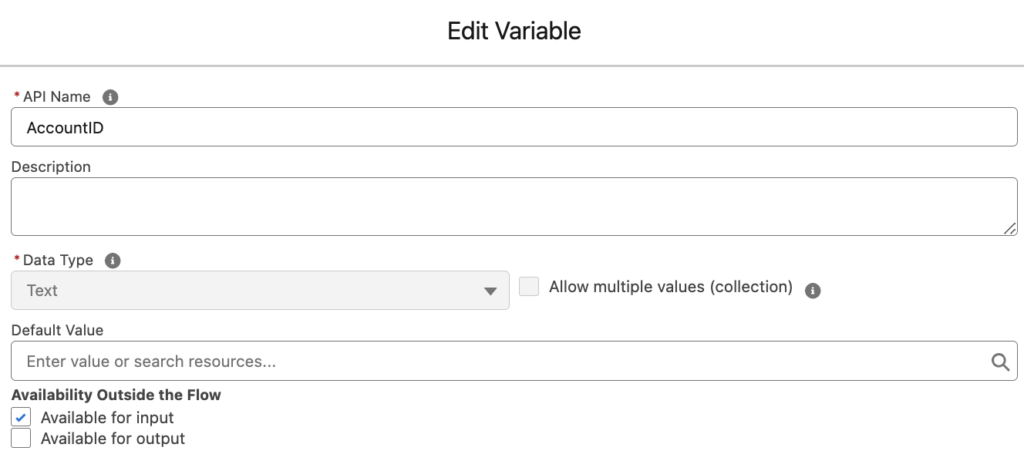
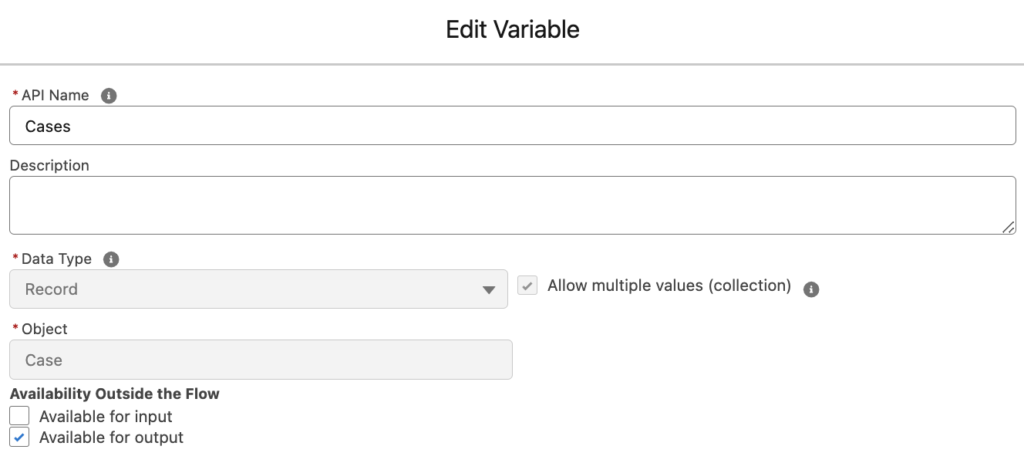
1- Build an autolaunched flow that gets the related Case and Contact records of the Account. In order to do that, create an input text variable for the Account Id and output record collection variables for Case and Contact.
Your flow should look like this.

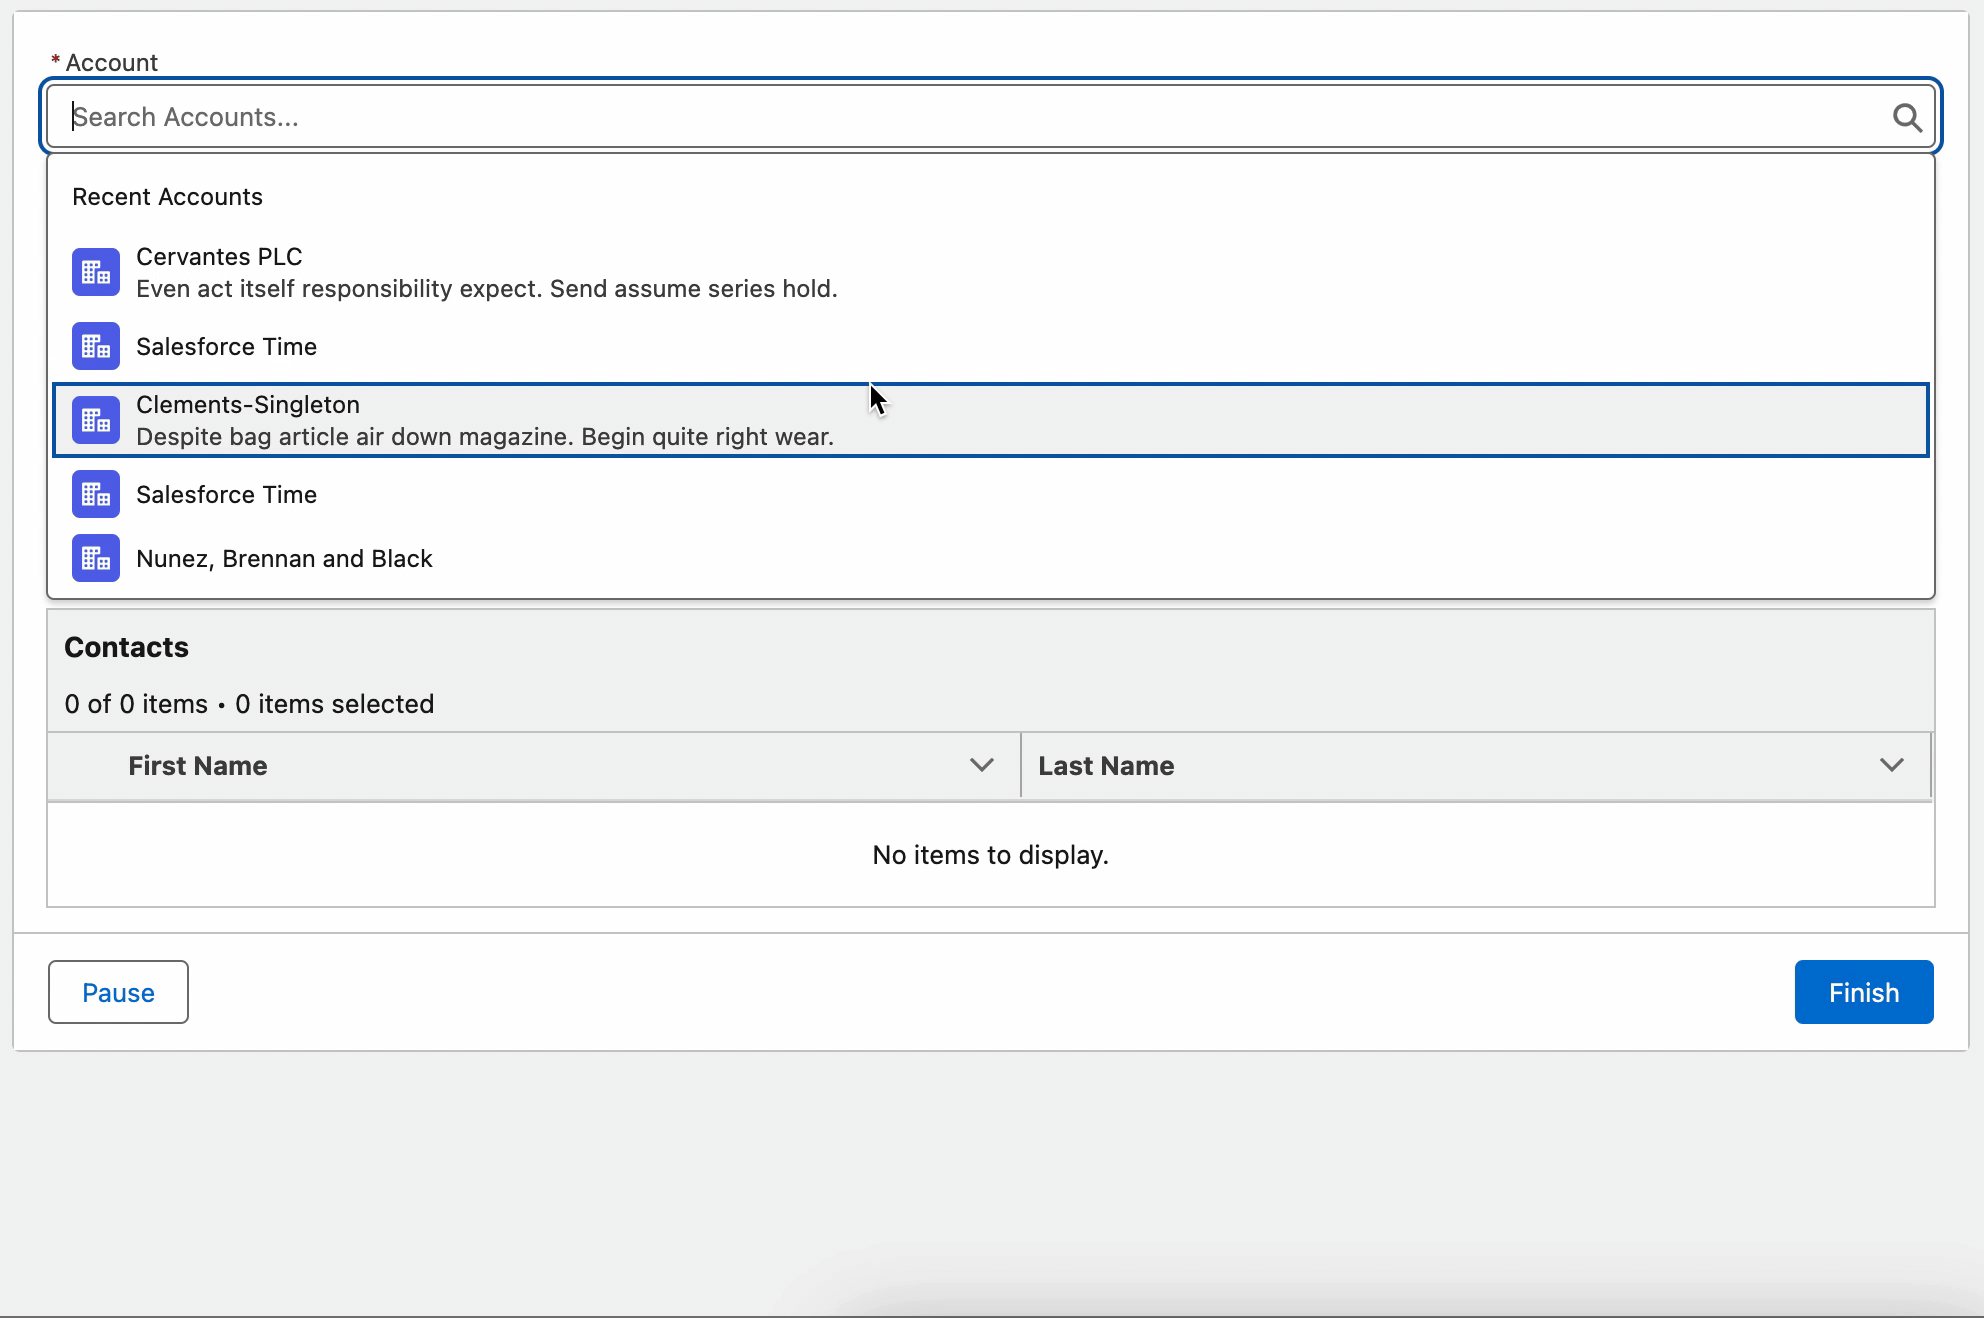
2- Build a new screen flow with any kind of record selection (picklist, radio button, data table, lookup, etc.). Let's use a lookup component to choose an Account record.
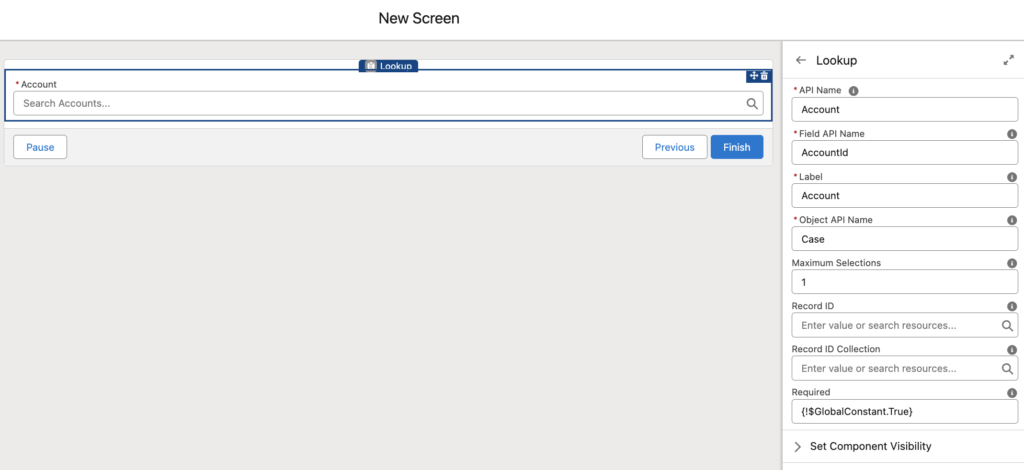
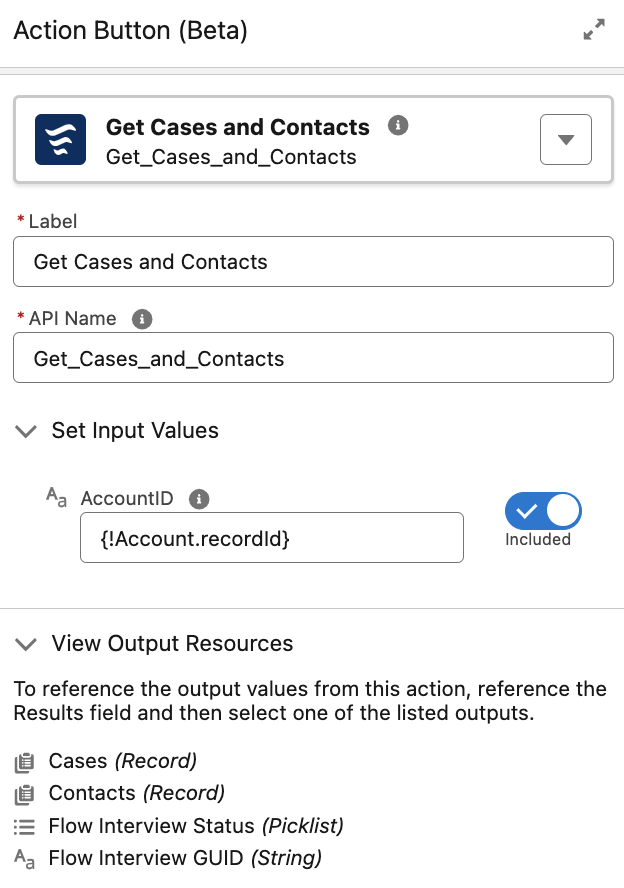
3- Add an Action Button component to the screen. Give it a name and choose the autolaunched flow that you want to call.
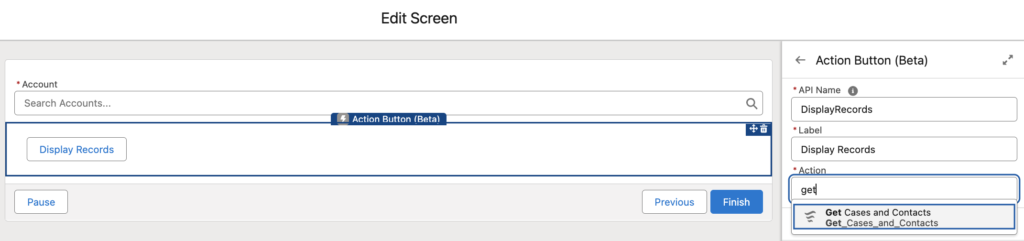
Pass the selected Account's Id as an input value. As you can see, it displays the output variables of the autolaunched flow.
4- Let's add data table components to display the output variables of the autolaunched flow.
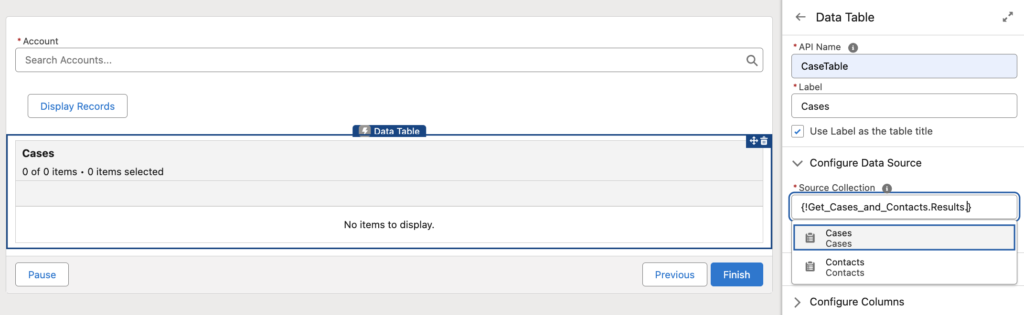
For the source collections, use the outputs of the component (Cases and Contacts are record collections).
5- At the end, your screen will work like this.
Action Button Component with HTTP Callout
It is possible to use the Action Button component to make an HTTP Callout too. Just build an autolaunched flow that makes the callout and returns the output to your screen.
For example, here is a screen flow to create a Lead record in Salesforce. Action Button passes the email address to an autolaunched flow that makes an HTTP callout to validate the email.
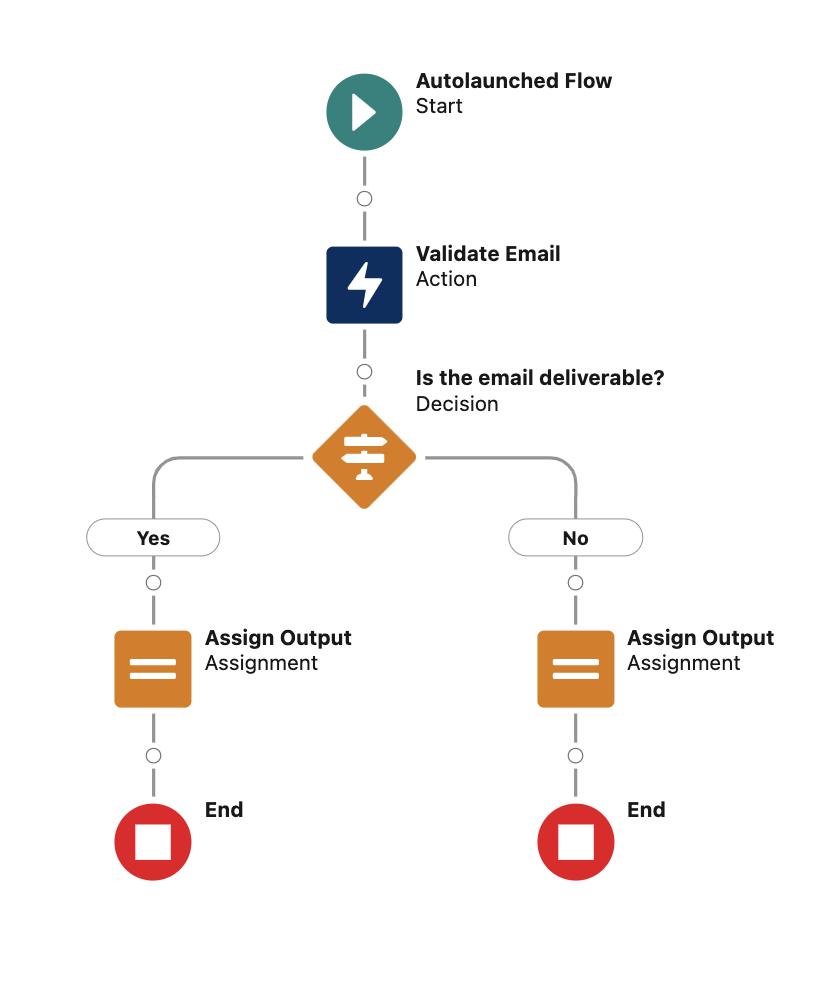
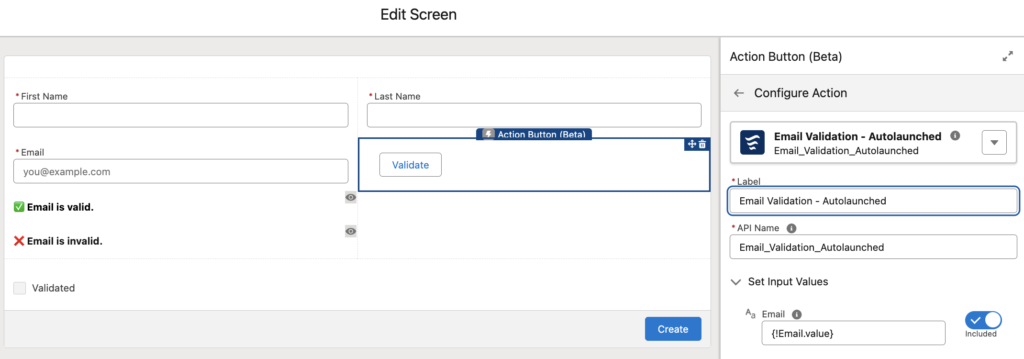
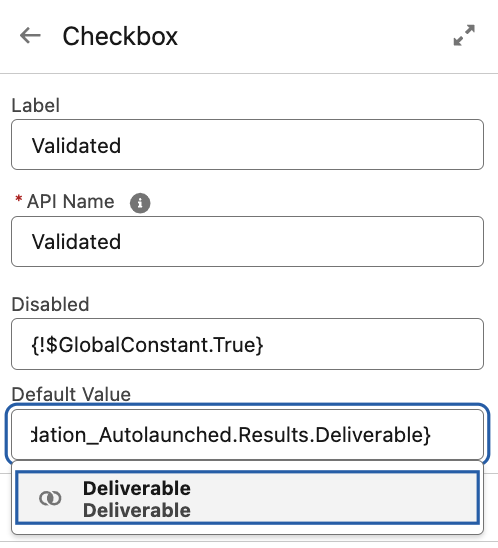
Pay attention that there is a disabled checkbox field on the screen. It becomes true if the email is valid. Additionally, there is a validation rule in place that prevents the user from proceeding if the email is invalid.
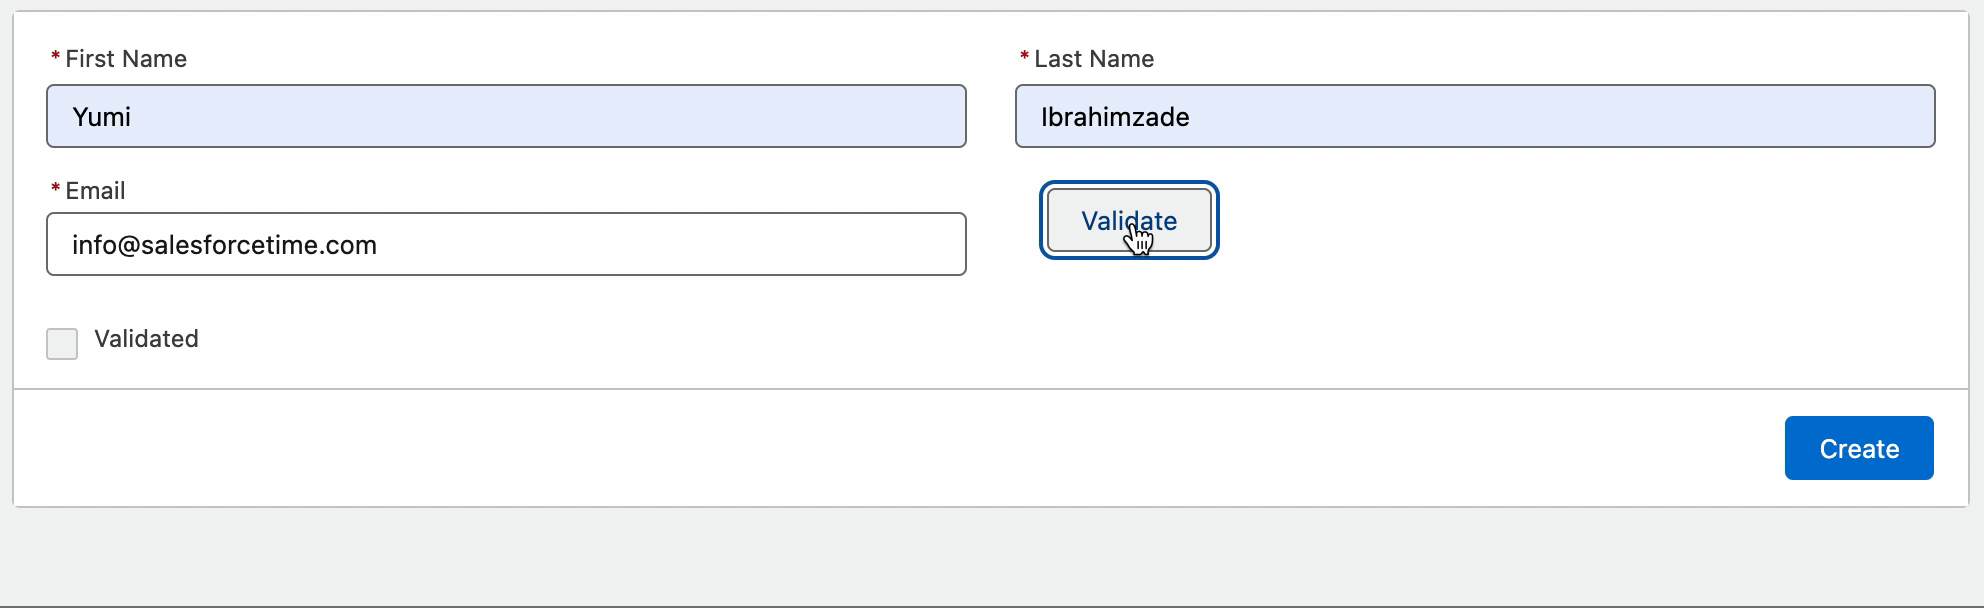
At the end, it works like this:
Summary
Salesforce introduced the Action Button component in the Summer '24 release. It is a game-changing feature that allows you to run autolaunched flows directly from flow screens. This functionality opens up a world of possibilities!
Love it!