
In Salesforce, an approval process is a workflow automation feature that outlines a series of steps for the approval of records. These approval steps act as significant milestones within your workflow and they determine where the record moves next. When creating an approval step, you have the option to select individual users as approvers. Additionally, for objects that support queues, you can designate a queue as well. However, in cases where the object doesn't support queues (e.g., the opportunity object), sending an approval request to a queue is not directly possible. Despite this limitation, you can overcome it by using a flow to send approval request to queue.
Select Assigned Approver
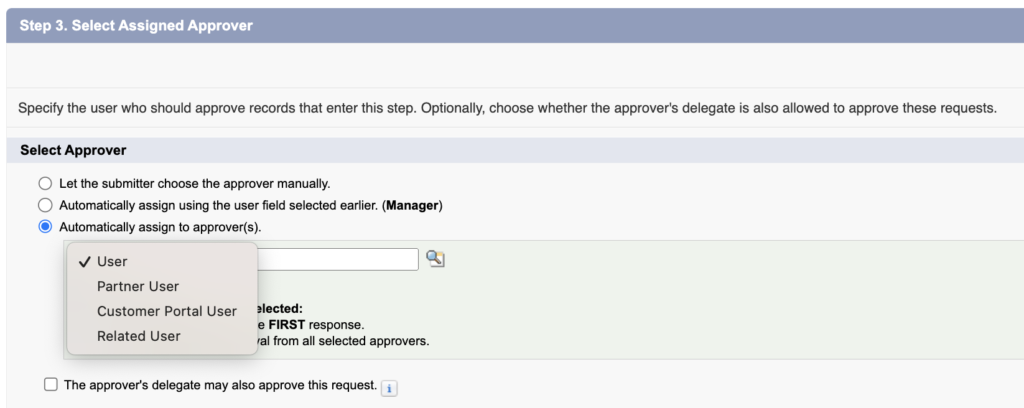
When configuring an approval step, one of the steps is to select the assigned approver. Make sure that you choose 'Let the submitter choose the approver manually'. This allows setting the approver Id from the flow.
Building a Flow to Send Approval Request to Queue
Let's assume that we have an approval process on the opportunity object. If you enter to approval process, you will see that it is not possible to choose a queue as the assigned approver. Here is how to use a flow to accomplish this.
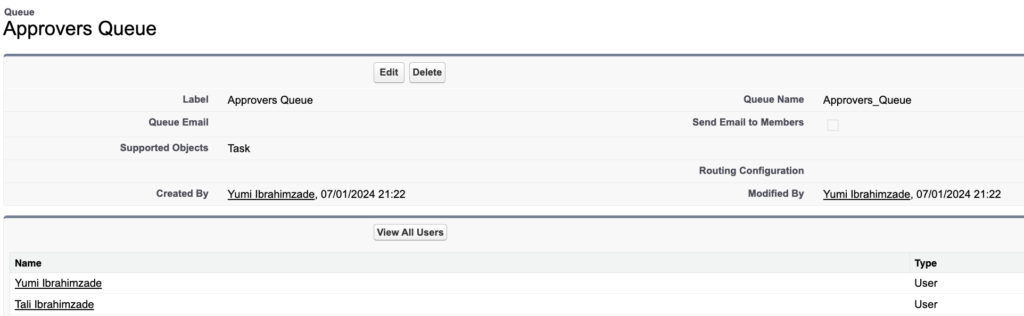
1- Create a queue in Salesforce setup. It doesn't need to be related to the same object (it cannot be). For instance, we are doing this example for the opportunity object. However, this queue is for the task object.
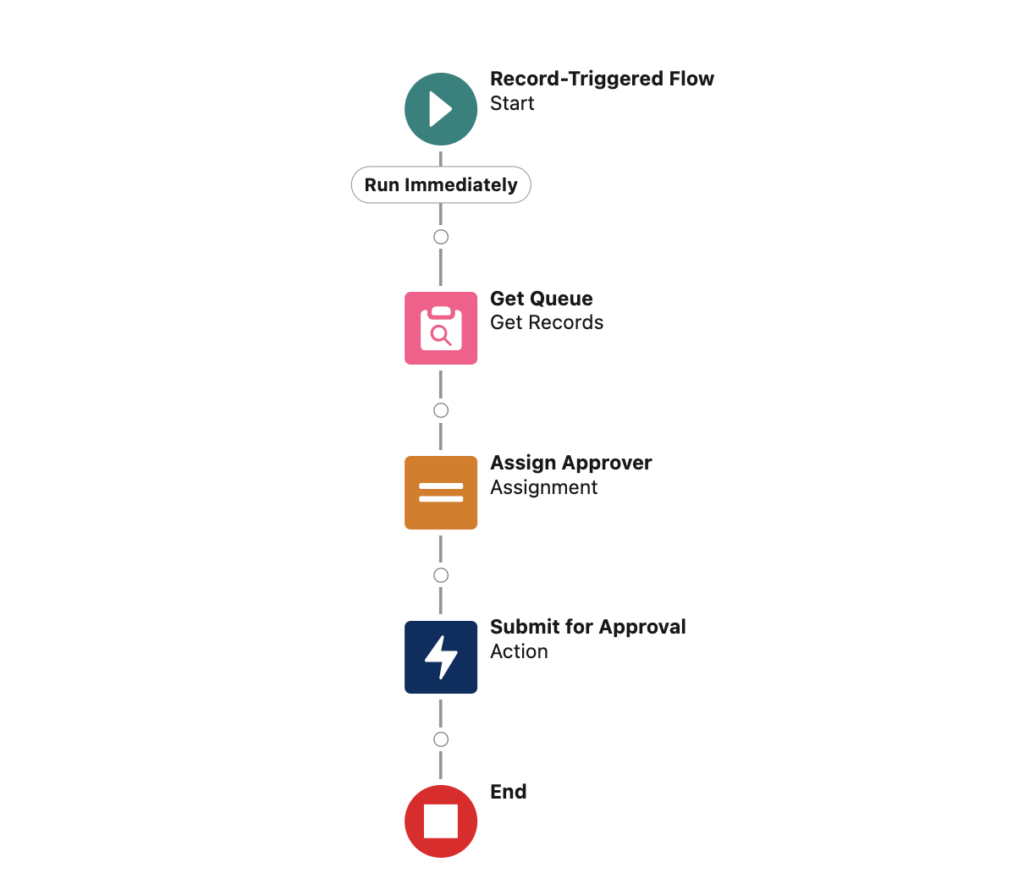
2- Create a flow (it is a record-triggered in this example) and enter your start criteria.
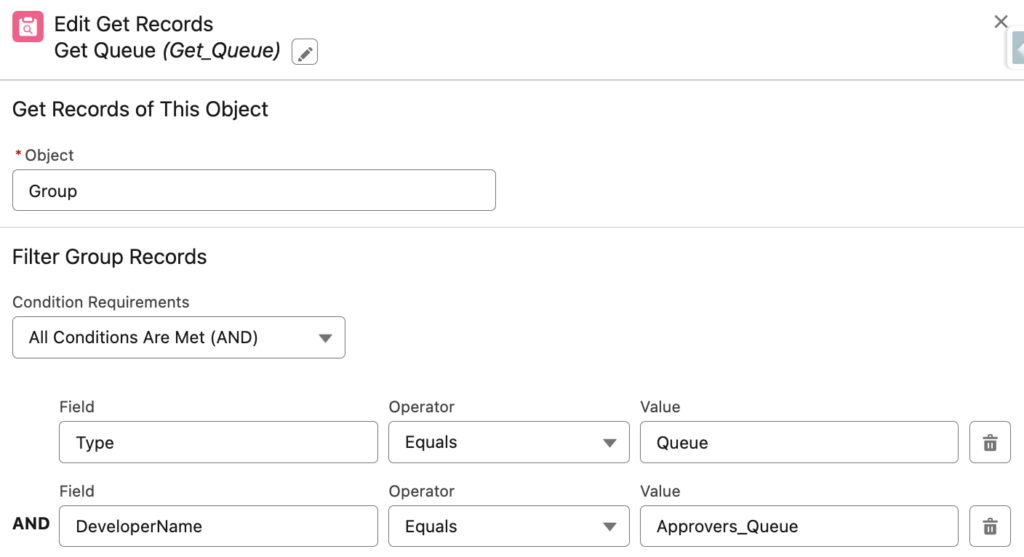
3- Add a Get Records element to get the queue's Id.
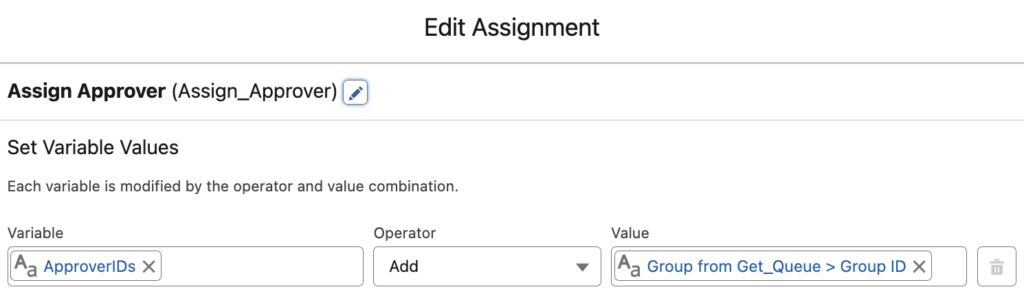
4- Create a text collection variable and use an assignment element to add the queue's Id into this variable. You can add a user's Id as well but we will send the approval to a queue in this example.
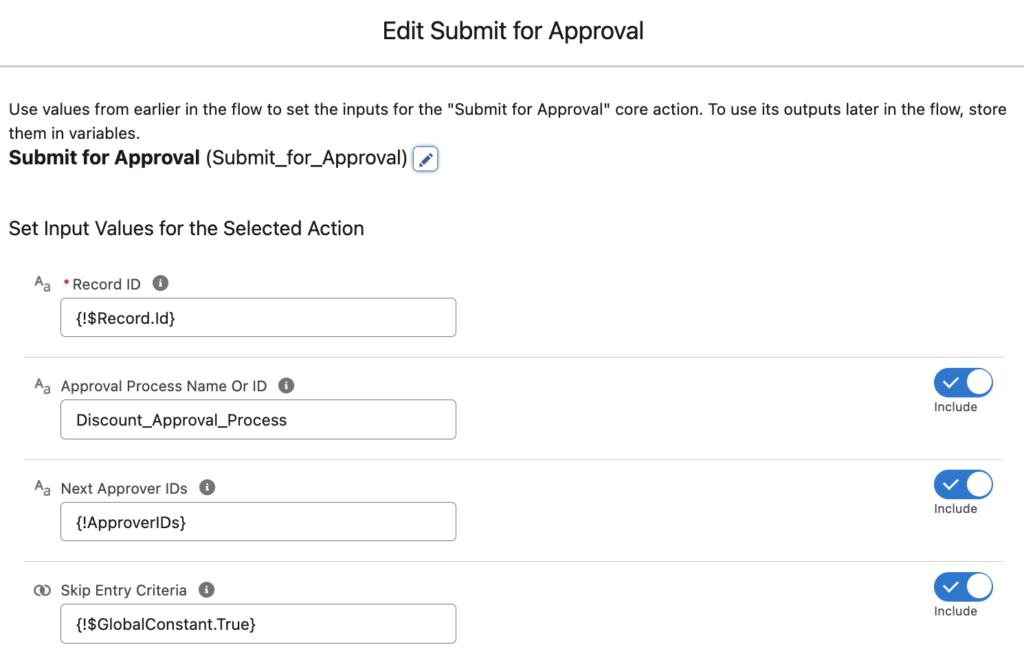
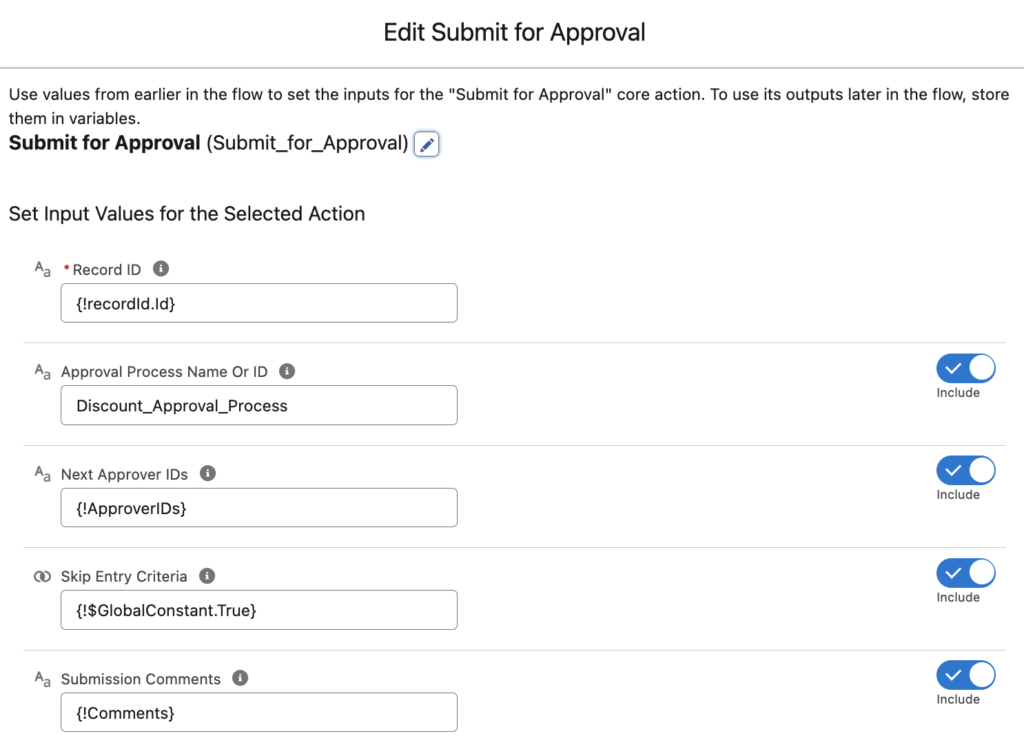
5- Add an action and choose 'Submit for Approval'. Then, set the input values for the action. Make sure that you pass the text collection into Next Approver IDs.
At the end, your flow should look like this.
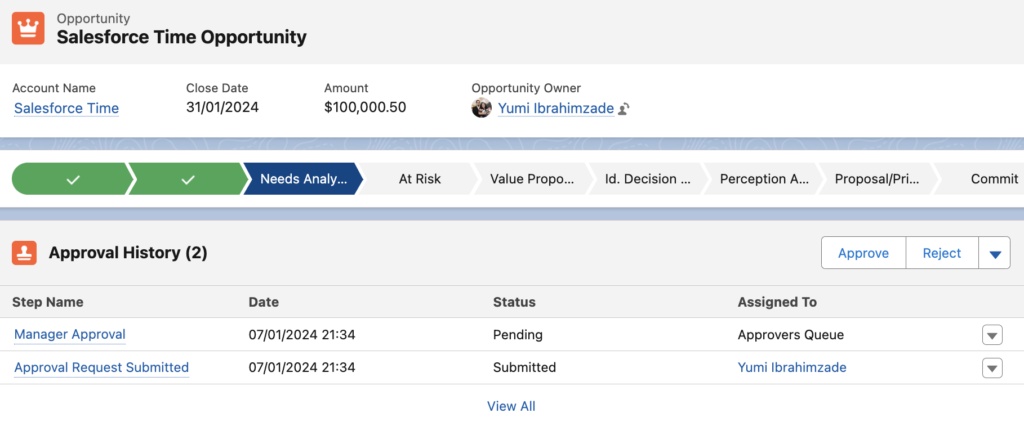
As you can see, approval request is assigned to 'Approvers Queue'. Any user from this queue can approve the request.
Using a Screen Flow
You can also use a screen flow and let the users choose the approver from a list of users or queues.
1- Add a screen element with a radio button, long text field, and 2 choice lookup components.
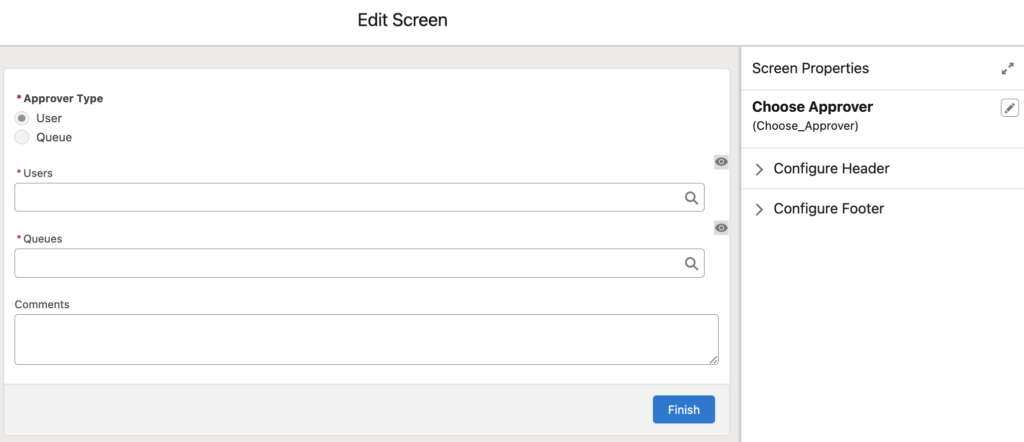
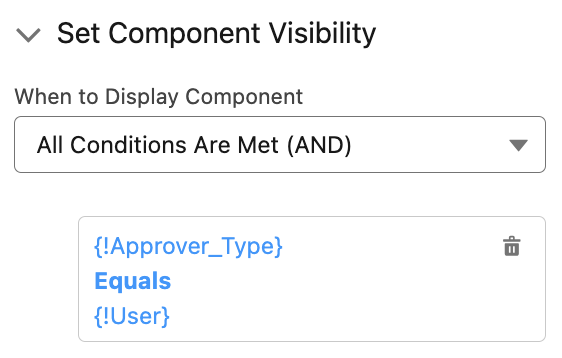
Display the choice lookup components dynamically according to the radio button. You can do this using the component visibility.
2- Add a decision element to check which type the user has selected.

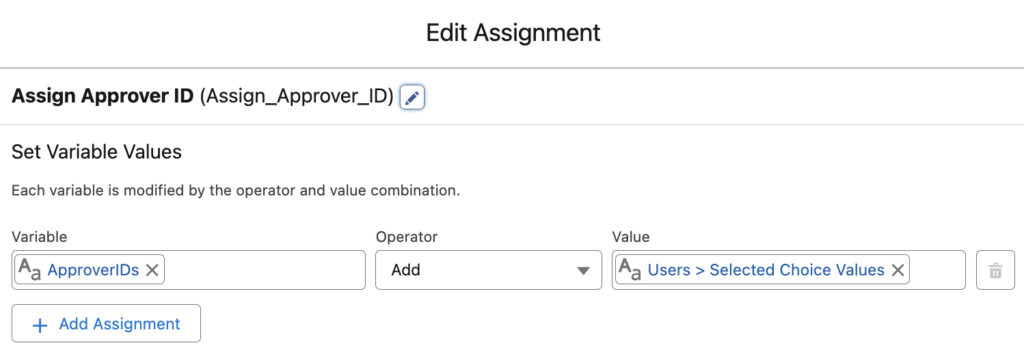
3- Create a text collection variable to store the approver Id. Then, add assignment elements to assign the user's or queue's Id to this collection variable.
4- Add an action and choose 'Submit for Approval'. Then, provide input values for the action.
At the end, your flow should look like this (don't forget to add a fault path too).

Here is how it works.
Leave a Reply