
Salesforce CPQ (Configure, Price, Quote) is a sales tool for companies to deliver precise pricing in various product configuration scenarios. It enables sales reps to rapidly and accurately generate price quotes, considering optional features, customizations, quantities, and discounts. Salesforce CPQ has a user-friendly UI that is accessible on any device through its cloud-based platform. It ensures smooth integration with the Sales Cloud platform for significant sales decisions. After creating a quote record in Salesforce, users need to click on Edit Lines button in order to open the main screen of CPQ: Quote Line Editor.
Quote Line Editor is the screen for adding products, configuring prices, discounts, and quantities. In most of the cases, users need to click the Edit Lines button right after creating the quote record. Therefore, many users ask admins to reduce that extra click to save time and improve the user experience. Although there is no setting for this, it is possible to use a screen flow to navigate to Quote Line Editor after creating quote in CPQ.
Using Screen Flow to Create Quote
Salesforce CPQ has its own Quote object (its api name is SBQQ__Quote__c). This object is related to the standard Opportunity object of Sales Cloud. Instead of clicking the standard New button from the related list, you can build a screen flow to create a Quote record. Using a screen flow, you can guide the users and collect/display relevant data. This makes the process faster and improves the user experience.
Here is an action that launches a screen flow to create a new quote. And yes, there is an emoji in its label!

Here is a simple screen flow that collects information from the user and creates a quote record.

How to Navigate to Quote Line Editor at the End of the Flow
There is no out of the box solution to navigate to a screen/record at the end of a screen flow. However, it is possible to use custom solutions. In this example, we will use Navigate Everywhere flow action from UnofficialSF. This action provides a range of navigation choices. Basically, you can navigate to wherever you want.
Here are the steps that you have to add to your flow.
1- Install the Navigate Everywhere action.
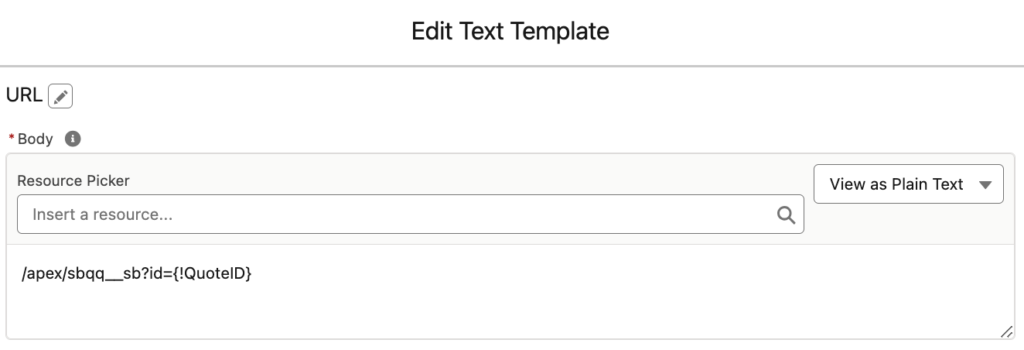
2- Create a text template that holds the URL that you want to navigate to. Here is the URL that you have to use in order to navigate to the Quote Line Editor.
/apex/sbqq__sb?id={!QuoteID}
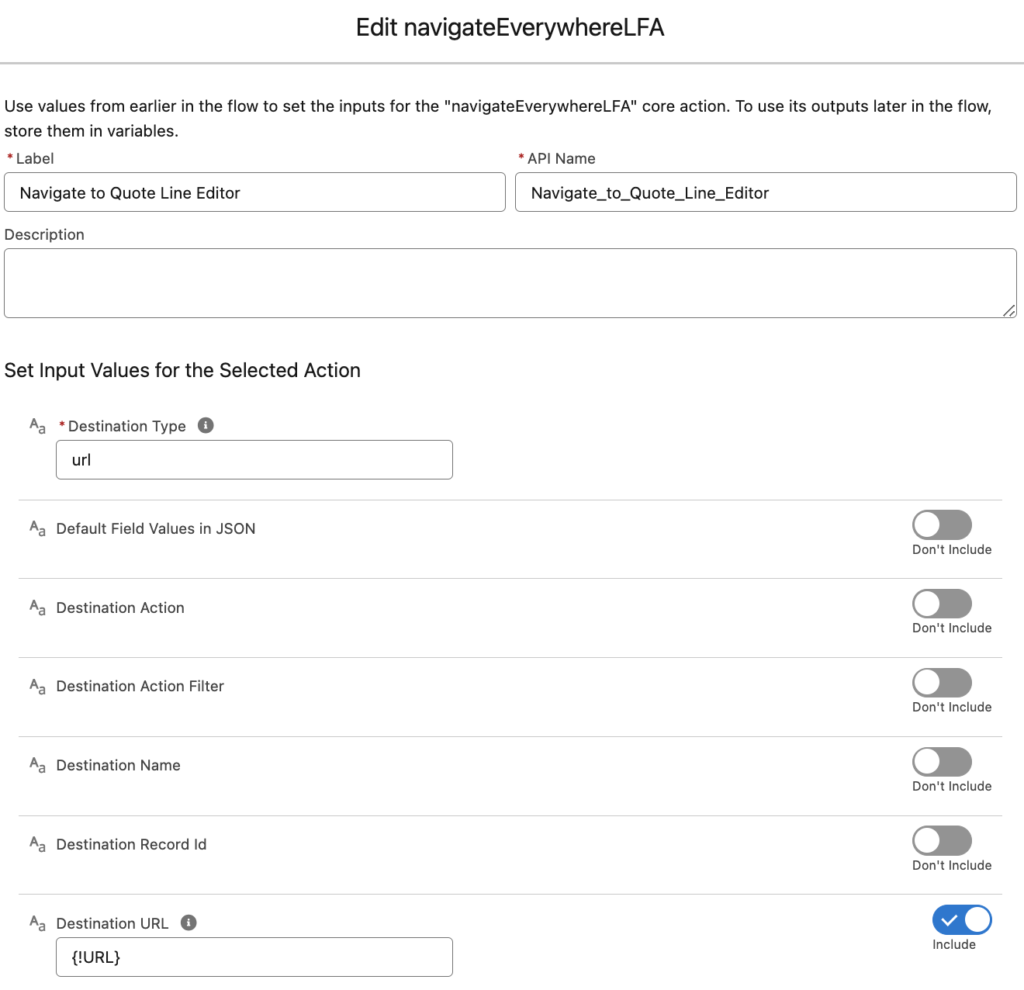
3- Add the Navigate Everywhere action to the end of the flow and configure it like this.
Destination Type: url
Destination URL: {!URL}
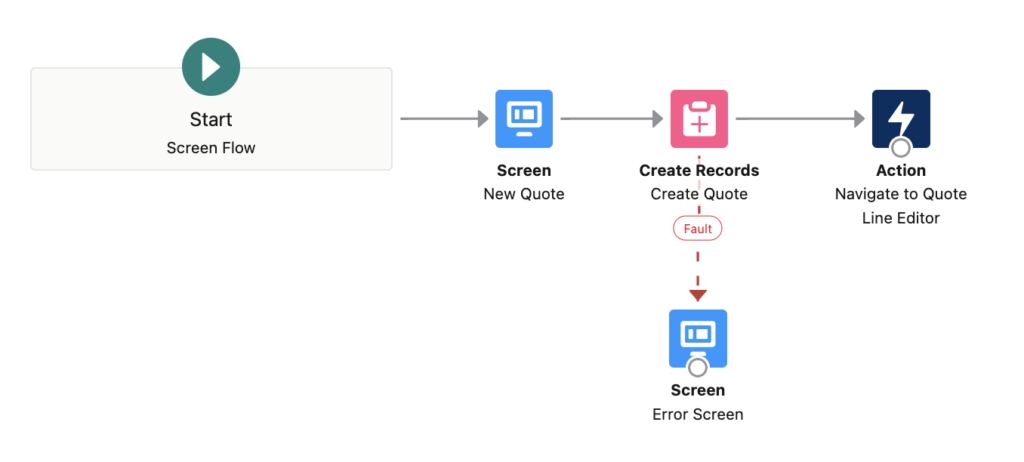
Basically, that's it. Your flow should look like this.
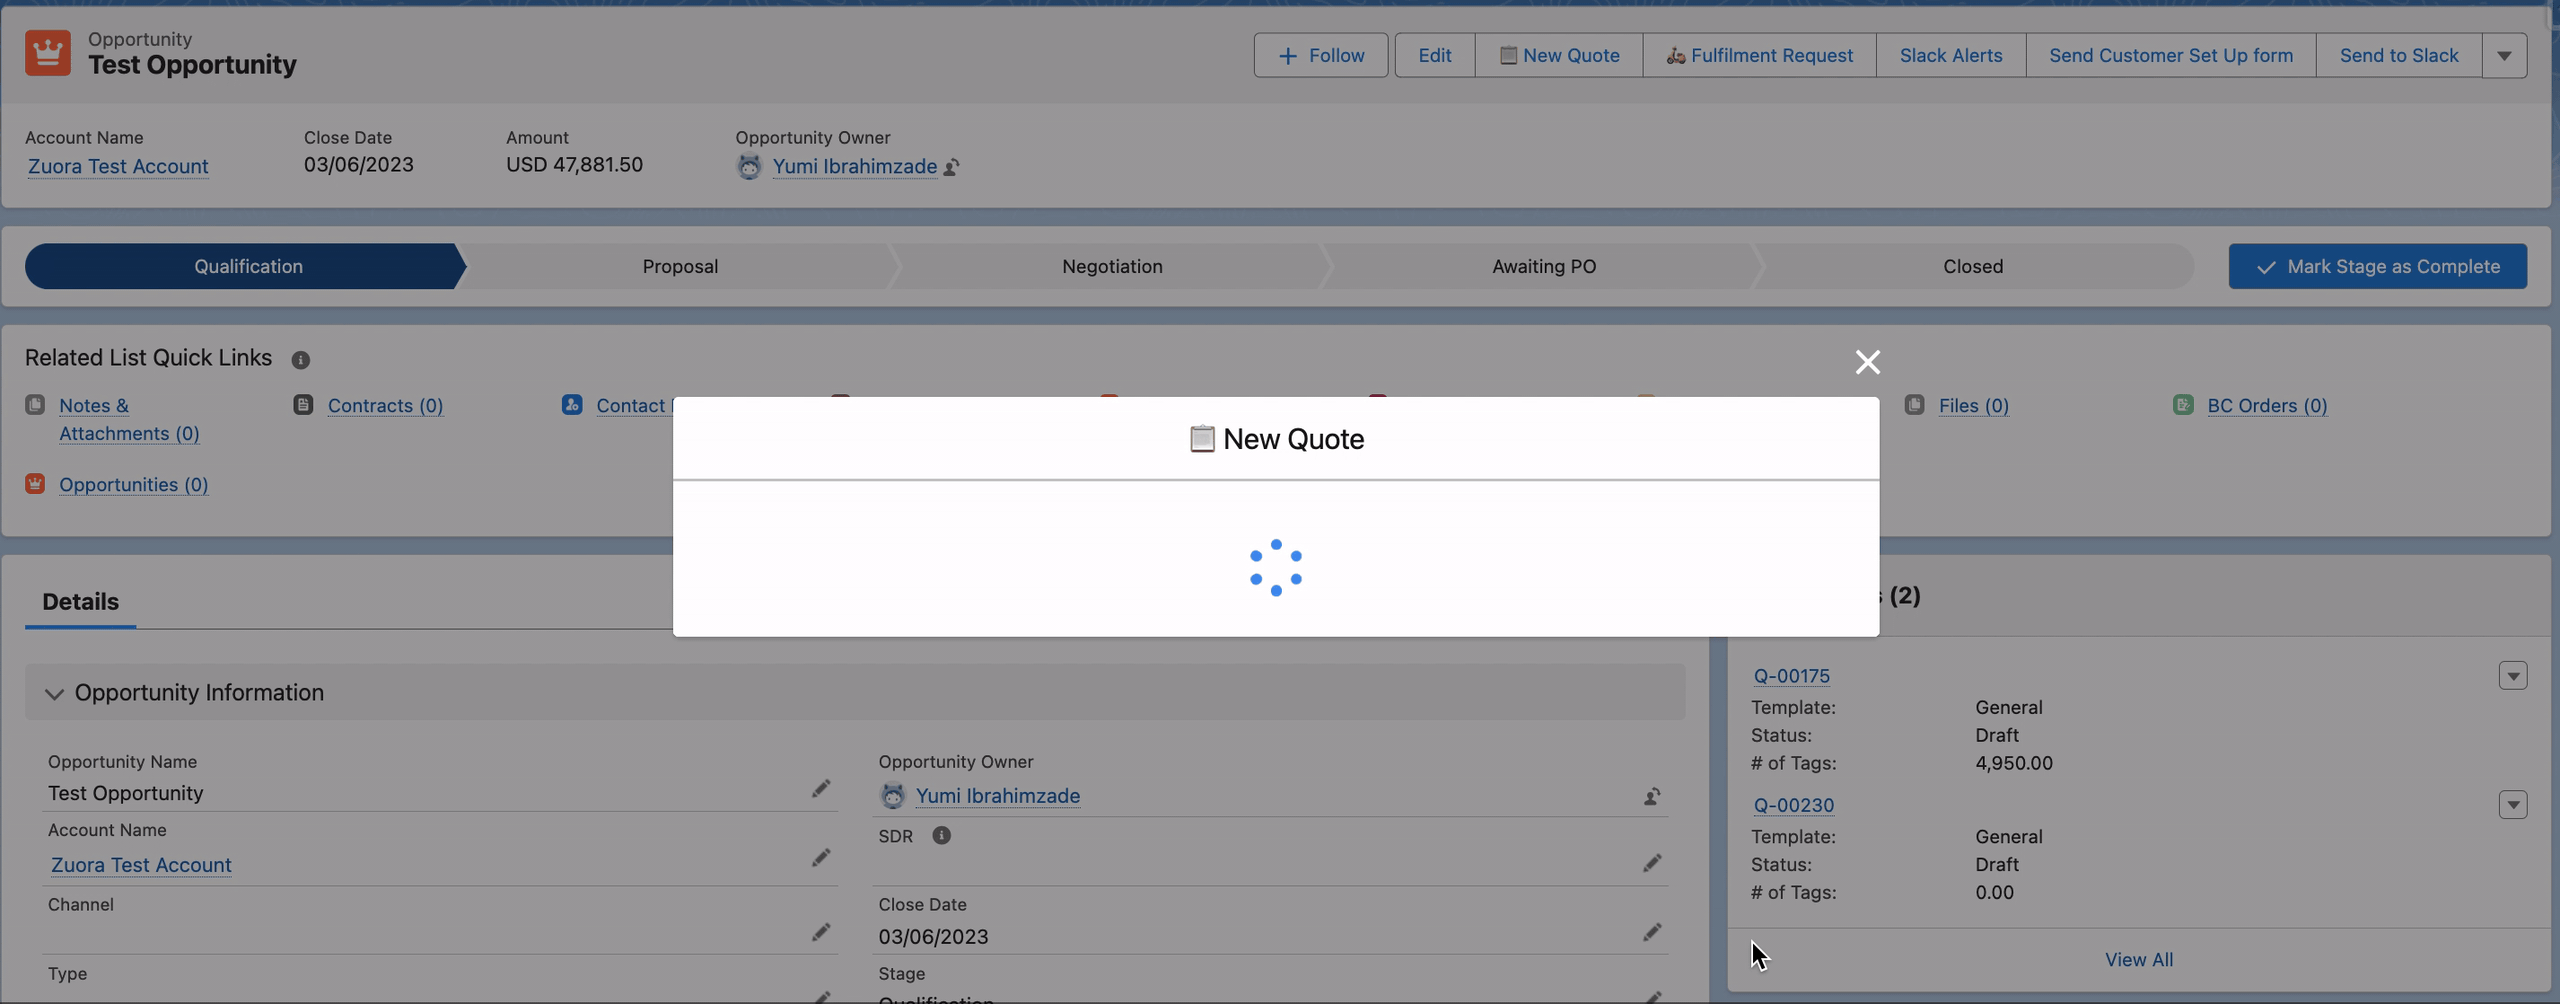
Here is the flow in action.
Hey,
Do you have an alternative for navigating back to the QLE ? If my screen flow is launched from the QLE itself, the NavigateEverywhere action does not work.
Thanks!
Em
I have the same requirement where I created a Custom Button/Action on the QLE and calling a screenflow and in the End redirecting the User to the QLE screen only. Instead of creating the URL Parameter into the Screen flow, we can use RetURL into the Button. It worked for me.
This is the URL which I used on the Button - /flow/Add_Non_Inventory_Product?recordId={!SBQQ__Quote__c.Id}&retURL=/apex/sbqq__sb?id={!SBQQ__Quote__c.Id}
That's great!
Big help, thank you for posting this!