
List views are dynamic lists that display records that meet a specific criteria. They make it possible to see all the relevant data in one place. There are many things that you can do using list views. You can add a chart to visualize the data, inline edit the records, delete records, etc. However, in order to delete a record, you should click the small arrow and then click the delete button. There is no standard button to delete multiple records at once. What if you have many records to delete?
In order to achieve this, it is possible to build a flow and create a custom button that calls it from a list view. After selecting multiple records and clicking this button, flow will run for the selected records and perform the actions. In this use case, it will delete the selected records. Read this post to learn more about passing multiple records to flow.
Let’s create a flow that deletes the selected Case records from a list view.
Screen Flow That Deletes the Selected Case Records
In this example, let's build a flow that deletes the selected records and displays messages to the user. Since the flow will display a message, it must be a screen flow. However, if you don't want to display anything to the user, it is possible to build an autolaunched flow too.
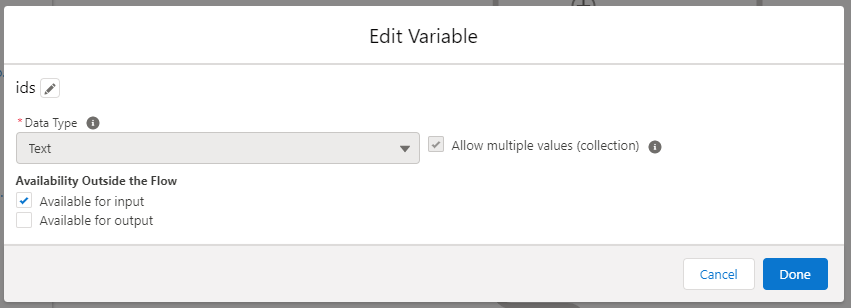
1- After creating the flow, create an input text collection variable called ids. If you create a text collection variable called “ids” and mark it as input variable, Id values of the selected records will be automatically passed with the custom button.
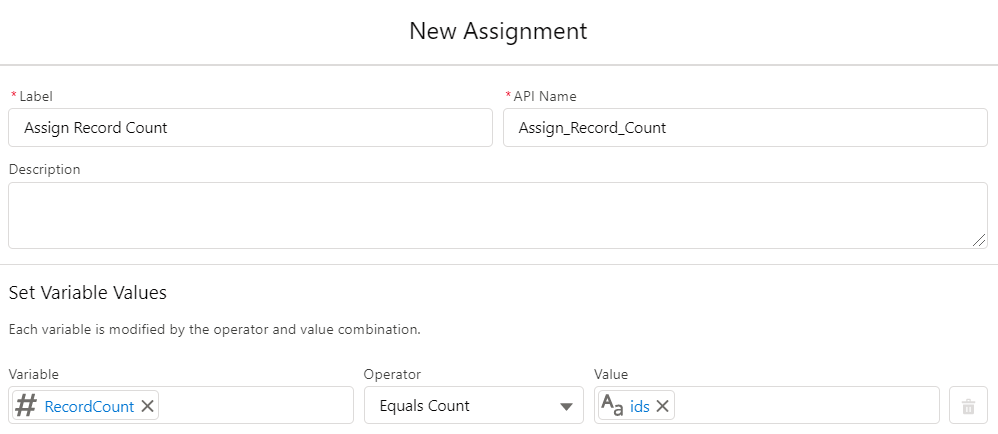
2- Create a number variable called RecordCount. Then add an Assignment element and assign the item count of the ids collection to the RecordCount variable.
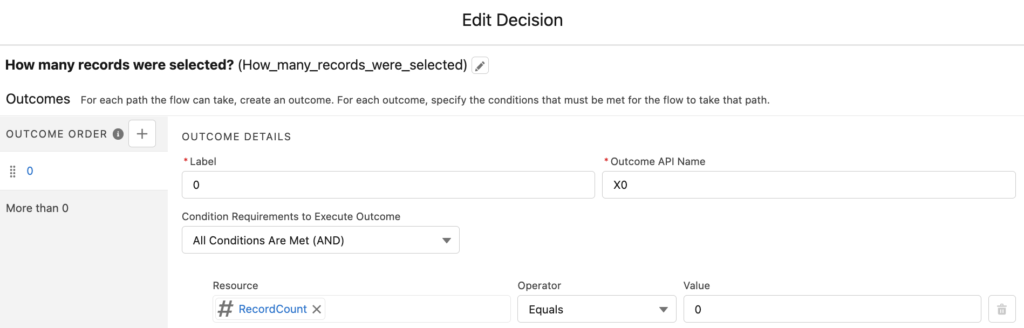
3- Add a Decision element to check the selected record count. If the user didn’t select any records, you can display a message and exit the flow. If the RecordCount is greater than 0, continue with the next element.
4- Add a Delete Records element to delete the Case records that their Ids are in the ids text collection.

As you can see from this post, there are multiple ways to delete records from a list view. Using the In operator, which was introduced in the Winter '23 release, there is no need to loop through the ids collection anymore. Therefore, this is the most efficient way and the flow performs much better than the other options.
5- Add screens for the error and success messages.


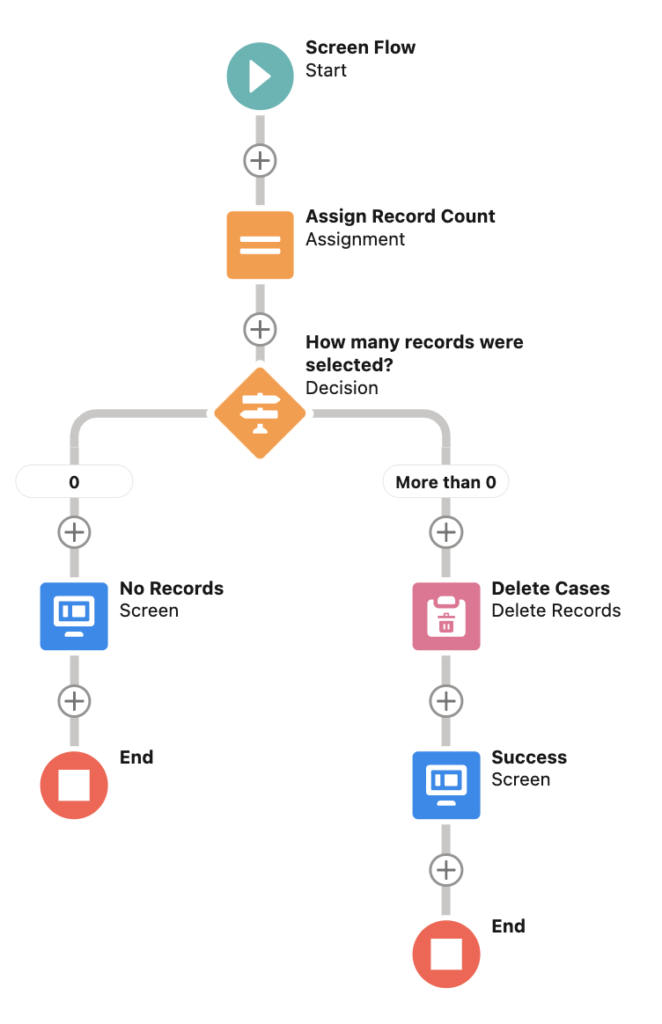
At the end, your flow should look like this.
Create a Button to Call the Flow
The flow is ready, let's create a button that launches the flow.
Go to Case in Object Manager, click on Buttons, Links, and Actions and then click on New Button or Link.
Give it a name, select List Button and mark the checkbox called Display Checkboxes (for Multi-Record Selection). This will make the button available for list views (for the selected object only) and it will allow you select multiple records. Select Display in existing window without sidebar and header as the behavior and make sure that content source is URL. For the URL value, you have to put the flow’s URL.
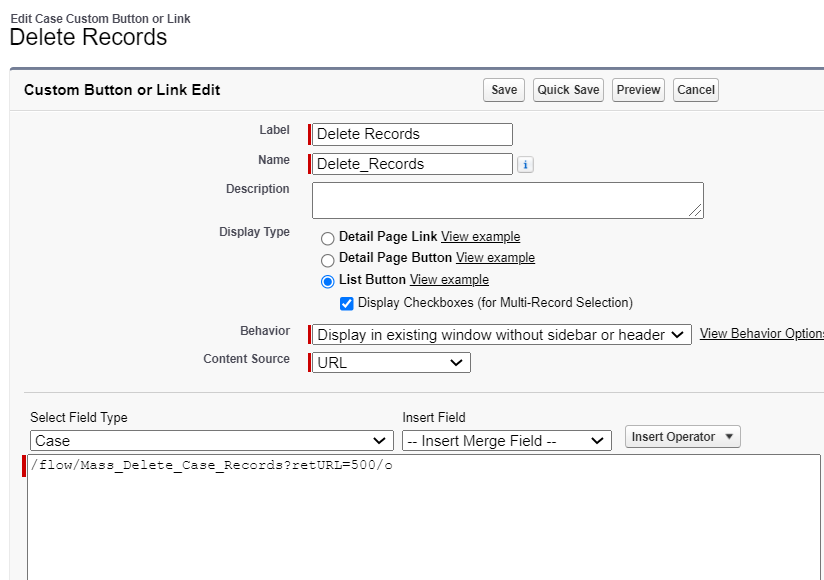
You can find the URL of the flow from the flow detail page in setup. Since you created an input text collection called “ids”, it will automatically pass the Ids of the selected records.
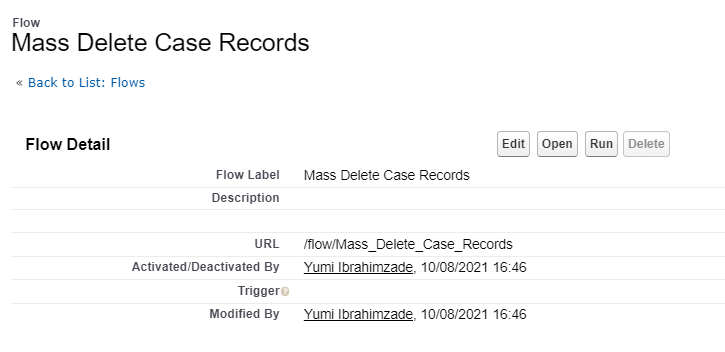
In order to return to a page at the end of the flow, you have to add a retURL parameter to the end of the URL. Using the retURL=500/o parameter, the flow will navigate back to the Case home page (Case list view). 500 is the prefix of the Case object. If you are building the flow for another object, replace this value with the prefix of it.
Add the Button to List Views
After creating the button, add it to list views. In order to add the button, go to List View Button Layout and then click edit on List View.
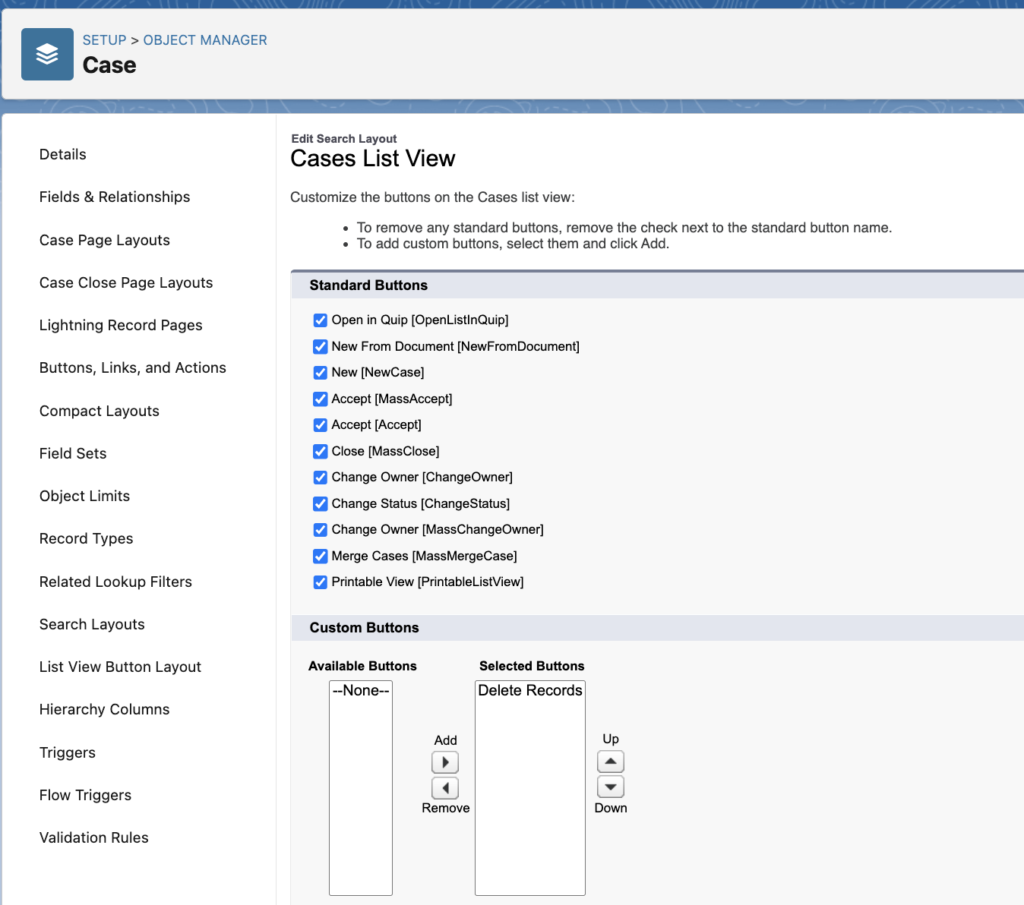
Pay attention that once you add a button to list views, it will be visible on all list views of this object.
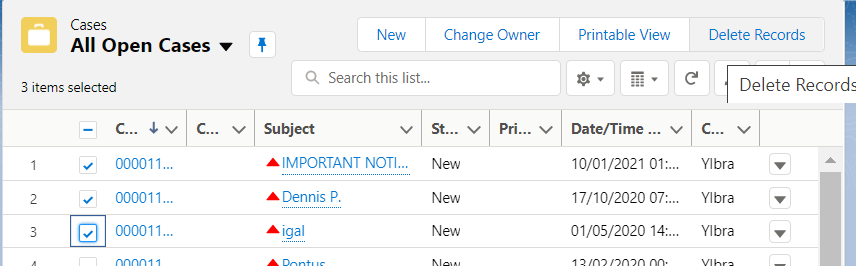
This is the end of the flow and the configurations, now it is the time to test it.
Stumped! I followed this flow set-up to delete multiple leads from the list view. Debug is clean. However, regardless of how many leads I select in the list view, the No Records screen returns & none of the selected leads are deleted. I have looked at the flow, the elements & the variables so many times that my eyes are blurry. Not sure what I'm missing, but it seems like the record count is always being set as 0?
Do you still have this issue? Did you mark your text collection variable (it must be called ids) as available for input?
I am also facing the same issue. No matter how many records I select, flow always goes to 0 records screen. Followed all the steps mentioned
Did you create a text collection variable called "ids" and marked it as available for input?
How would I find the URL prefix for other objects?
Hi,
You can use EntityDefinition to find the object name from key prefix.
https://salesforcetime.com/2022/06/04/find-object-name-from-record-id-prefix-in-flow/
tank you for sharıng ..but how could u do 2.varıable(RecordCount)?bec ıf ıts number varıable in assignment,ı cant get equal count and ids?ı dont know what I missed there?
RecordCount should be a number variable and ids should be a text collection variable. In the assignment element you can choose RecordCount Equals Count (this is the operator) ids.
I built this Flow and button, but when I got to the last step to add the button to list views, I found that my custom object does not have the item "List View Button Layout" in Object Manager. Is this only possible for standard objects?
Hi,
List View Button Layout should be available for custom objects too. Did you find a solution for this issue?
Hi! I have followed all the steps mentioned above still im getting the recordcount as 0.How should I proceed?
Hi,
Did you name your text collection input variable as ids?