
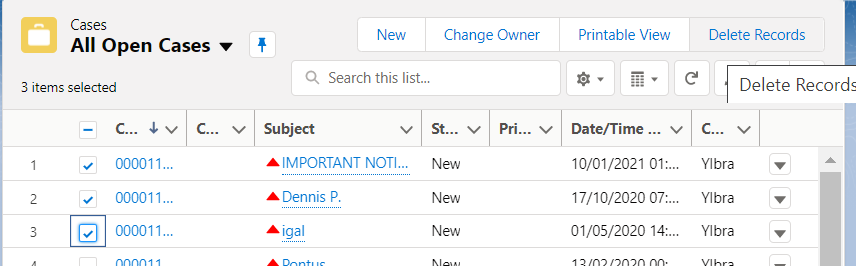
List view is a great tool to create a dynamic list of records that meet a criteria. Once a record meets the criteria, it enters to the list. This way, it is possible to see all the relevant data in one place. There are many things that can be done using list views. It is possible to inline edit the records, add a chart to visualize the data, delete the records, etc. However, to delete a record, you have to click the small arrow and then click delete button to delete the record. What if you have many records to delete? What if you created a list view that shows the records that should be deleted? There is no mass delete option, you have to delete them one by one.
Custom button that calls a flow can be used to delete the selected records at once. After you select multiple records and click this button, your flow will run for the selected records and perform the actions. In this use case, it will delete the records. Read this post to learn more about passing multiple records to flow.
Let's create a flow that deletes selected Case records.
Important Update
There are many ways to achieve this. Read this post to see the easiest and the most efficient way to delete multiple records from a list view.
1- Create a Flow That Deletes Selected Case Records
First of all, you have to create a screen flow. In this use case, you can also create an autolaunched flow but if you want to display a message to the user, then you need a screen. This means that you need a screen flow. Records are visible on the list view and they will be selected from the list view. The only reason that we are selecting screen flow is to be able to display a meaningful message at the end.
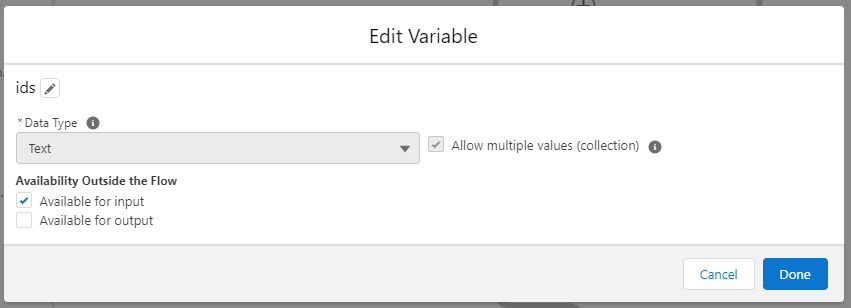
When you create a text collection variable called "ids" and mark it as input variable, selected record Ids will be automatically passed with the custom button.
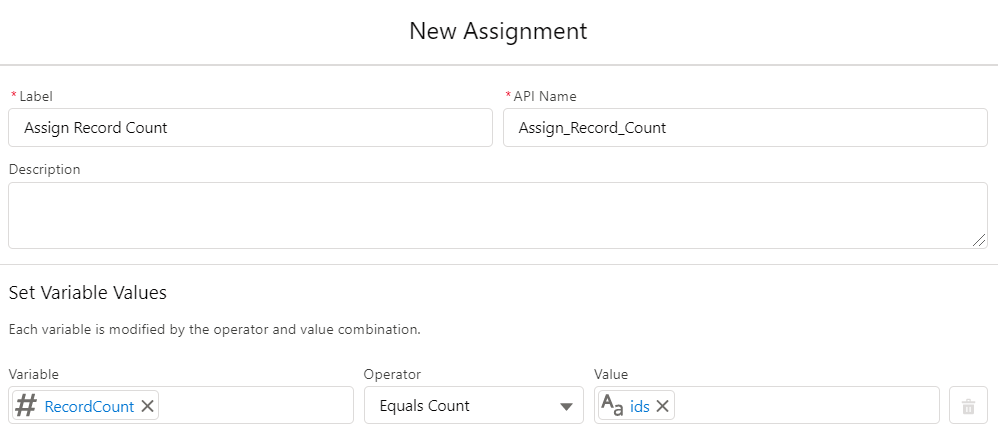
Create a new number variable called RecordCount and add an Assignment element to assign the number of selected records.
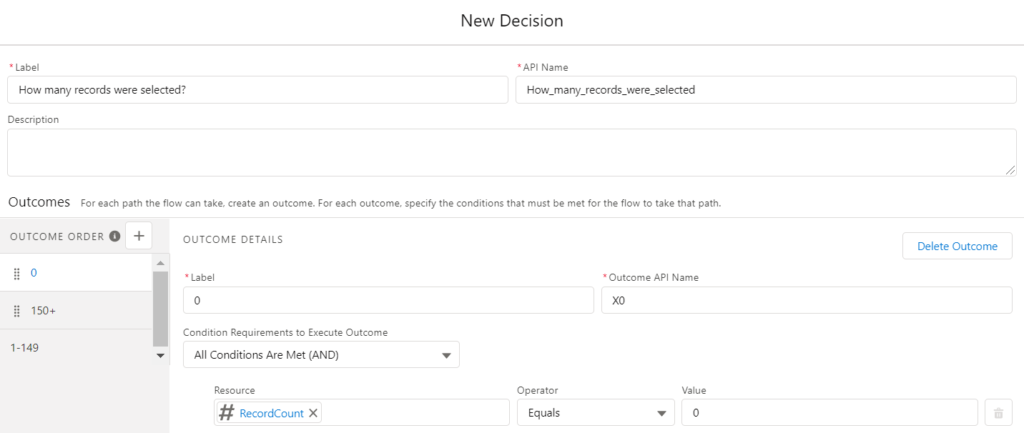
Add a Decision element to check the selected record count. This element should have 3 outcomes for 0, 1-149 and 150+. If the user didn't select any records, you can display a message and exit the flow. If the user selected more than 150 records, you can display a message and ask him/her to select less records and then exit the flow. Otherwise, you can continue the flow.
After passing the record Ids to the flow, you will have them all in the collection variable called ids. In order to delete the records, you need the Id values one by one. To do so, use the loop element to extract Id values.

This loop extracts the Id values as a text. Note that the current item from the loop is just a text, not the complete case record. However, you don't really need the case record in order to delete it. So in this case, having the Id value as a text is enough.
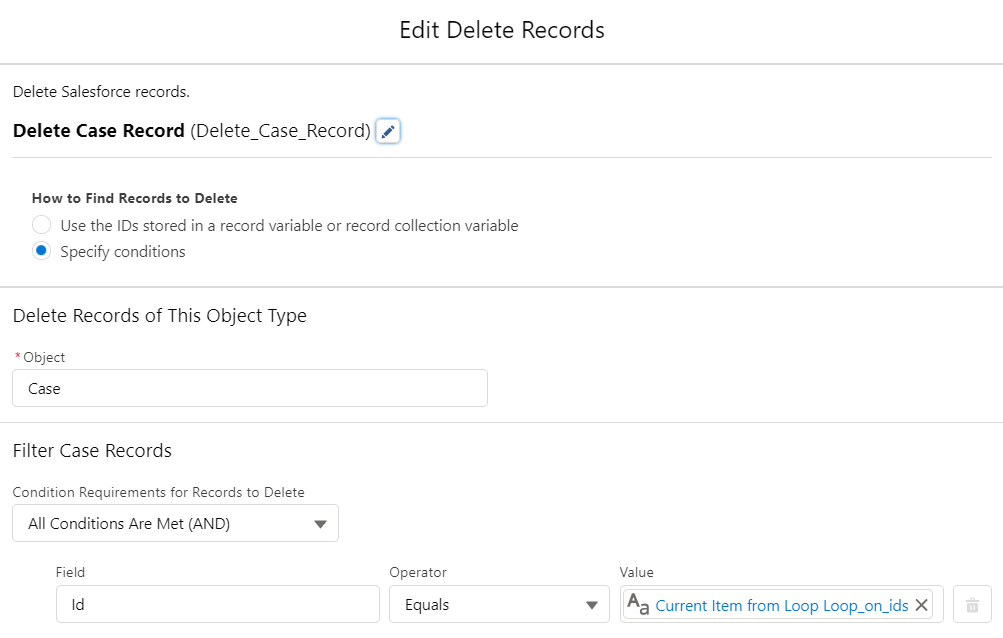
Use the Delete Records to delete the current case record. In the Filter Case Records section, make sure that you are deleting the case record that Id of it equals to the current item from the loop.
Pay attention that there is a DML action in a loop which might cause you to hit the governor limits. In order to avoid this, we added an assignment and decision elements to check the record count and exit if the count is higher than 150 (DML limit is 150). However, this is still not the best practice. Try not to use any DML operation in a loop. Instead, look for other workarounds like mentioned in the "Improvements" section.
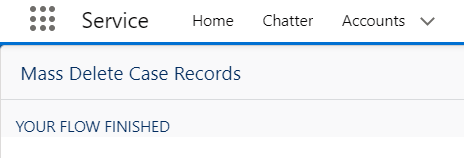
If you leave the flow as it is, it will delete the records successfully but the user will get a screen like this. Instead, I would recommend you to display a message at the end of the flow and then navigate to the Case list view (a parameter in the button URL will do the navigation). This is why we created a screen flow.
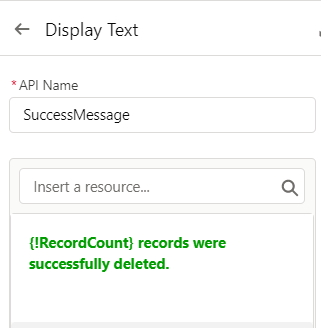
Create three screens that display messages for each outcome. Pay attention that you need two error/warning messages and one success message. The screen that will appear after the loop should be a success message, not an error. To make the message dynamic, use the RecordCount variable that you created.
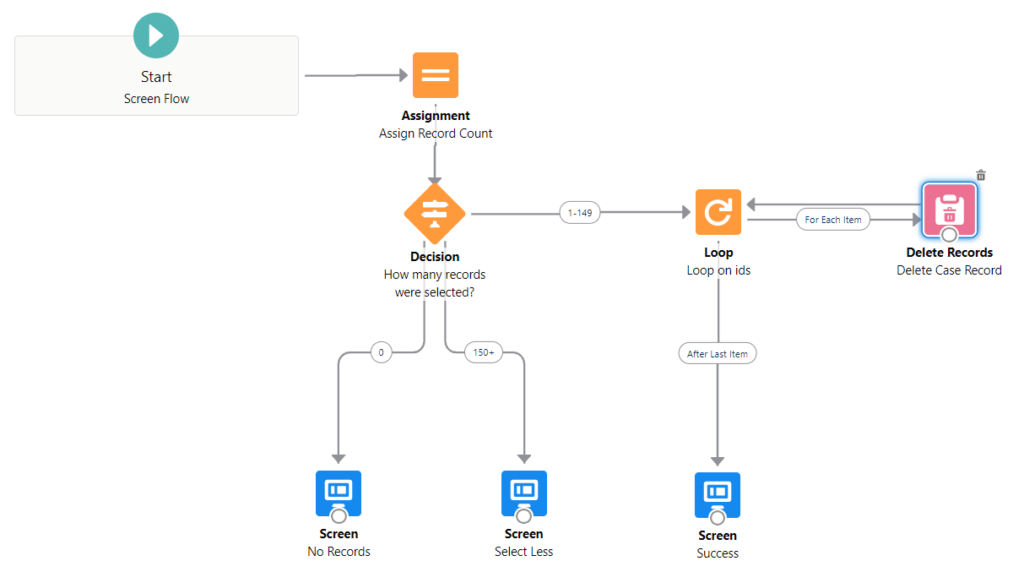
At the end, your flow should look like this.
2- Create a Button That Runs the Flow
Go to Case in Object Manager, click on Buttons, Links, and Actions and then click on New Button or Link.
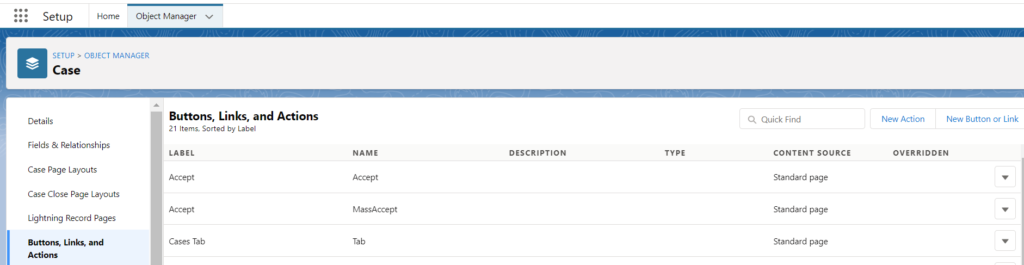
After giving a name, select List Button and mark the checkbox called Display Checkboxes (for Multi-Record Selection). This makes the button available for list views (for the case object). Since you marked the checkbox, it will allow you to select multiple records. Select Display in existing window without sidebar and header as the behavior and make sure that content source is URL. For the URL value, you have to copy the flow's URL.
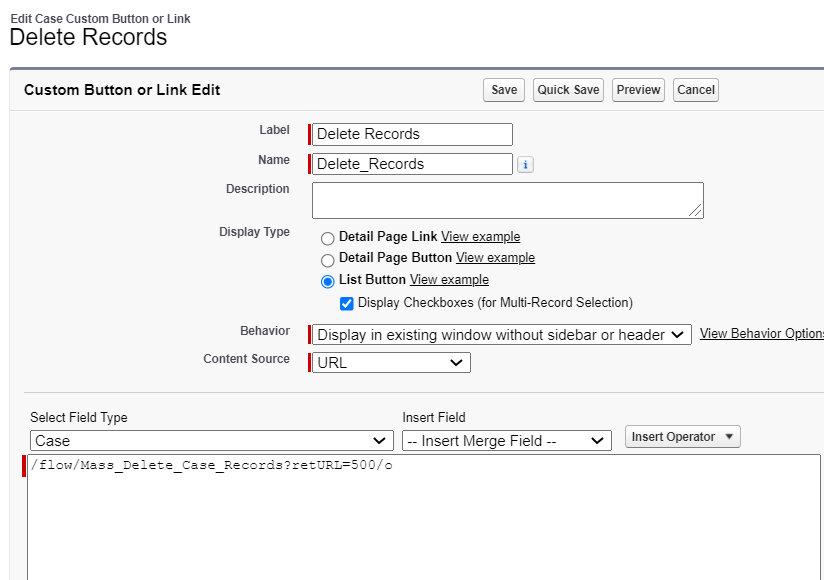
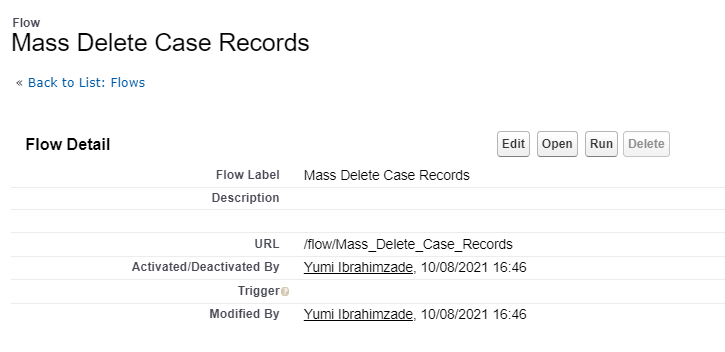
Flow's URL can be found on Flows in setup. Pay attention that you are not passing any parameters but since you created an input text collection called "ids", it will pass the selected record Ids.
In order to navigate somewhere, you have to add a retURL parameter at the end of the URL. Using the retURL=500/o parameter, the flow will navigate back to the Case home page (Case list view).
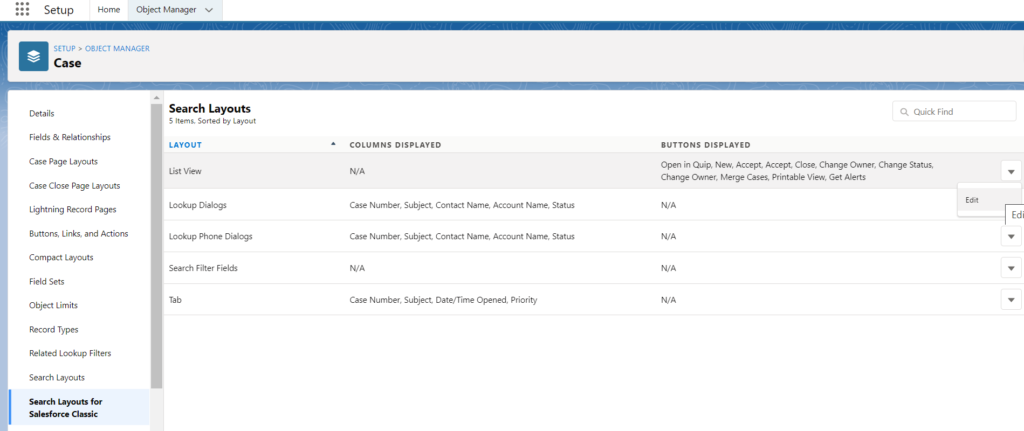
3- Add the Button to List Views
After creating the button, you have to add it to list views. In order to do it, go to Search Layout for Salesforce Classic and then click edit on List View.
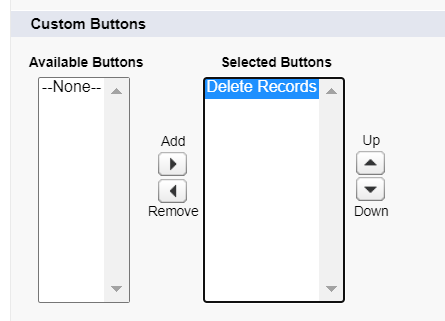
Choose the button that you created in the previous step and click save. Note that you are not selecting a specific list view. Once you add a button to list views, it will be visible on all list views of this object.
This is the end of all of the configurations, you can test your button.
4- Improvements
This flow can be built in a few different ways but in any use case, pay attention to the governor limits and put some elements to avoid hitting the limits, that is the most important part.
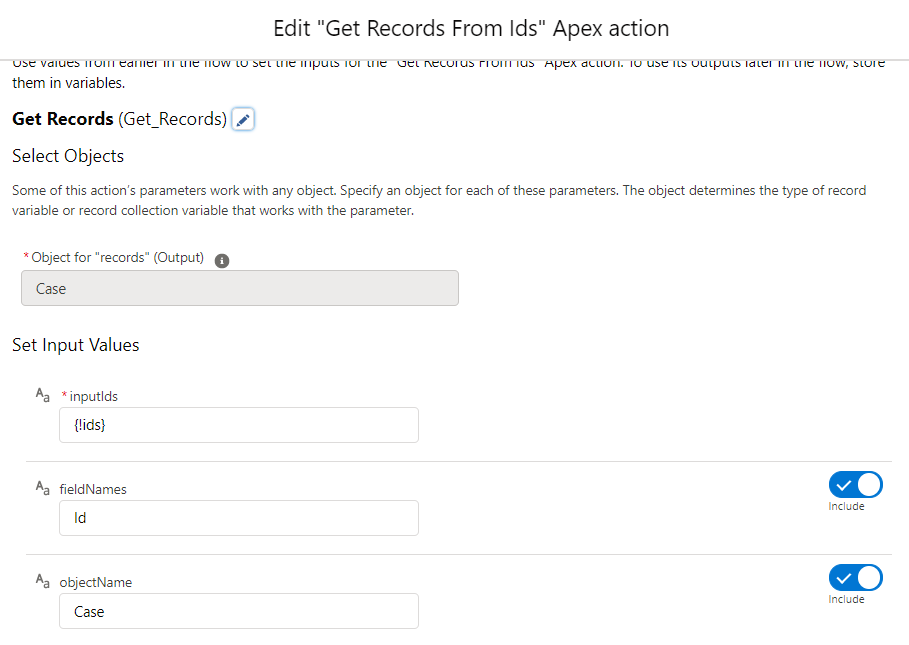
One change that I would recommend is to use a custom action that converts a text collection that contains Ids to a record collection. By doing so, you can remove the loop and the delete action inside it. Here is how to do that.
Add a new action and select the action that you installed. Select Case as the object and pass the text collection that you have the Ids. In this use case, it is enough to store only the Id of the records, so just type "Id" to the fieldNames and Case to the objectName. This action will convert your text collection to a Case record collection. Since you have all the records in one collection now, there is no need to do a loop and you can delete them all at once.
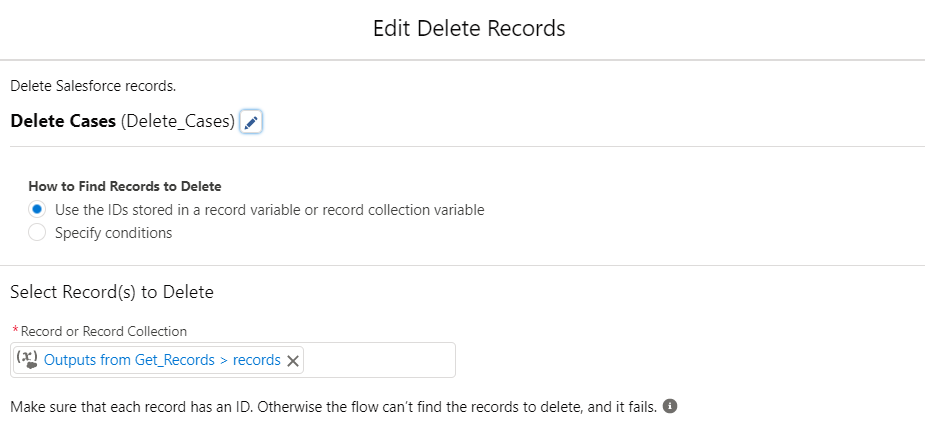
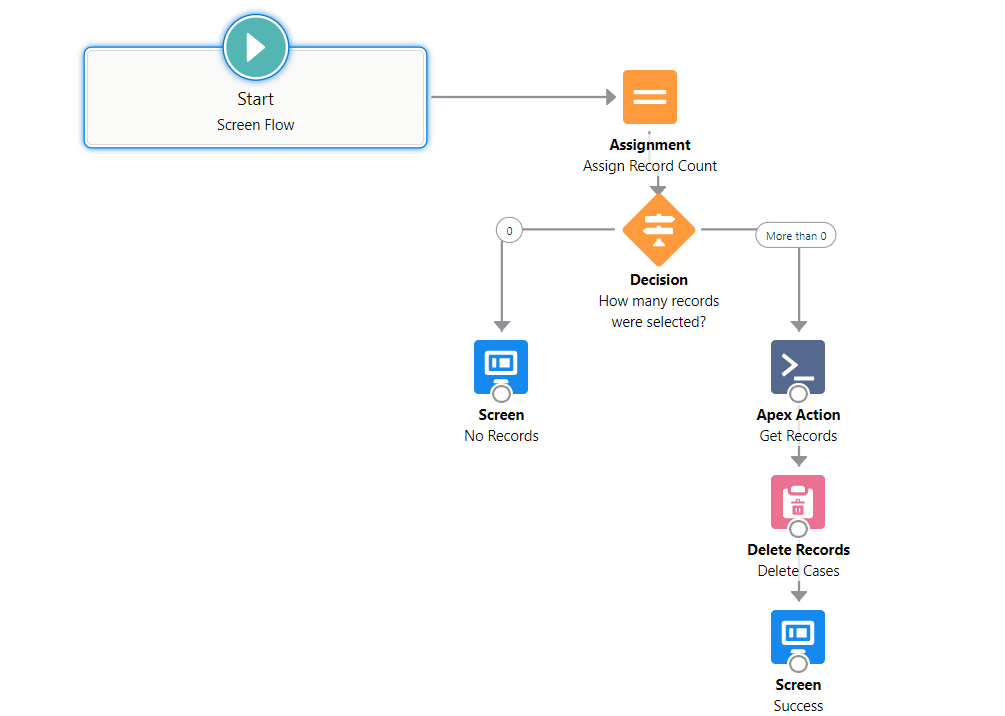
At the end, your flow should look like this. Pay attention that there is only 1 DML in this flow which means that you will not hit the DML limits.
That is a really great solution to a very common problem.
Thanks Yumi!
Thank you Yanir!
Nice article!
As addon:
To get back from the list view where the flow was launched, you can create a simple visualforce page
Name visualforce page: (for example) CurrentCaseListView
and then reference it in your list button: change retURL to
?retURL=apex/CurrentCaseListView
Note:
In visualforce page the Behavior should be --> Display in existing window without sidebar or header
Thank you Jerome! It is a great add on.
Hey Jerome,
Great thought! Could you please add the code on how to do that, to return back to the list view where the flow was launched?
A great solution for a basic use case!
Yes, thanks!
Amazing! Thank you 🙂
Thank you too!
Couldn't you have looped through all the {!ids} and assigned them to collection variable and then performed one Delete DML?
Yes, I was planning to add this option as well. You can loop through the ids and generate a collection of records. In this use case, you don't need any other field values, so a record collection that only has the ids would be enough.
Can you show screen shot for the record count variable ?
also I am getting everytime the first screen which is record count 0 even though I selected 3 records. Somehow it is not passing the records. It would be great if your steps are detailed with screen shot of every step.
Hi,
Did you create a text variable called "ids", marked "Allow multiple values (Collection)" and "Available for input"?
Then you should use an assignment element to assign the size of this collection to a number variable (using Equals Count operator).
There are screenshots for these 2 steps.
Hey Yumi,
Really appreciate this post and your detailed instructions 🙂
I am running into the same issue as Ali when I try to create this flow for deleting Contact records... I am getting a record count = 0, even though I selected multiple Contact records on a list view.
I have double checked my flow and I created a Text variable, allowing multiple values & Available for input. And then the Assignment variable with Record Count 'Equals Count' the text variable.
My thinking is that there is something wrong with the button, but I followed your instructions there too ticking the 'Display checkboxes' option for the List Button.
Wondering if you have any advice on troubleshooting this.
Thanks!!
Hi Yumi,
I didn't realize that the Text variable MUST be called 'ids'. I had named the variable something else.
Are you able to explain why the text variable needs to be called 'ids'? I've never encountered something like this before.
Thanks!
Yes exactly! It just works like this but I am not use if it is even documented by Salesforce.
If you wanted to do this for a different record, how do you find the retURL for a different or custom object?
Hi,
In order to navigate to home page of an object (I mean your pinned list view for the object), you have to use this format:
?retURL=objectCode/o
So, for example;
if its for Case, then use ?retURL=500/o
if its for Account, then use ?retURL=001/o
You just need to put the Id prefix value of your custom object.
Nice Post. You can also Remove Multiple Custom Fields From Multiple List Views In Few Clicks. Check it out - https://bofc.io/manage-list-views/how-to-remove-multiple-custom-fields-from-multiple-list-views-in-few-clicks