
Screen Flow is the only flow type that can be used to collect or display data in Salesforce. There are many input components that you can put on a screen. Besides the simple ones like text, number, or date, there are some input components that let the user select a value from the defined choices. Radio buttons, picklists, and checkbox groups can be used for this purpose. Unlike picklist fields that we know from the objects, these selection components can display records as choices too. So that it is possible to ask the user to select a record from a list. These selection components support multi-selection as well (multi-select picklist and checkbox group), which means that users can select more than one value from a list of choices. When the user selects only one record, then the screen component stores the value that you defined. So that you can use the selected value in your flow. However, when the user selects more than one choice, screen component stores all the selected values in a single variable. Since it is a variable of selected values separated with semicolon, it is not possible to loop through the selected choices, you have to convert it to a collection variable.
Read this article to learn more about the multi-select picklist screen component.
Convert Selected Choices to Text Collection
Even though flow doesn't store the selected values in a collection variable, it is still possible to convert them to a collection variable.
Let's assume that you have a screen that displays account records as choices. It displays account names as choice labels but stores the Ids as a text value.
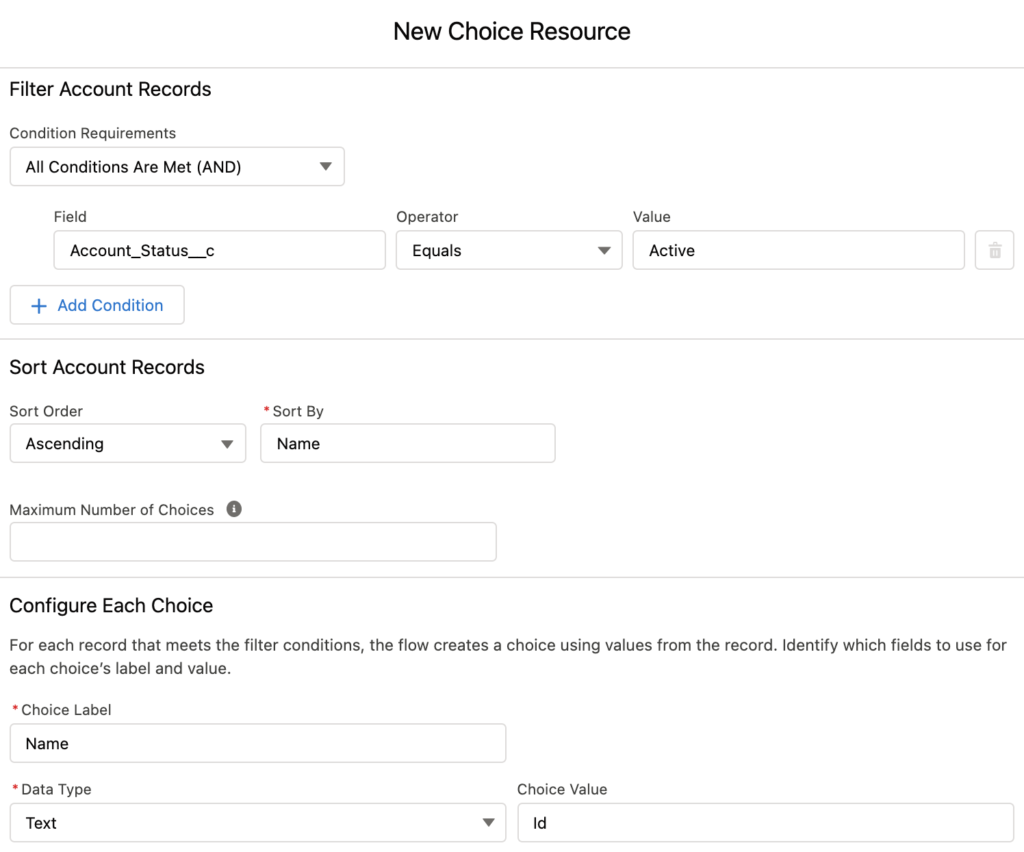
When user selects records from this checkbox group, flow stores the selected record Ids in this format:
0011n00002BT1rLAAT;0010Y00000tDP7nQAG;0011n00002BSo1nAAD
Since it is just a single text value, it is not possible to loop through them. In order to convert it to a text collection, follow these steps.
1- Creating a Text Variable and Assigning Values
First of all, create a text variable called SelectedIds and use an assignment element to assign the selected records to this new variable. Pay attention that Select_Accounts is the name of the screen component. Using the same assignment element, add ";" to the same variable.
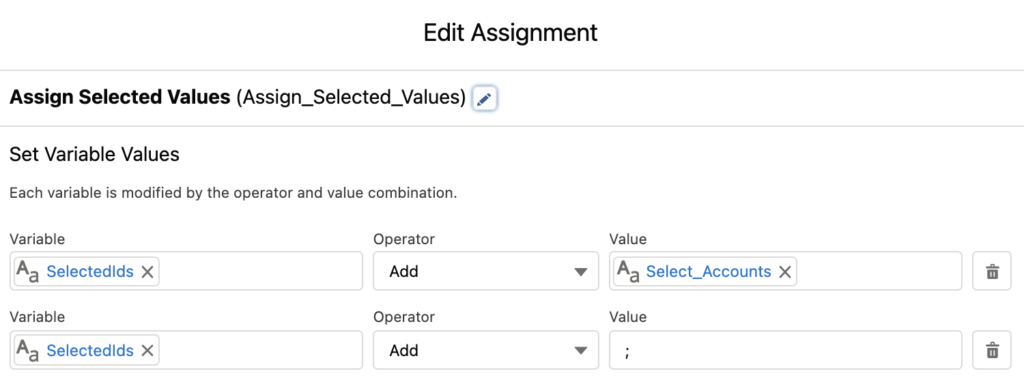
At the end of this assignment, SelectedIds stores a value in this format:
0011n00002BT1rLAAT;0010Y00000tDP7nQAG;0011n00002BSo1nAAD;
As you can see, there is a semicolon at the end of each Id value. This will make it easier to extract the values since it follows a specific pattern.
2- Creating Formula Resources
In this step, you have to create two text formula resources.
- FirstID
TRIM(LEFT({!SelectedIds}, FIND(";",{!SelectedIds})-1))

This formula extracts the first record Id from the left side of the SelectedIds variable.
- RemoveFirstID
TRIM(SUBSTITUTE({!SelectedIds},{!FirstID}+";",""))

This formula removes the first Id value and its semicolon from the SelectedIds variable.
If you are using this logic for the Id values, then there is no problem. However, if you use it for other text values, you might want to change the RemoveFirstID formula. For example, let's say that the selected text values are apple and green apple. Then this formula will remove the word "apple", so that the remaining value will be "green", which is not the selected choice. In this case, you can use a formula like this:
TRIM(
RIGHT({!SelectedIds},
LEN({!SelectedIds}) -
LEN({!FirstID}+";")))
So at the end of these two formulas, you have the first Id value and the remaining values. Therefore, it is time to add the first value that you extracted to a collection.
3- Creating a Collection Variable and Assigning Values
Create a text collection variable and add another assignment element to add the FirstID into the collection. In the same assignment element, change the value of SelectedIds to the value of RemoveFirstID formula.
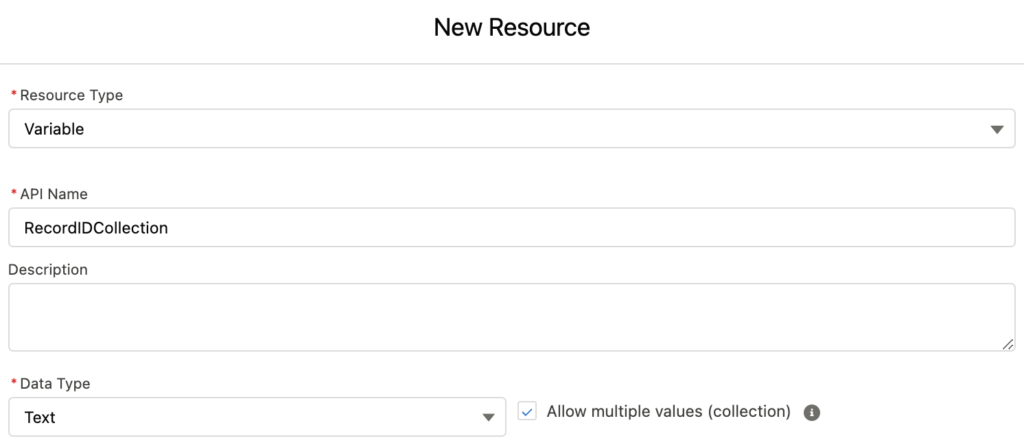
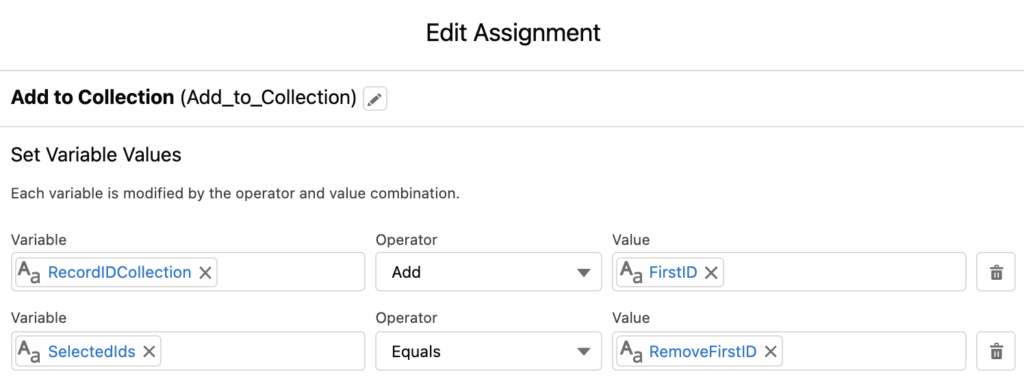
At the end of this step, you have a text collection that stores the first record's Id and another text variable that stores the rest of the Ids with semicolon. You have to repeat this step in order to extract all of the values and add them into the collection.
4- Add a Decision to Check Remaining Values
In order to repeat step 3 for all the selected records, add a decision element that checks if there are remaining records in the SelectedIds variable. If there are, go back to the step 3.


The End
This is the end of the steps to convert the selected choices to a text collection variable. After this last step, you can continue your flow with any action that you want to perform. Since you have a collection now, you can iterate over the items.
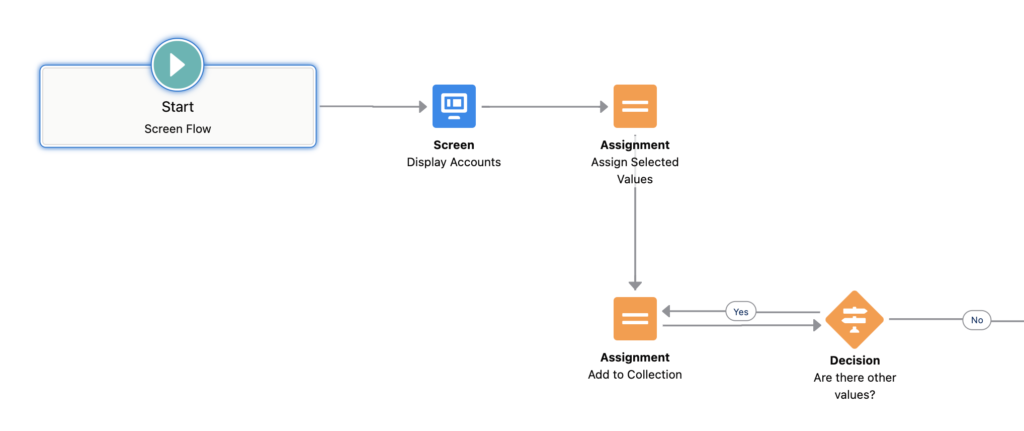
Read this post to see a real example of a flow that uses these steps.
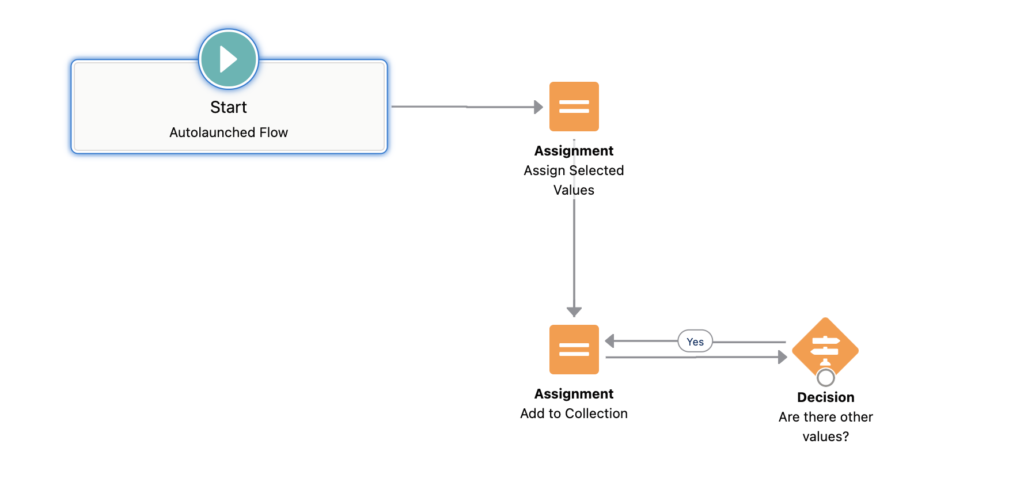
Creating an Autolaunched Flow To Reuse as Subflow
You can build an autolaunched flow that receives a text variable and converts it to a text collection variable using these steps. Then, whenever you want to convert the selected choices to a text collection variable, just call this autolaunched flow as a subflow. Pass the text variable as the input and get the text collection variable as the output. By doing this, you won't need to perform these steps in every flow.
These are the changes that you need to make:
- Create an autolaunched flow.
- Edit SelectedIds text variable and make it available for input. To make it more generic, rename it as SelectedChoices. When calling this subflow, you will pass your text variable into this input variable.

- In the first assignment element, remove the first line of the assignment that you did before, just add a semicolon at the end of this variable.

- Edit the RecordIDCollection variable and make it available for output. Rename it as SelectedChoicesCollection, so that it will be more generic. This will be the output of this flow.

- Rename the formula resources, so that they will be more generic as well.
FirstID --> FirstChoice
RemoveFirstID --> RemainingChoices
At the end, your autolaunched flow should look like this.
Action Time
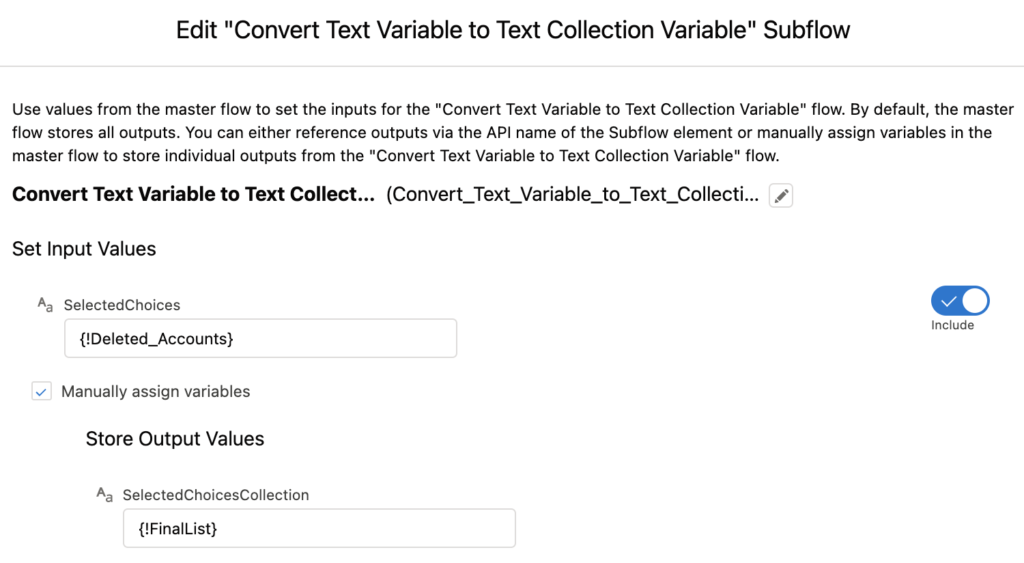
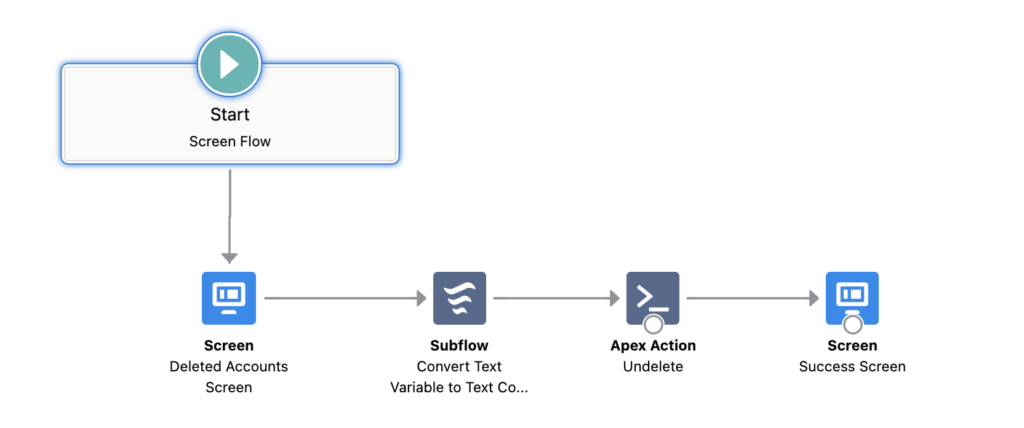
Let's call this subflow from the undelete flow that you can see in this post.
Add the subflow element to the canvas, select this autolaunched flow, pass your text variable (in this case it is Deleted_Accounts) as an input. Manually assign the output value of the flow to your text collection variable (in this case it is FinalList).
At the end, your flow will look like this. By reusing an autolaunched flow as a subflow, you won't need to do these steps again.
Installation
If you don't have time to build it or still unsure about the steps, you can install the autolaunched flow from this link.
Thanks - this is exactly what I needed for my flow!
A tip for other users - make sure to paste the Formulas in Step 2 as plain text - I didn't and the formula initially didn't save correctly because the quote marks had some kind of styling that interfered.
Great, I am glad that you found it useful!
Thanks, that saved me a lot of time, Simi!
@Yumi: perfect one, good description! will come back here 😉
Thank you Daniel!
Thanks, It was really helpful! It worked, this was the only error I came across. Glad I saw your comment.
Hello! When I try TRIM(LEFT({!SelectedIds}, FIND(“;”,{!SelectedIds})-1)) I have the warning: The formula expression is invalid: Syntax error
Why?
Hi, if you copy-pasted the formula, try to remove those quote marks and enter them again. I thinks its just a styling issue.
We found that updating the quote marks from " to ' solved the syntax error.
Thanks for help with this solution!
Yes, that's correct.
You are welcome!
Hi there! When adding to collection, I'm trying to set the SelectedIds variable equal to the RemoveFirstId text formula value, I get an error "The data type of the resource you entered isn't compatible." Any help is appreciated!
Hi,
Please make sure that SelectedIds is a text variable (not a collection).
Wow, what a helpful and clear post,
solves a fundamental and important problem and shows how by creative thinking you can do almost everything with the help of Flow,
thank you Yumi
You are welcome Emanuel. I am glad that you found it useful.
This solution seems perfect for my need... but for some reason it's leaving a semicolon on the last record ID of the collection. Any tips on where I might've gone wrong?
I fixed it myself... I had the assignment to the record collection in the wrong place in the Flow - a difference in the "Free-Form" view versus "Auto-Layout" view!
I am glad that it is solved!