
If you've worked with Agentforce before, you know that giving an LLM too much freedom can make agent behavior unpredictable. The new Agentforce Builder addresses this challenge by providing greater control over how agents behave. With an upgraded reasoning engine, Agent Script that combines natural language with programmatic logic, and built-in AI assistance to help you build, test, and refine agents. The new Builder makes agent development more flexible, predictable, and efficient.
Let's walk through what's new and why it matters.
Accessing the New Agentforce Builder
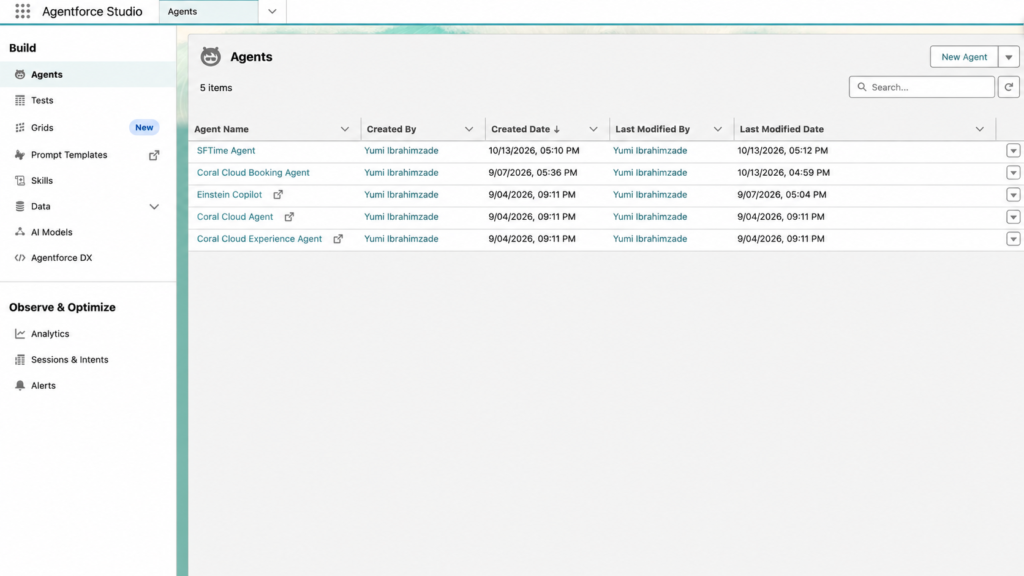
The new Agentforce Builder is available in Agentforce Studio. It is a central hub for creating, managing, testing, and monitoring AI agents in Salesforce.
To access it:
- Open the App Launcher in Salesforce.
- Search for and select Agentforce Studio.
- Click Agents.
From here, you can view your existing agents or create a new one using the new Agentforce Builder.
How to Create a New Agent
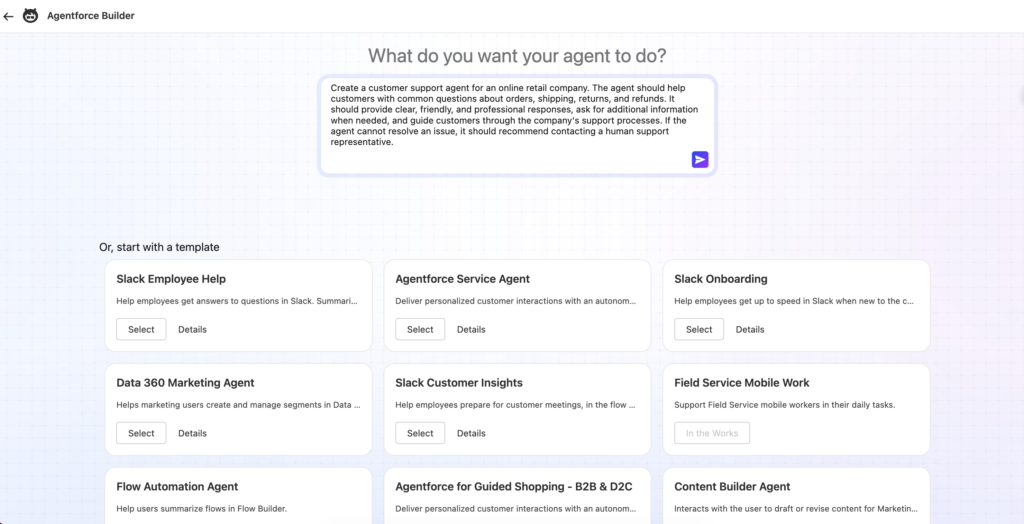
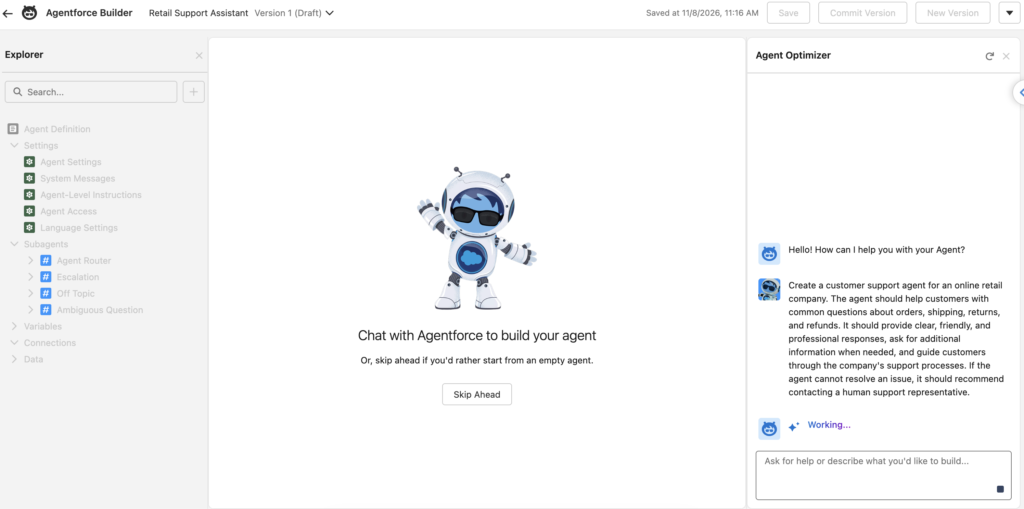
From the Agents page, you can open an existing agent or create a new one using the new Agentforce Builder. One of the biggest improvements is that you can start building an agent simply by describing what you need in natural language. You can also create a new agent using script.
- Click New Agent in the upper-right corner.
- Describe what you want your agent to do, including its role, the type of business it supports, and the tasks it should handle.
The more specific your description, the better the starting point. Agentforce uses your input to generate an initial agent configuration, which you can then review and customize in the Builder.
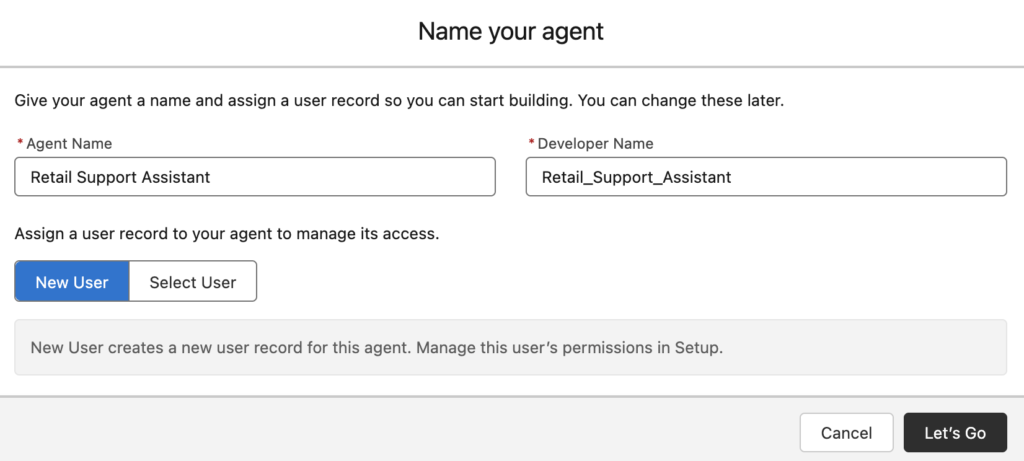
- Click Send to submit your description. Then, enter a name for your agent and click Let's Go to continue.
- You can continue chatting with Agentforce to build your new agent. Answer its questions, provide additional instructions, or ask it to make changes based on your requirements. Alternatively, click Skip Ahead if you prefer to configure the agent manually.
Main Components of the Agentforce Builder
Here are the main components/sections of the Agentforce Builder.
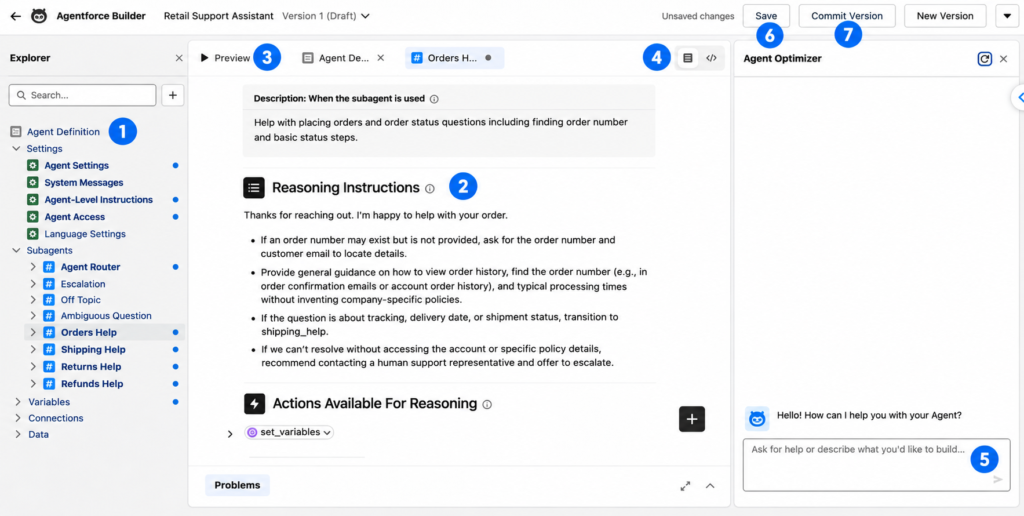
Once Agentforce creates your agent, the builder opens. Here is what you will find on the screen:
- Explorer: Navigate through your agent's components, including settings, subagents, actions, variables, and connections, all from one place.
- Canvas: View and edit your agent's configuration, including subagent descriptions, reasoning instructions, and available actions.
- Preview: Test your agent by entering messages and reviewing its responses, reasoning, and behavior.
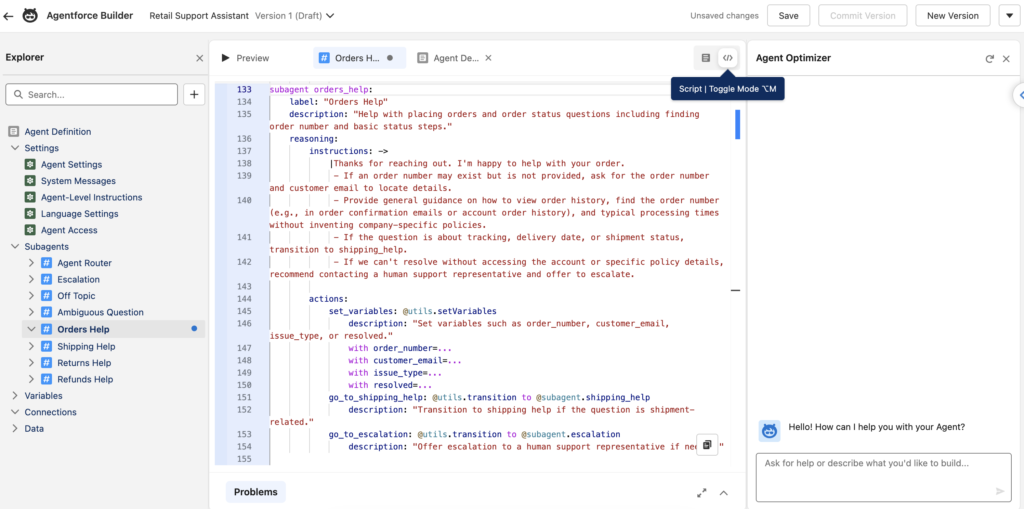
- Canvas/Script: Switch between the visual Canvas editor and the code-based Agent Script view to configure your agent.
- Agent Optimizer: Use natural language to ask questions, make changes, and troubleshoot your agent directly within the Builder.
- Save: Save your latest changes to the current draft version of your agent.
- Commit Version: Finalize the current version by creating a locked snapshot of its configuration. You can then activate it or create a new draft version for further changes.
How to Customize Your Agent
In order to customize your agent, use the Explorer panel to select existing assets or create new ones. Every asset opens in Canvas view by default. Canvas is a low-code view that turns Agent Script into easy-to-read blocks.
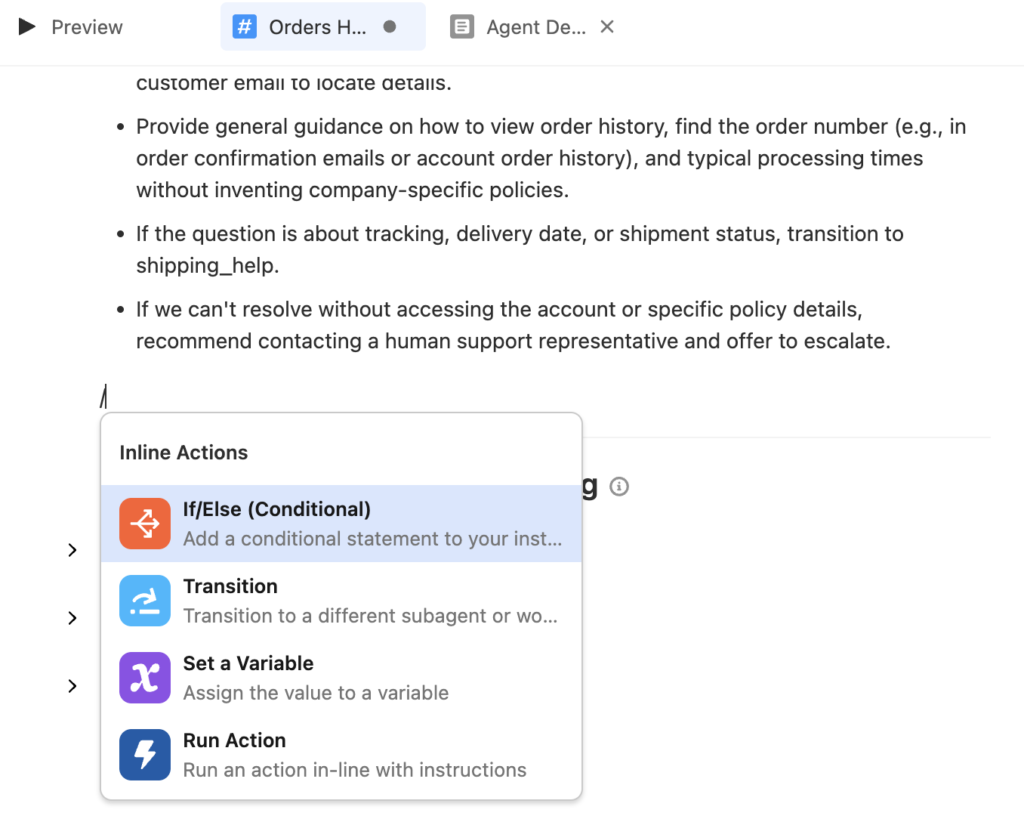
Type "/" to add inline actions that let you add deterministic logic, like if/else conditionals.
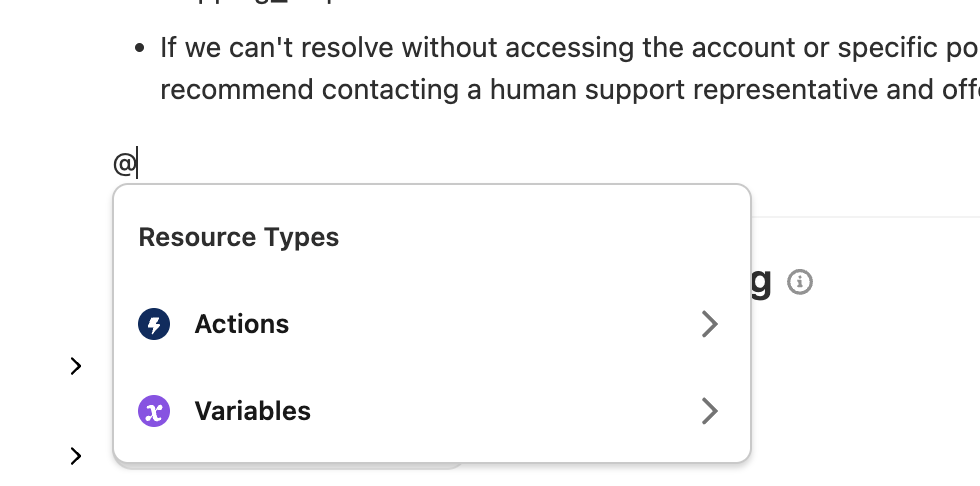
You can also type "@" to use the resource picker for subagents, actions, and variables.
Do you want pro-code control? You can simply switch to script view. Both views stay in sync. When you edit in Canvas, the builder writes the Agent Script for you in the background.
How to Test Your Agent
Testing is very important for building an agent you can trust. To get started, click Preview. The Preview panel offers two modes:
- Simulate: A risk-free space to validate your agent's configuration. It skips permission checks, doesn't run actions, and never touches your data.
- Live Test: This mode runs actions and makes real changes in your org. You see how your agent performs when it's active.
Either way, you get behind the scenes details as you chat. View interaction details for current and past messages. They give you a high-level overview of your agent’s reasoning, with AI-generated explanations. Unexpected behavior becomes much easier to spot and fix.
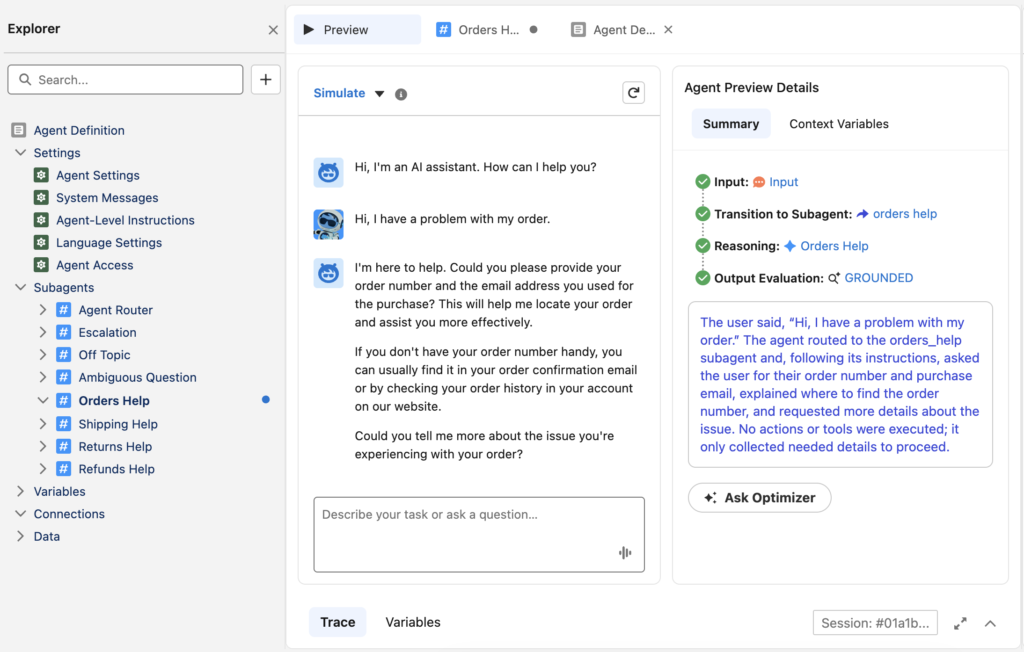
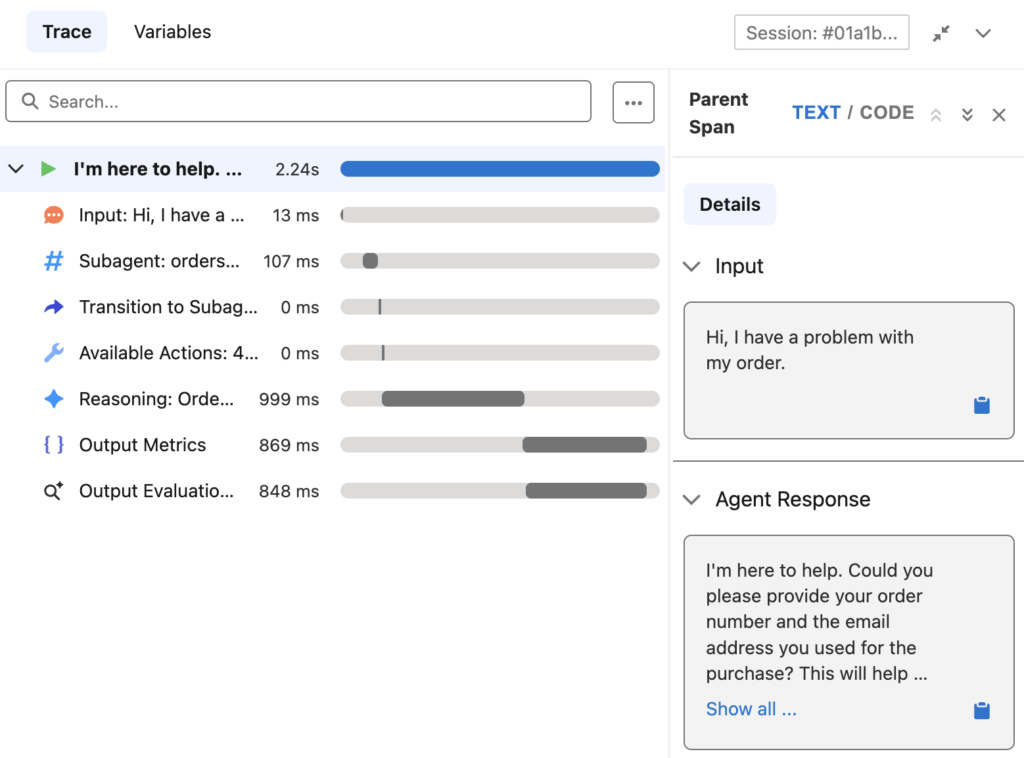
You can use trace to dig into the steps your agent performed. At any step, ask Agentforce to explain what the agent did and why.
You can also track the values of every variable throughout the conversation. Review the time elapsed for each sub-process to spot latency and cut it down. Found something to fix? Chat with Agentforce to update your agent based on what you saw in preview.
Commit and Activate
Happy with your agent? Click Commit Version to save a final snapshot. Then click Activate to go live for customers or employees. Only one version can be live at a time, so activating a new one switches off the old one automatically.
Need more changes? Save the committed agent as a new draft and start over.
Leave a Reply