
Data extensions contain fields to store any data about your contacts. They can exist independently or be connected to other data extensions as well. Creating a data extension in Marketing Cloud is crucial, especially if you want your list to store more than 500,000 records or to send global messages. More importantly, you need to use a data extension if you want to store additional information about your subscribers or contacts in general.
There are two ways to create a data extension in Marketing Cloud: through Email Studio or Contact Builder. This article provides a guide for both methods of creating a data extension.
Creating a Data Extension Through Email Studio
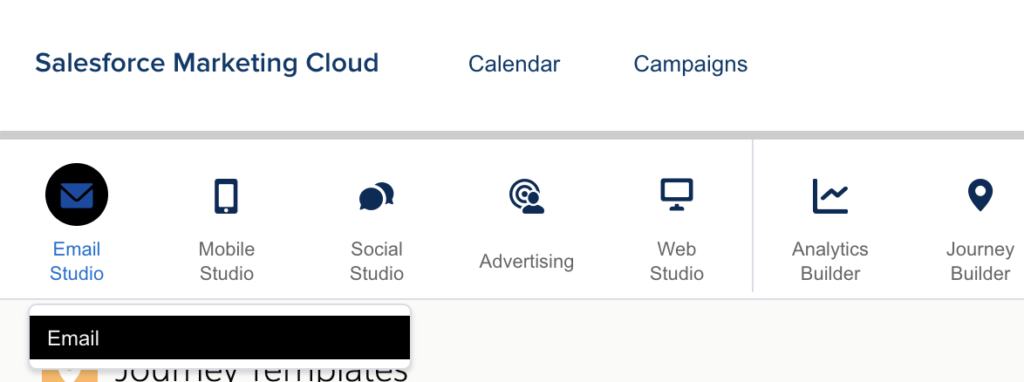
Click Email to navigate to Email Studio.
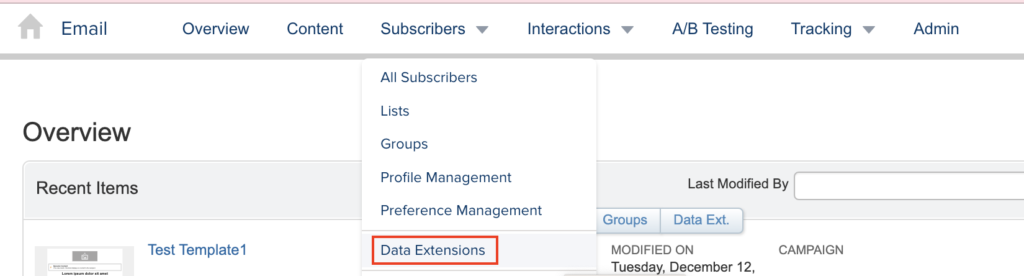
In Email Studio, Click on Data Extensions under the Subscribers menu.
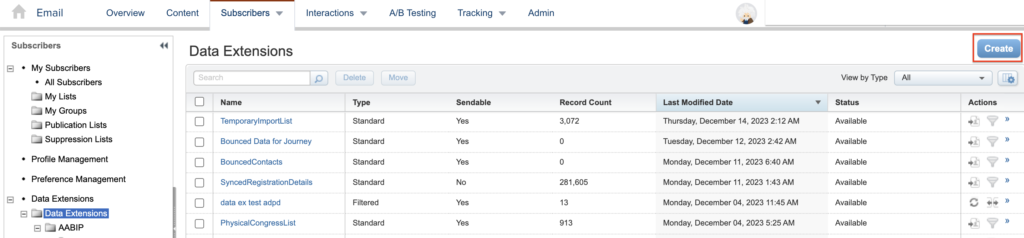
On Data Extension Page, click the Create button.
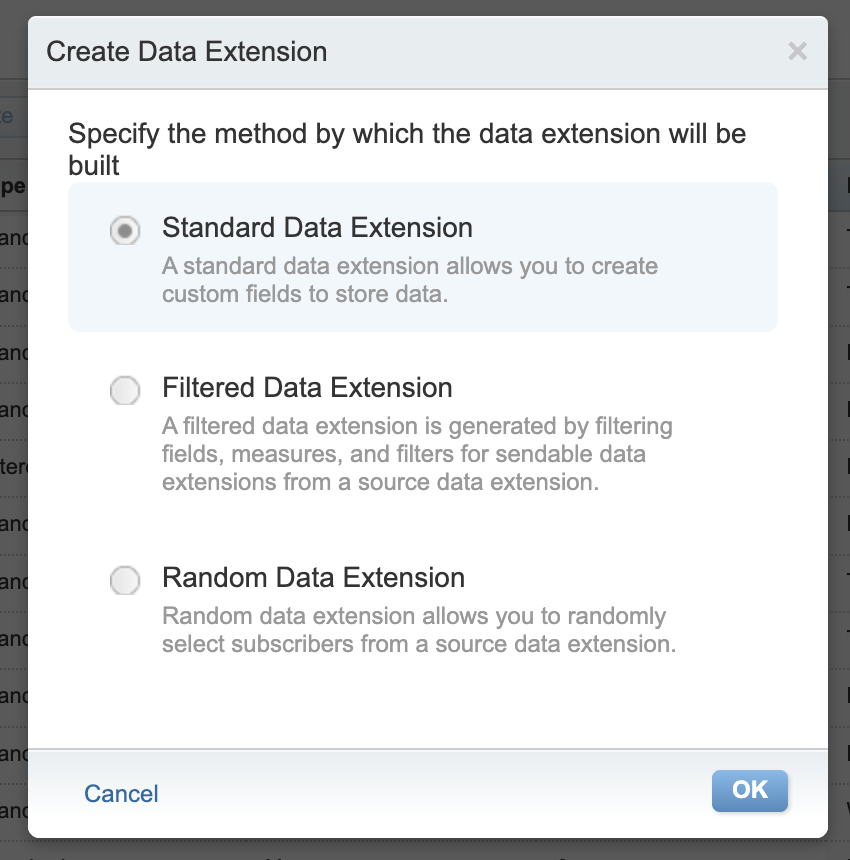
Choose the method; in our example, we will continue with Standard Data Extension. Click OK to proceed.
Properties Tab
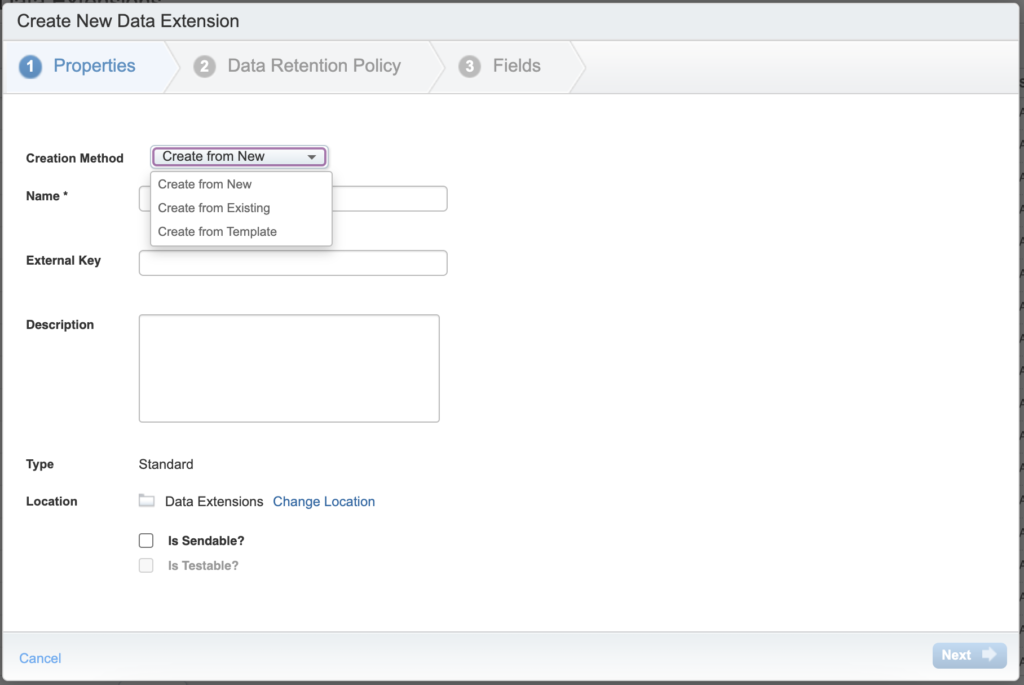
In the Properties tab, first, select the Creation Method. The 'Create from New' option allows you to build a data extension from scratch, requiring you to enter field names from the beginning. 'Create from Existing' lets you generate a data extension using the fields from a previous data extension, but it doesn't obligate you to use all those fields. When you reach the Fields stage, you will see the fields of the existing data extension, and it's possible to change, delete, or add new fields. 'Create from Template' is similar to 'Create from Existing,' but instead of choosing a data extension, you select it from the templates.
After selecting the creation method, proceed to name your data extension. Optionally, you can add an external key and description. Next, choose a location for your data extension.
Mark the 'Is Sendable' checkbox if you intend to use this data extension for sending emails. If you leave it unchecked, your data extension will be non-sendable. Non-sendable data extensions are useful for reference data. For example, you can create a product table data extension to store prices and product names.
If you intend to use this data extension for testing purposes, remember to mark 'Is Testable' as well.
Data Retention Policy Tab
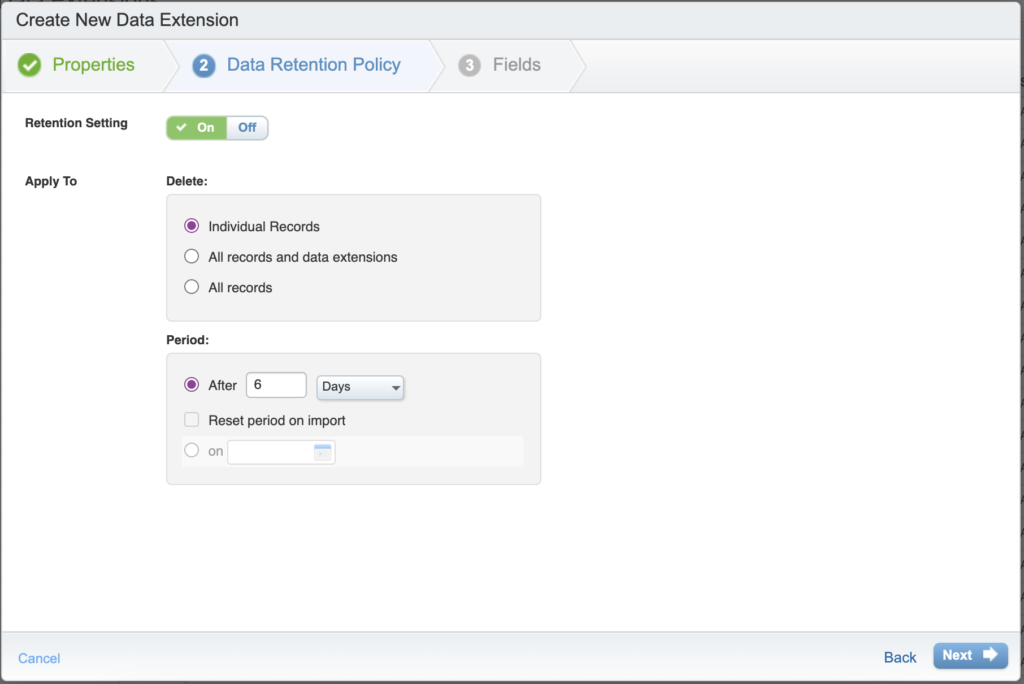
In the Data Retention Policy tab, you can configure auto-deletion rules for the data extension. If you wish to set a retention policy, select 'On' from the Retention Settings.
Next, choose the criteria for deletion and select the Period.
Fields Tab
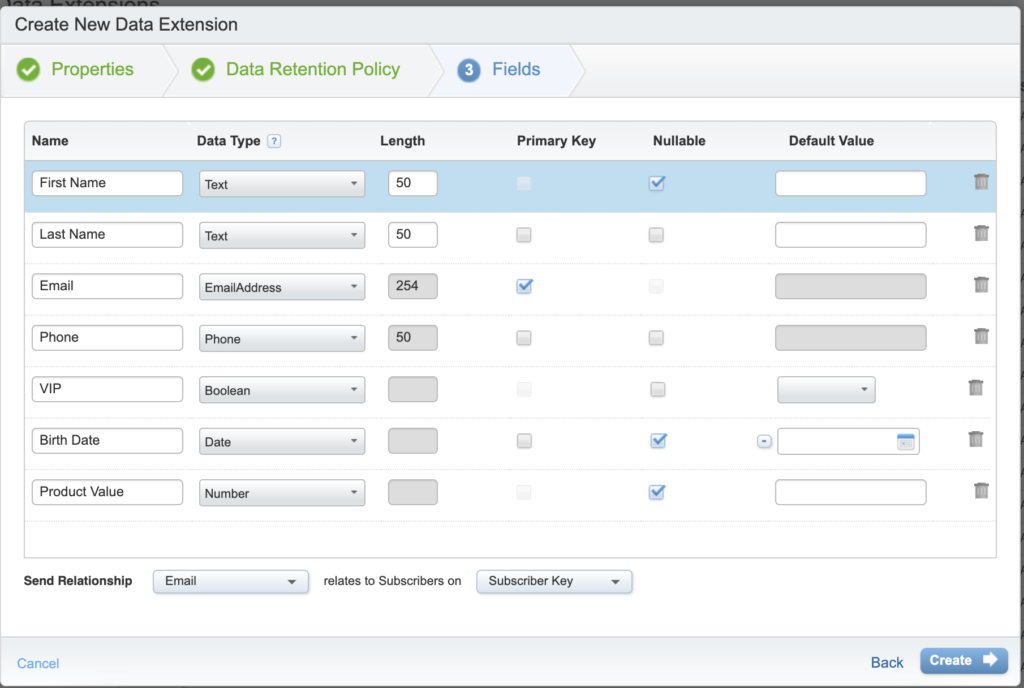
In the Fields tab, you'll need to define the fields for your data extension. Think of these fields as the columns of your data extension. Begin by naming your field and selecting its data type. In the screenshot below, you'll notice various data types available. For the Text data type, you have the option to specify the length of the text.
Moreover, you'll need to select whether the field will be a Primary Key for the data extension. A Primary Key ensures that the values under the field are unique and serve as identifiers for each record. If the field can be null, you should mark the 'Nullable' checkbox.
Then, choose the send relationship. In this case, I selected Email as the Subscriber Key. Finally, click the 'Create' button to generate the new data extension.
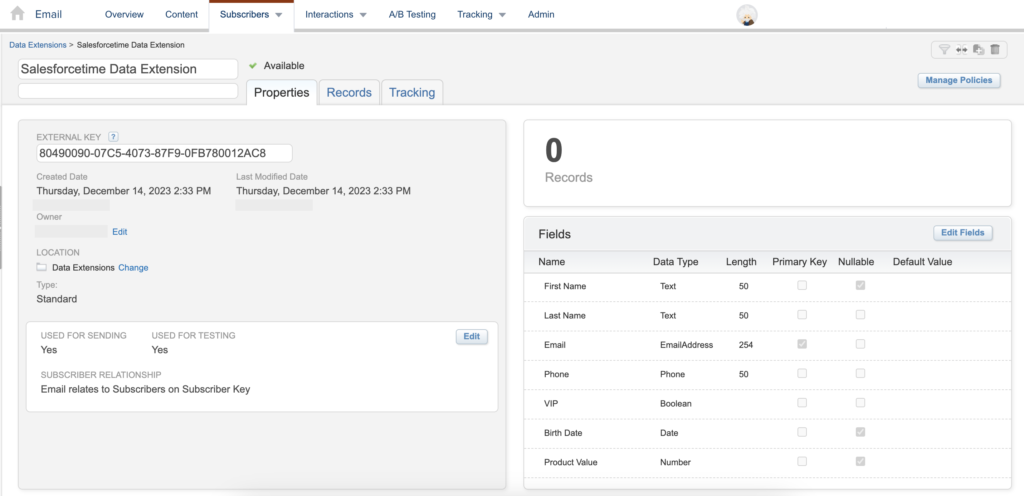
When you create a data extension, you can see it under Data Extensions. Click the name of the data extension in order to review details. Moreover, you can add records to this data extension from the Records tab.
Creating a Data Extension Through Contact Builder
You can create a data extension through Contact Builder as well.

Select Data Extension and click to create button

The process of creating a new data extension is almost the same as creating a data extension using Email Studio. You have to give it a name and mark Is Sendable and Is Testable according to your needs. Moreover, you can define a data retention policy. Finally, you'll need to add attributes, which are similar to fields. However, there's a slight difference in this step. Here, you can find the 'Required' option for the field value. Unlike in Email Studio, where it was 'Nullable,' this time, you need to mark the checkbox if you want this field to be mandatory.
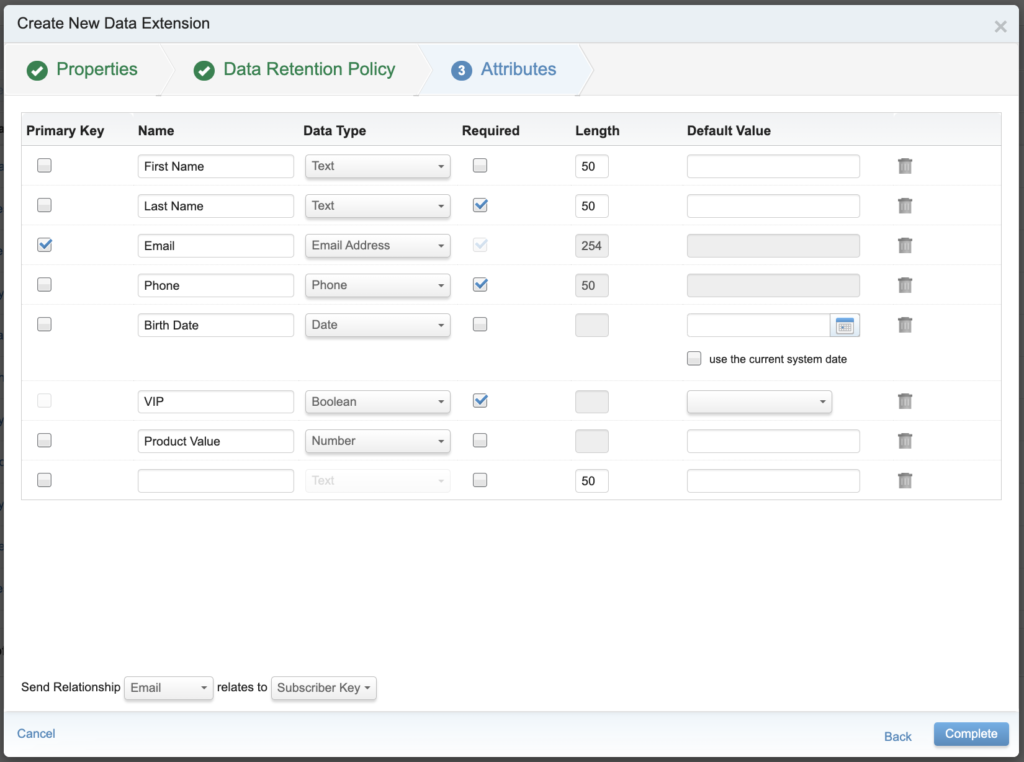
Finally, click the Complete button to finish creating a data extension in Marketing Cloud.
Read this post to learn the differences between data extensions and lists in Marketing Cloud.
Leave a Reply