
When you create a new flow, after selecting the flow type you will be prompted to select either to build a freeform flow or an auto-layout flow.
Freeform flow was the only layout option that we had till Winter '21 release. However starting with the Winter '21 release, Flow Builder now provides a canvas option called auto-layout that automatically connects elements to each other and handles layout. This beta feature (for now) simplifies the user experience and makes flow construction more consistent.

If you have a flow that uses the freeform layout, you can still switch to the new auto-layout by marking the toggle on the Flow Builder header.

Even though this toggle is visible on all types of flows, you cannot switch from freeform layout to auto-layout if your flow contains one or more of these items, which aren’t supported in auto-layout.
- An element that’s not connected to the Start element.
- A scheduled path on the Start element.
- An element with multiple incoming connectors, unless it’s a Loop element or an element that completes multiple paths from the same Decision or Pause element.
- A Step element.
After you select auto-layout or switch from freeform layout to auto-layout, all the elements in your flow will be organized vertically.
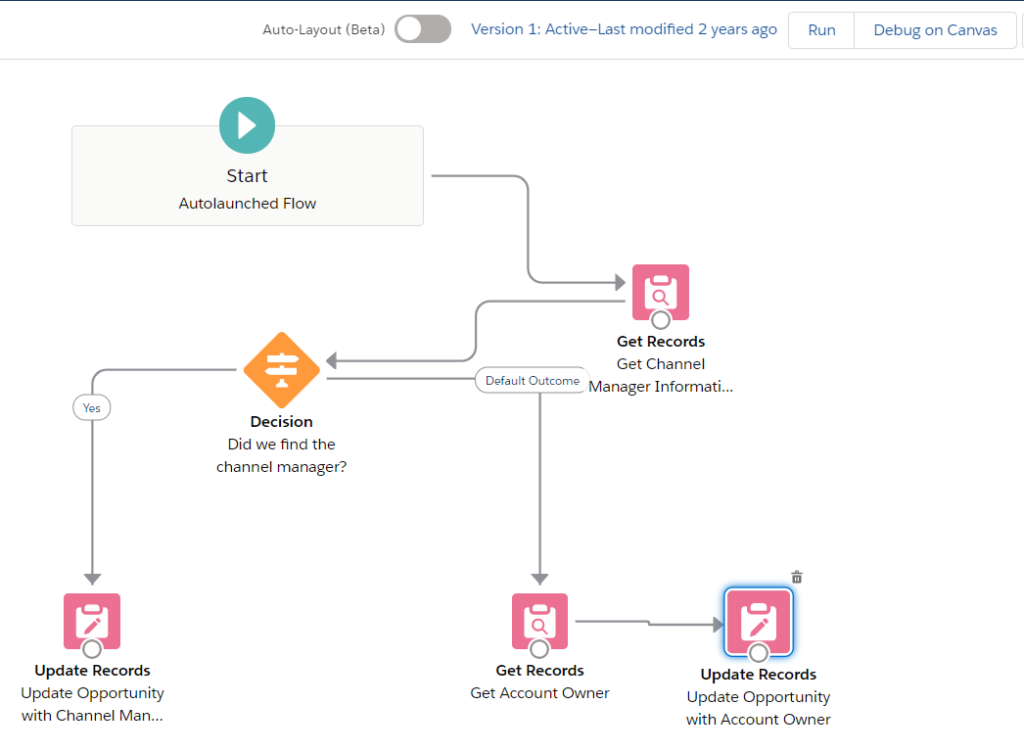
Here is a flow that was built with freeform layout.
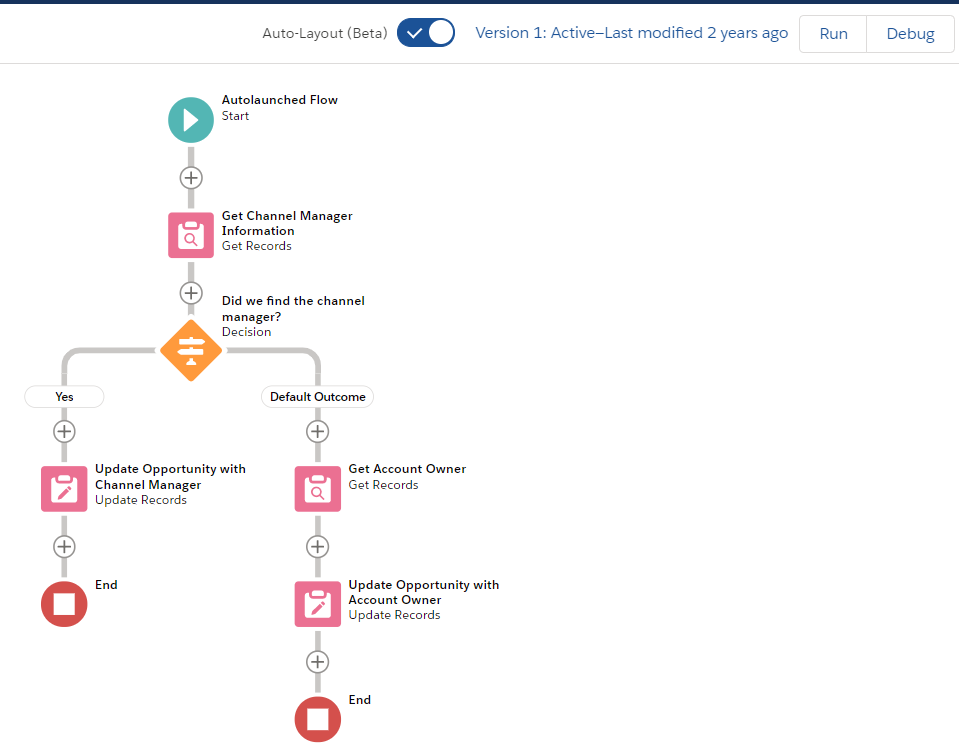
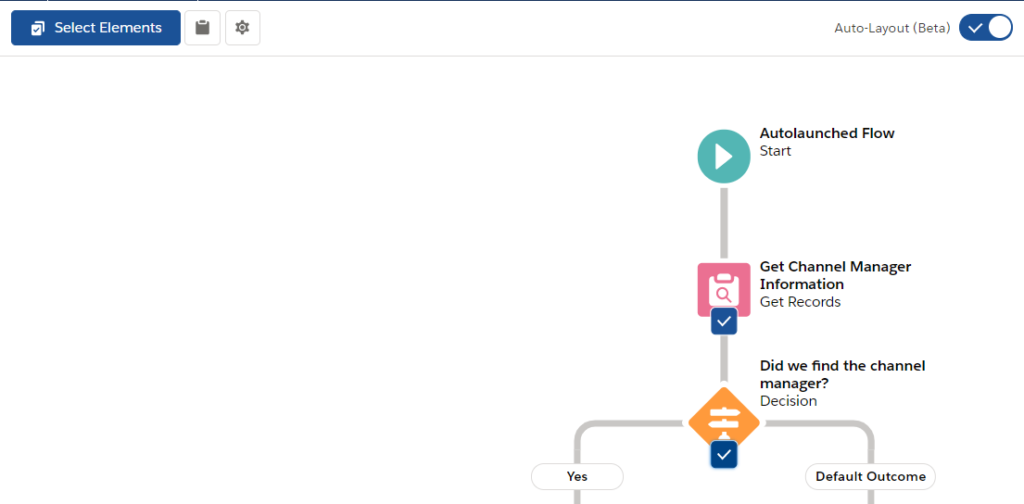
After clicking the toggle to switch to auto-layout, flow will look like this.
If you switch back to freeform layout, then all the positions of the elements will be lost. So it means that once you switch to auto-layout, you cannot go back to your own built design.
Auto-layout option organizes all your elements and builds a one-directional flow, which means that the flow will be built in a vertical way. Even though it sounds and looks good, if you are planning to build a complex flow, then your flow will be vertically long and on the other hand, you cannot manually move the elements, which might be annoying in some cases.
Main Differences
1- Toolbox
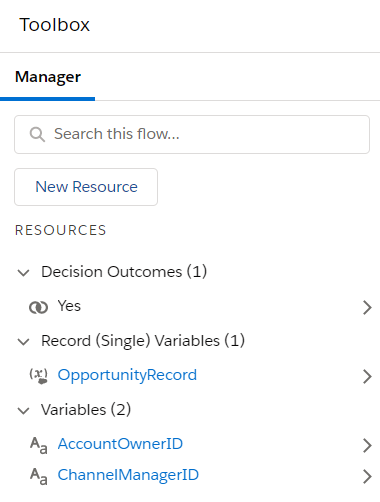
When you switch to auto-layout, Toolbox on the left side will just have the Manager tab and Elements tab will not be visible.
2- Adding Elements
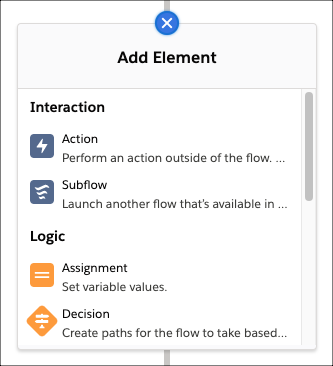
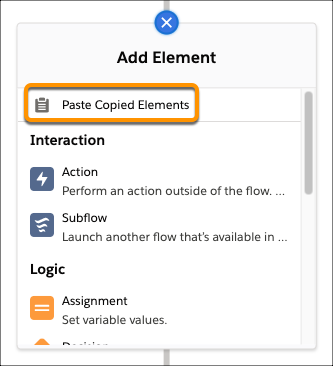
Since the Elements tab is not visible, you cannot drag and drop from the Toolbox. To insert an element (for instance screen, update record, get record etc.), click  where you want it to run. Flow Builder then shows the options and possible elements for this location.
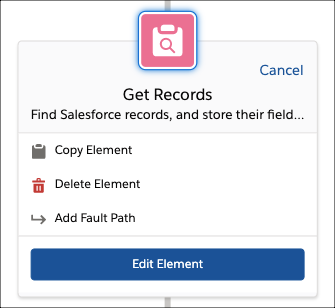
3- Modifying an Element
To edit an element, double-click it. It will open the edit screen of the element.
To copy or delete an element or to add a fault path, click once.
After copying an element, click where you want to paste it. There you will see the option to paste copied elements.
To copy multiple elements at once, click Select Elements, then click  on each desired element. To copy the elements, click
  . To paste, click on the desired location and then select Paste Copied Elements.
Leave a Reply