
Salesforce quietly rolled out two new standard invocable actions that bring voice capabilities straight into Flow: Speech to Text and Text to Speech. Until now, converting audio to text (or the reverse) inside Salesforce meant either building a custom LWC around the browser's Web Speech API or wiring up an external service integration yourself. These new actions skip all of that. They are native, composable building blocks powered by Agentforce's speech infrastructure, and they are ready to drop into any Flow without writing a line of code.
In this post, you will learn what each action does, what inputs it expects, and a few things worth knowing before you build them into your automation.
Where These Actions Are Available
These actions aren't just Flow actions. They are also available as Agentforce agent actions, and they aren't available on every org by default. They are part of Agentforce's Speech Foundations, which requires an Agentforce entitlement. You'll find them on Enterprise, Performance, Unlimited, and Developer Editions with Foundations or Agentforce 1 Editions.
Usage is metered separately from other Agentforce consumption, billed through Flex Credits, so it's worth keeping an eye on consumption once you start using these actions at scale.
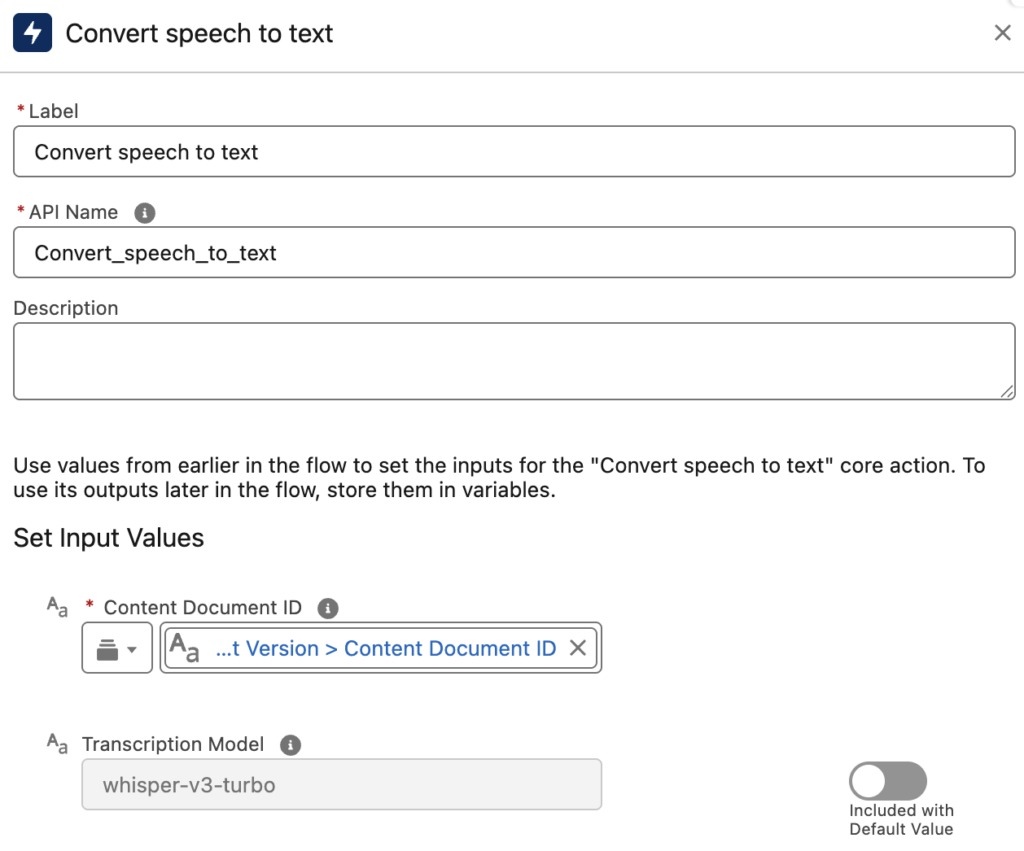
Convert Speech to Text Action
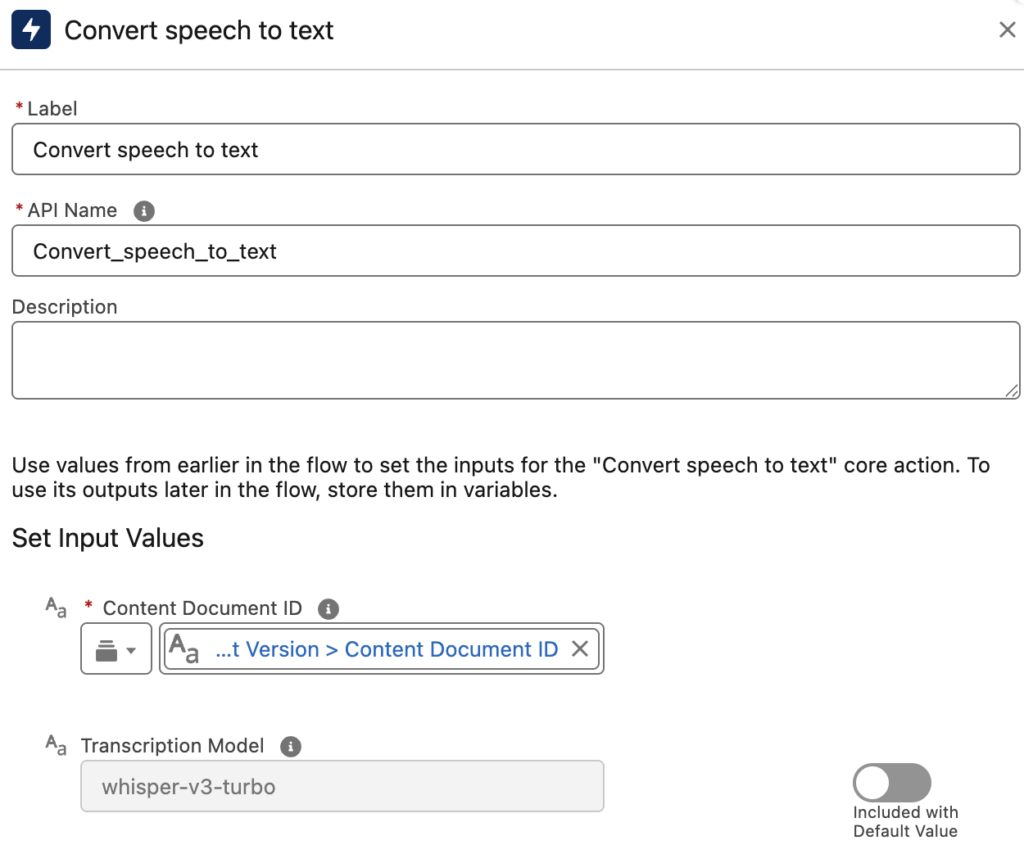
Convert Speech to Text action transcribes spoken audio into written text using AI-powered speech recognition. It takes a Content Document ID as its required input. It means that the audio needs to already exist as a file in Salesforce before you can run it through this action. There's also an optional Transcription Model parameter, which accepts one of two exact values: whisper-v3-turbo (the default) or elevenlabs-scribe-v2. This gives you a way to switch transcription engines depending on your accuracy or language needs, without changing anything else in your Flow.
The output is a simple text variable containing the transcription, ready to use anywhere else in your Flow.
Guidelines and Considerations
Before building this action into your Flow, there are a few limitations worth knowing. The Speech to Text agent action isn't supported in Government Cloud, so if you're working in a regulated or public-sector org, this one's off the table. It also consumes Flex Credits under its own dedicated Speech to Text usage type, so keep an eye on consumption if you're planning to use it at scale.
One important detail: this action returns a transcript only. It doesn't store it anywhere automatically. If you need to keep the transcription, you'll need to add that logic yourself.
On the audio side, the action supports multiple languages and a solid range of common formats (MP3, WAV, FLAC, OGG/OGA, AMR, MPEG, and MPGA) with a maximum file size of 5 MB. It's worth noting that it transcribes audio based on the primary detected language, and while mixed-language audio may work, it's not guaranteed. If you're planning to feed the resulting transcript into downstream Agentforce features, it's worth double checking that the detected language is actually supported. And to be clear, this action transcribes, it doesn't translate.
Convert Text to Speech Action
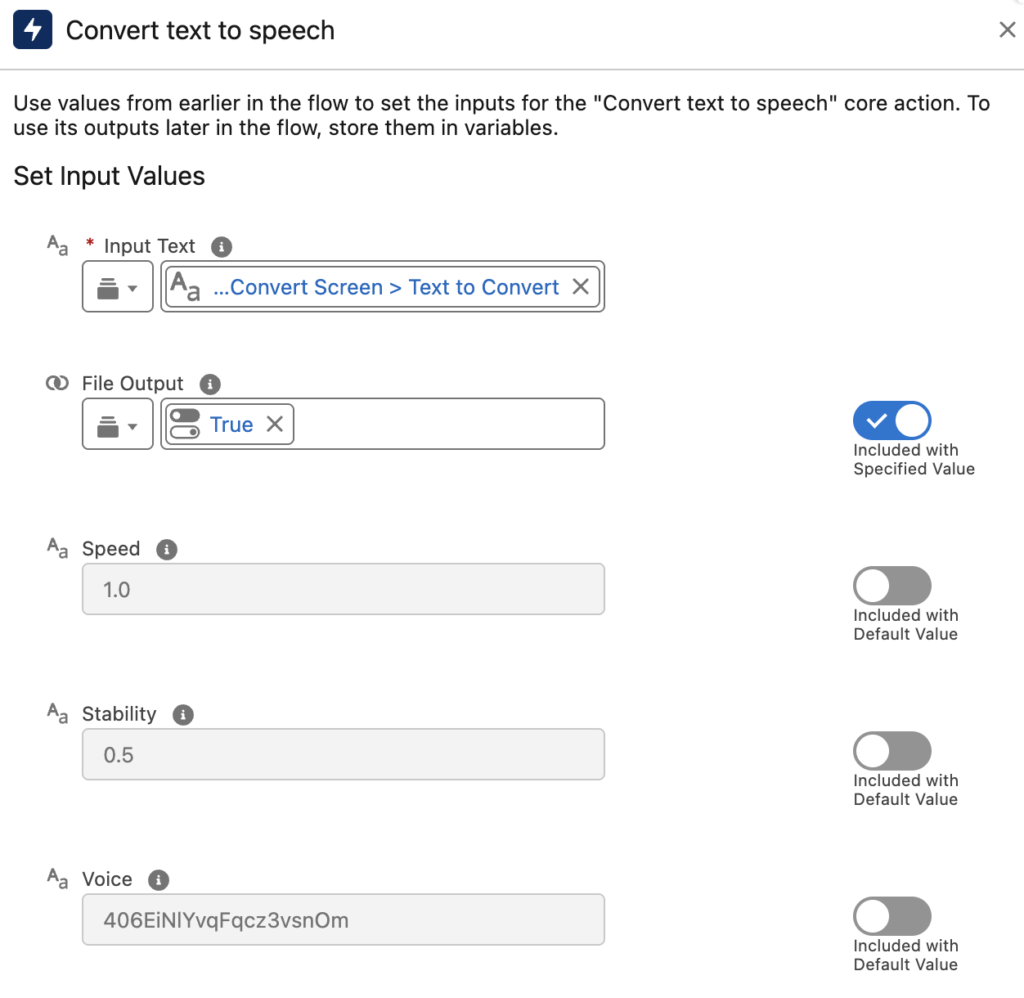
The Convert Text to Speech action does the reverse. It converts written text into natural-sounding spoken audio.
Here are the input values of the action.
Input Text: It is the text you want to convert to speech.
Speed: It controls playback rate and the default is 1.0.
Stability: It controls how consistent versus expressive the voice sounds. Lower values can produce more expressive speech, while higher values produce more stable speech output. The default is 0.5.
Voice: It lets you specify which voice to use via its ID.
File Output: It is a toggle (default False) that determines whether the action returns raw audio data directly or creates a Salesforce File you can attach to a record. It is useful if you want the generated audio to persist rather than just being used in the moment.
By default, the output is returned in Base64 encoded format. However, you can set File Output to true to get the audio back as a Content Version ID instead (it creates an mp3 file).
Considerations of Convert Text to Speech Action
This action consumes Flex Credits through the Digital Wallet, based on the applicable rate card. Therefore, it's worth tracking usage if you're deploying it broadly. It's also subject to an invocation limit of 100 requests per minute. Any requests beyond that will fail, so keep this in mind if you're calling it from a high-volume automation.
Example
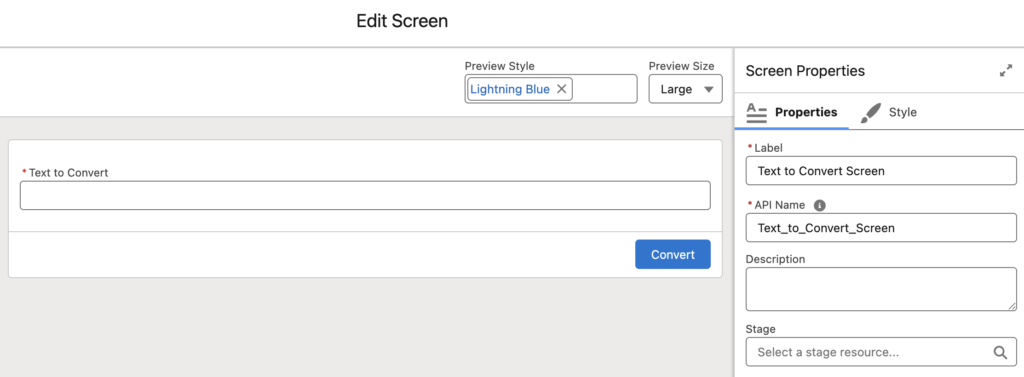
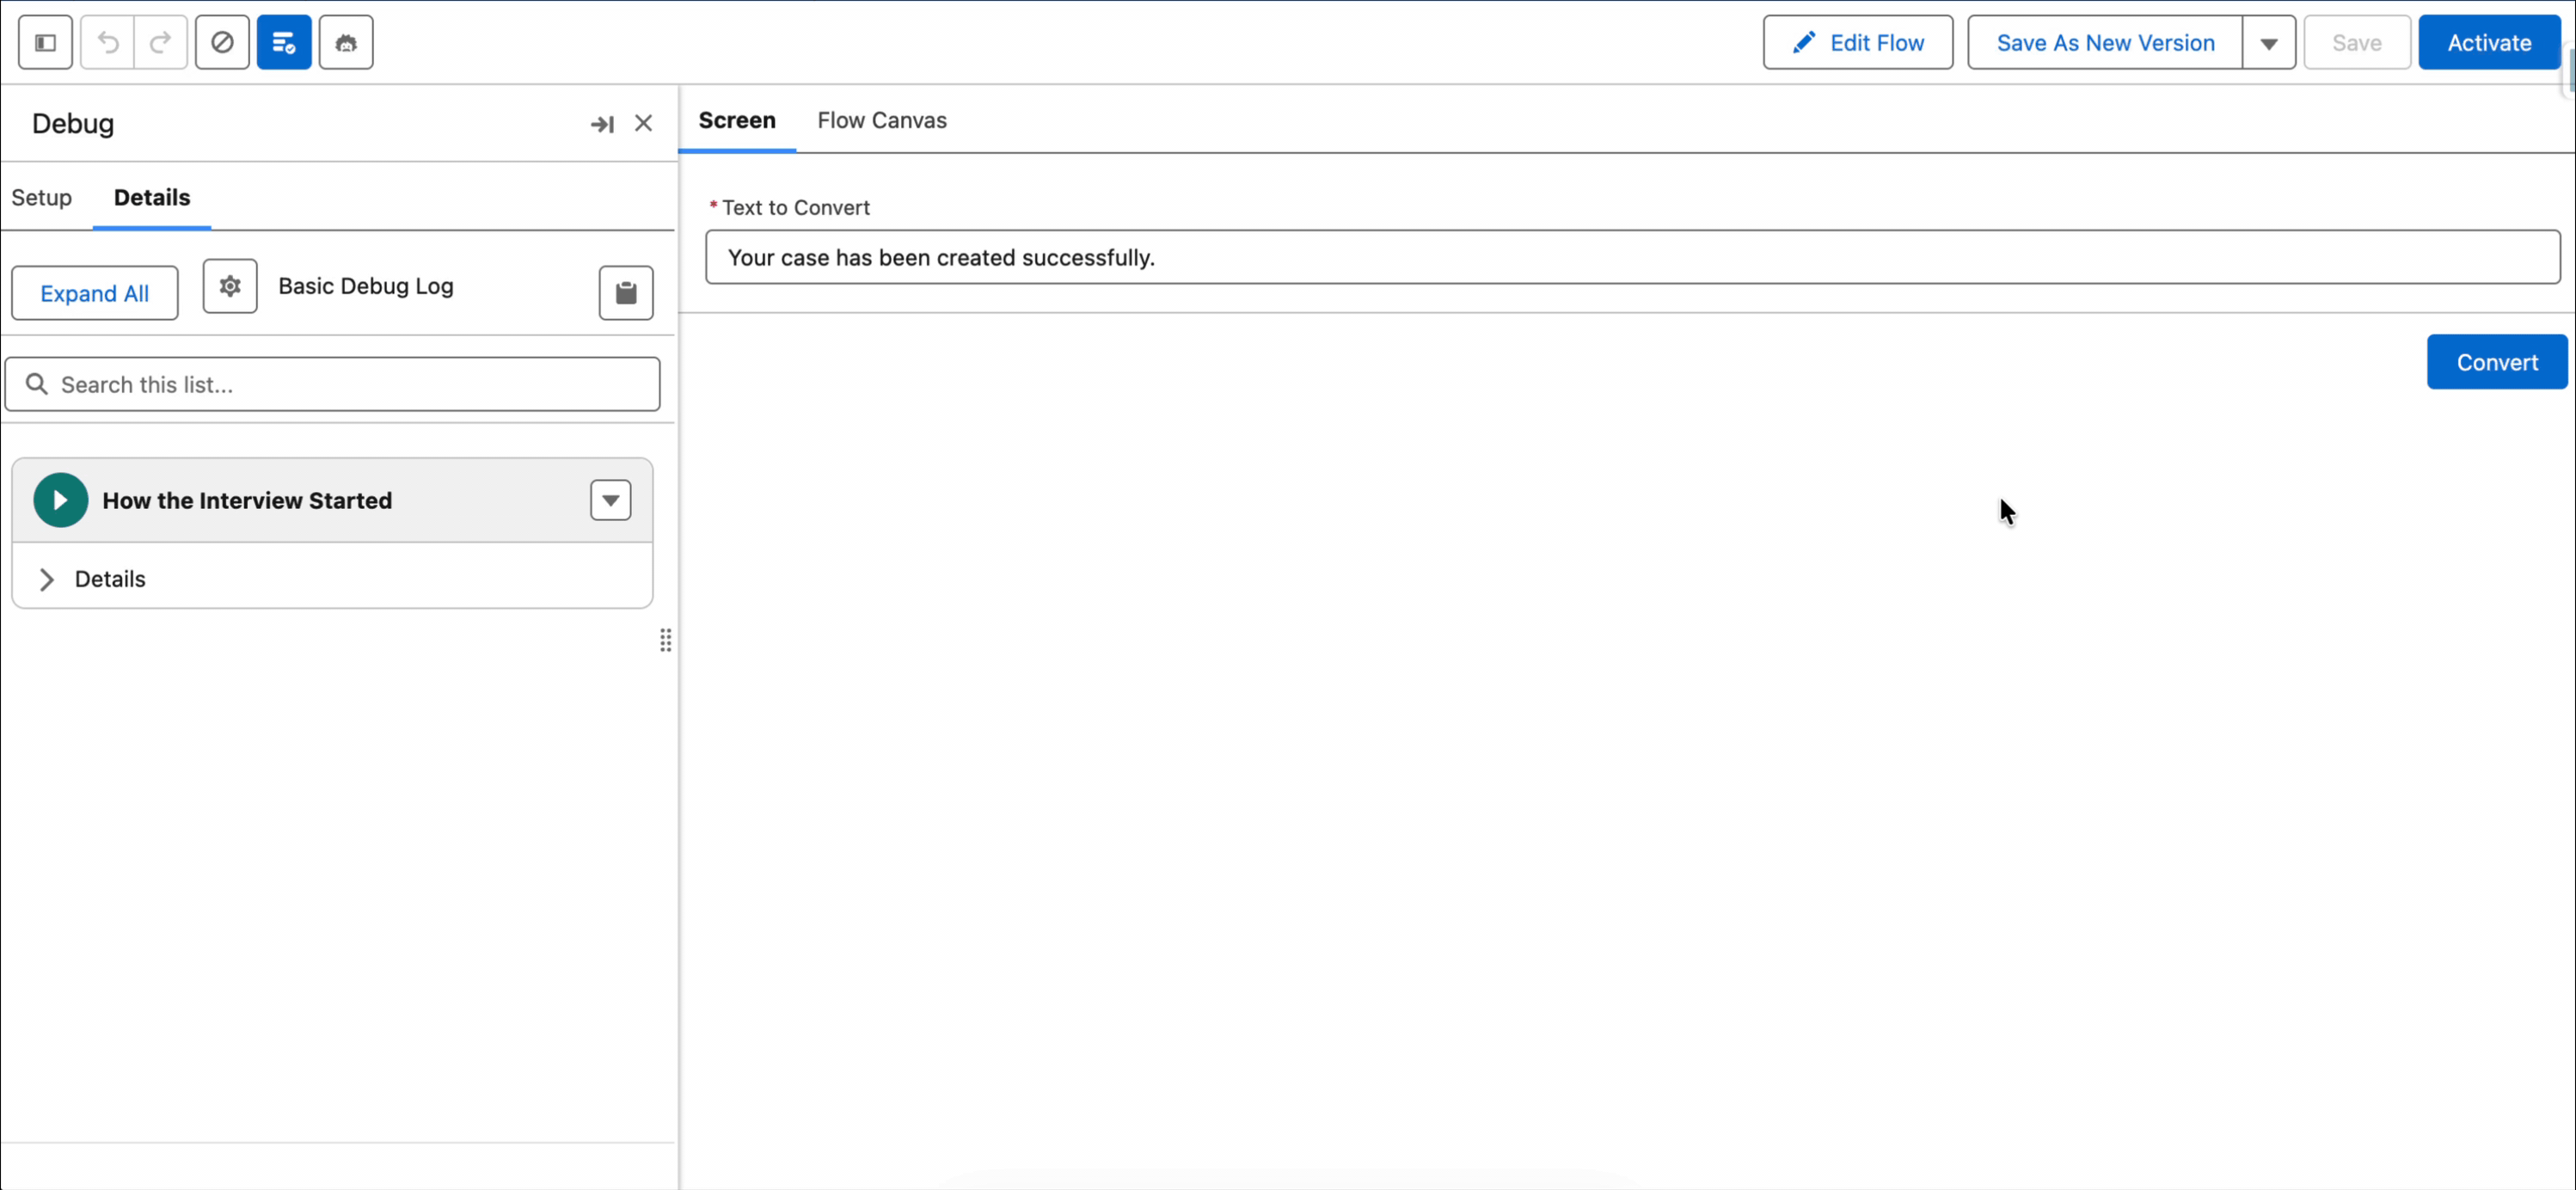
Here is a simple screen flow that lets the user type text, then converts it to speech, and then back to text again. This simple flow is just to show how these actions work.
1- Let's add a screen element with a text field so that the user can type the text to convert.
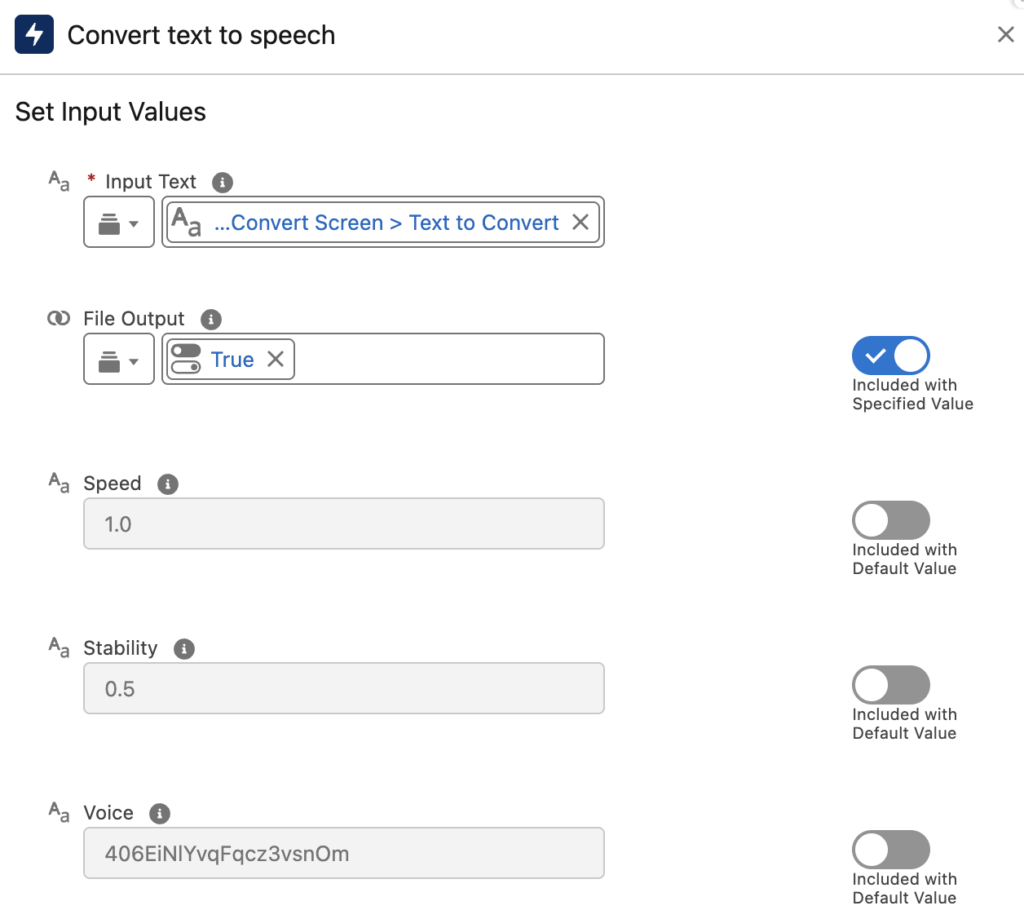
2- The next element is a Convert Text to Speech action. The Input Text is the text the user typed in the first screen. Pay attention that File Output is set to true, which means the output will be a Content Version ID.
3- Since we need a Content Document ID (and not a Content Version ID) for the next element, we need to use a Get Records element.
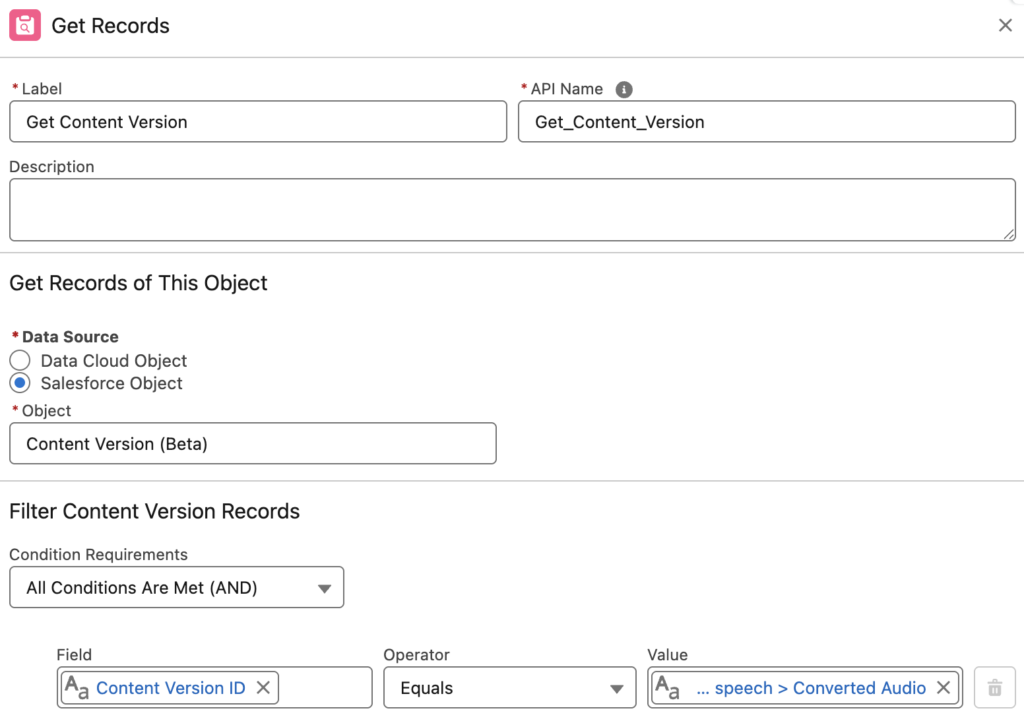
4- Now that we have the Content Version record, we can find the Content Document ID. Let's add a Convert Speech to Text action to transcribe the audio file.
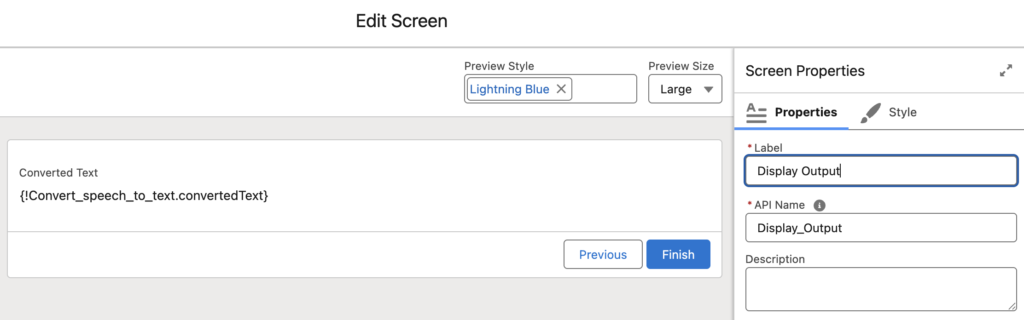
5- Finally, let's display the transcribed text and check if it's the same text the user typed.
Here is how it works:
If you want to speak and transcribe text without using these actions, you can use this custom screen component instead. It uses the browser's Web Speech API, which doesn't require Agentforce and doesn't cost anything.
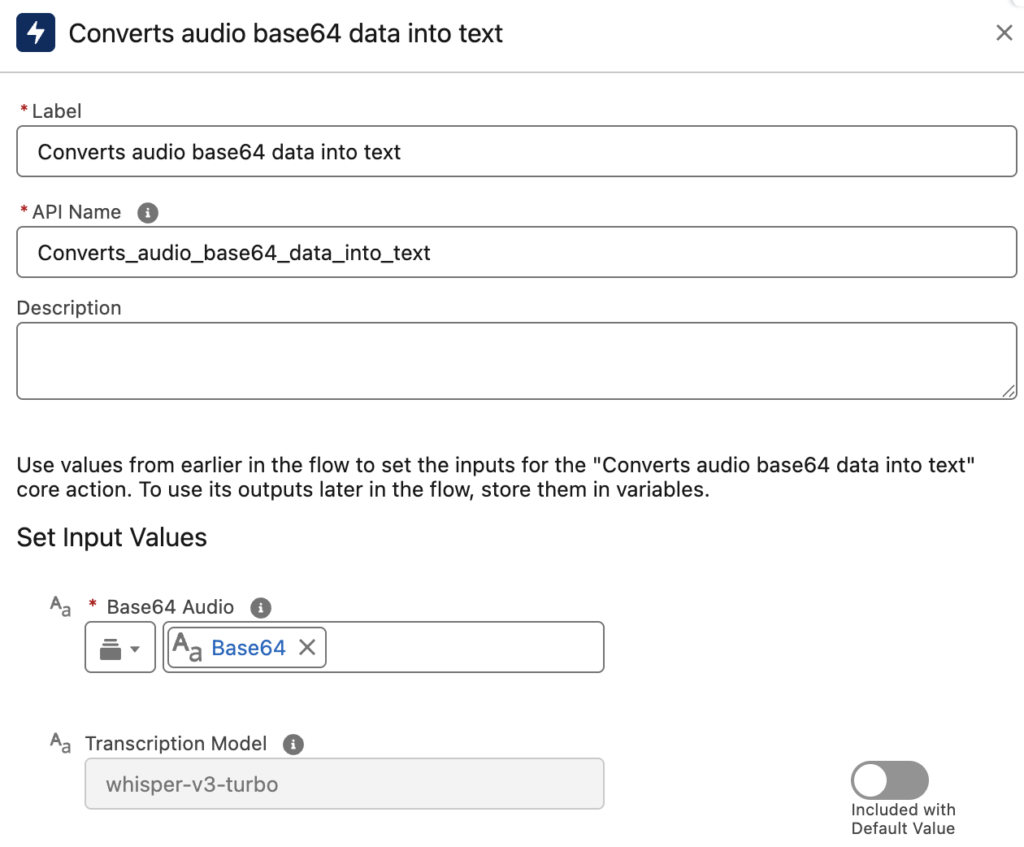
What If Your Audio Is Base64 and Not a File?
There's a similar action that converts Base64 audio data into text. You simply need to provide the Base64 audio and choose a Transcription Model (default is whisper-v3-turbo). The action then converts it to text.
Leave a Reply