
Agentforce is changing the way Salesforce automation works. If you already know how to build Flows, you are closer than you think to building powerful AI agents. One of the most practical things you can do right now is connect a Flow to an Agentforce agent as a custom action. When you do, your agent stops just answering questions and starts doing things. It can create records, retrieve data, update fields, all triggered by a natural language conversation.
In this post, you will learn how to use Flow as an Agentforce agent action.
What is a Flow-Based Agent Action?
In Agentforce, actions are the tasks an agent can actually perform. Out of the box, Salesforce provides standard actions like "Identify Record by Name" or "Query Records". But custom actions, most of the time built from your own Flows, are where the real power lies.
When you set an Autolaunched Flow as an agent action, you are telling the agent: "If a user asks for something in this area, run this Flow." The agent's AI reasoning (the Atlas Reasoning Engine) reads your action instructions and decides when the action is relevant. Then it collects any required inputs from the user, runs the Flow, and returns the output. All of these happen without a human clicking anything.
Let's see how to set a Flow as an agent action.
Step 1: Build Your Autolaunched Flow
The Flow you connect to an Agentforce action must be an Autolaunched Flow. It cannot be a Screen Flow, or a Record-Triggered Flow. This is because the agent runs Flows in the background. There is no screen for a user to interact with directly.
It is important to define all your input and output variables upfront, before saving the flow. Once the agent action is created from this flow, you cannot change the inputs/outputs without rebuilding the action. Keep this in mind, as it is one of the most important tips.
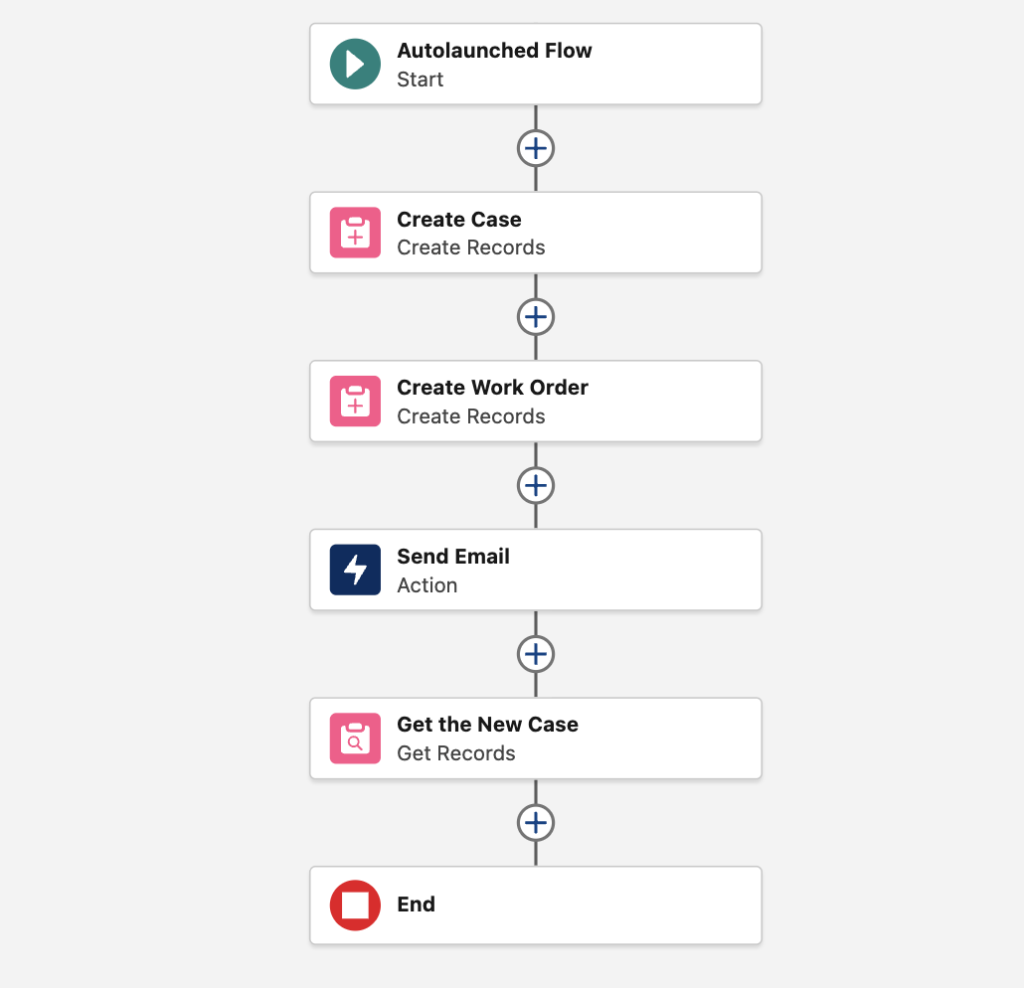
In this example, we will build a simple Autolaunched Flow to create Case and Work Order records. The agent will pass multiple input values, the Flow will create the records, send an email, and return the Case number.
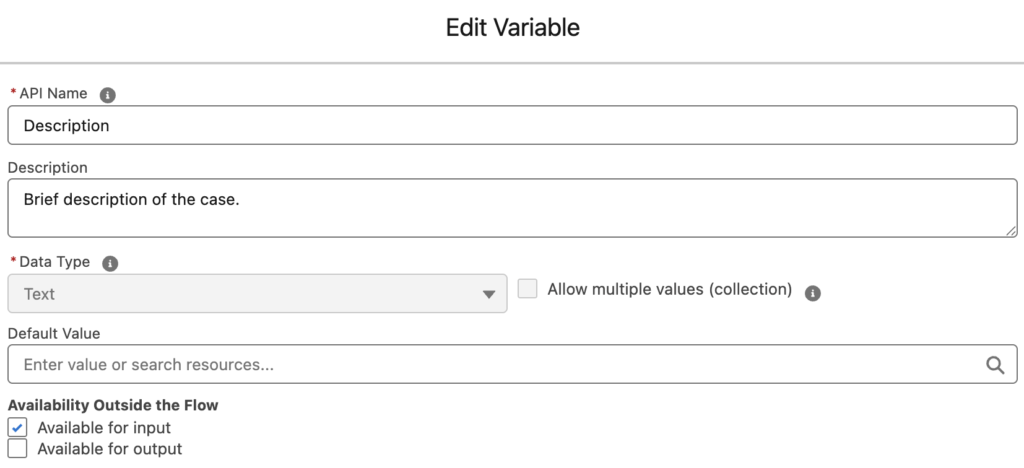
Add Input Variables
Input variables are the pieces of information the agent will collect from the user and pass into your flow.
Create variables for each input and make sure to check “Available for input”.
Tip: The Description field on your variables matters more than you might expect. Agentforce reads these descriptions to understand what data to collect from the user.
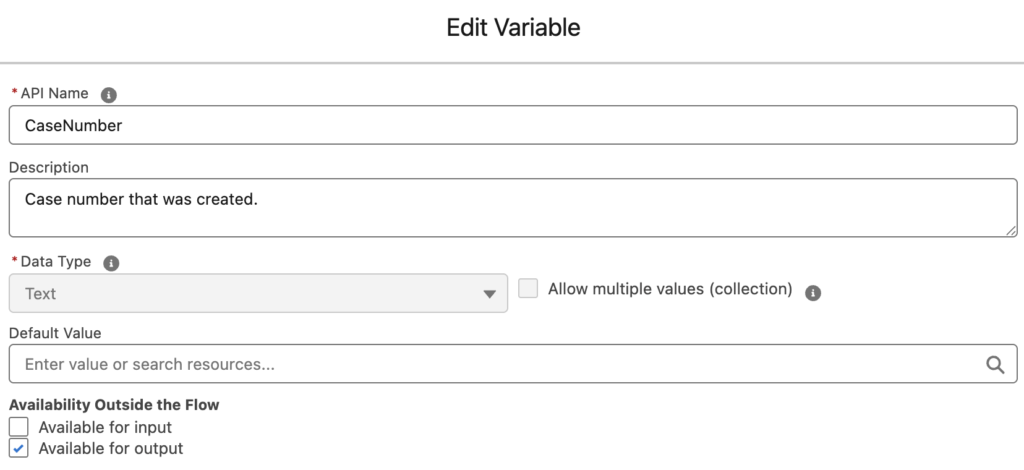
Add Output Variables
Output variables are what the flow sends back to the agent.
Create a variable for each output and make sure to check "Available for output". Again, write a clear description.
Build the Flow Logic
Now build out whatever your flow needs to do. In this example, our flow will create Case and Work Order records, and then send an email. Before saving, make sure to add a Description for the entire flow. This description populates the Agent Action Instructions automatically when you create the action.
Step 2: Turn Your Flow into an Agentforce Agent Action
Now it is time to create an action Agentforce can use.
Go to Setup, open Agentforce Assets, and create a new agent action.
- Reference Action Type: Flow
- Reference Action: Select your flow from the picklist
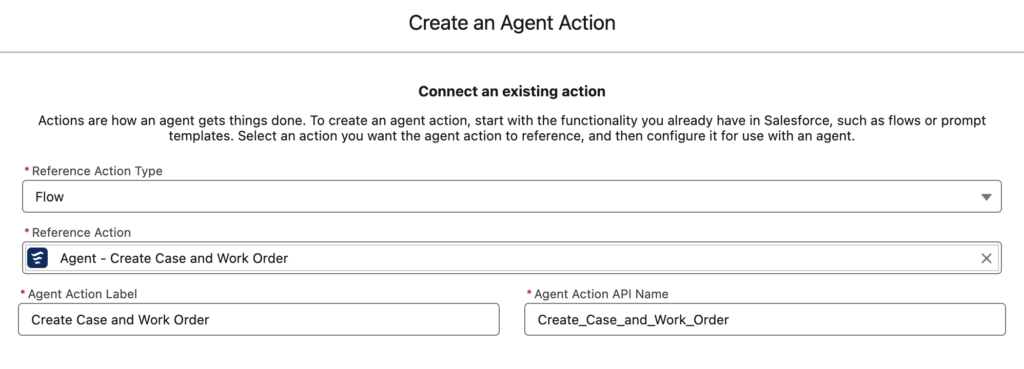
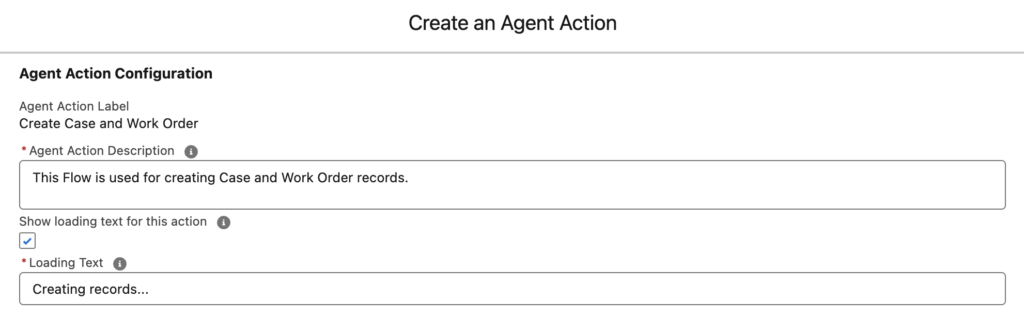
Then, configure agent action description. The Agent Action Description field tells the Atlas Reasoning Engine when to use this action and what it does. Think of it like writing instructions for a smart colleague. Describe what the action does in one or two sentences. Then optionally, add a Loading text.
Configure Input Settings
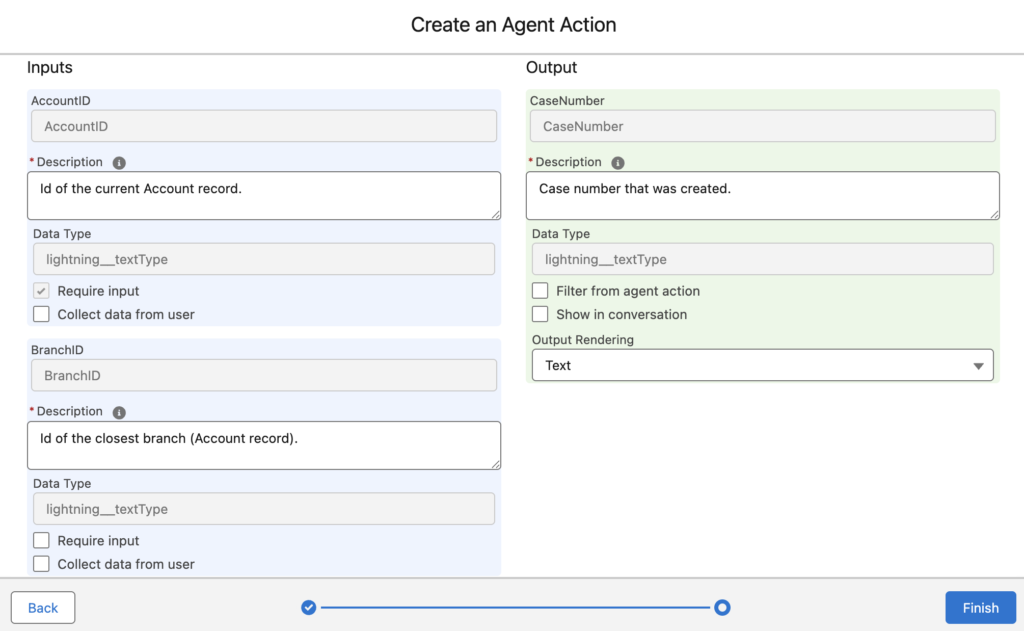
You will see each input variable of your Flow listed here. For each one:
- Description: Describe what the agent should collect. Since you added a description to each flow variable, it should automatically appear here.
- Require input: Check this if the flow cannot run without this value. The agent will ask the user for it before proceeding.
- Collect data from user: Check this if the value should come directly from the conversation (as opposed to being derived from context).
Configure Output Settings
For each output variable:
- Description: Describe what this output represents. Again, since you added a description to each flow variable, it should automatically appear here.
- Filter from agent action: If you check this, the output won't be shown in the conversation, and the AI reasoning engine can't reference it in its response.
- Show in conversation: Check this so the agent presents the value back to the user in the chat.
At least one output must be set to show in conversation, or the agent will have nothing to display.
Step 3: Add the Flow-Based Agent Action to Your Agent Topic
Actions live inside topics. A topic defines a subject area your agent handles, and actions are the tools the agent can use within that topic.
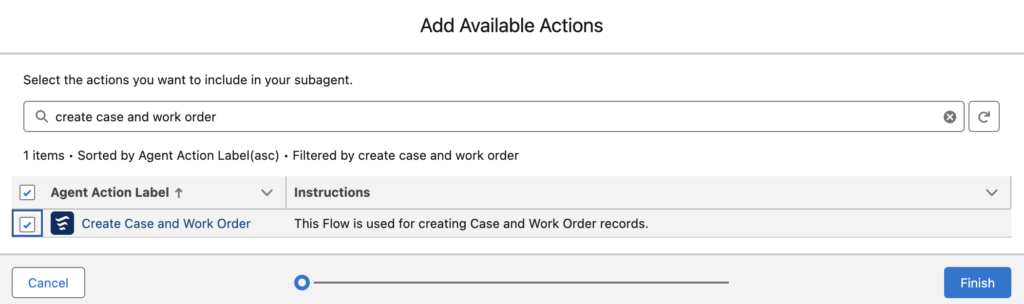
Go to your Agentforce Agent, select the relevant Topic (or create a new one), and click the This Topic's Actions tab. Click New, then Add from Asset Library, and search for the action you just created and select it.
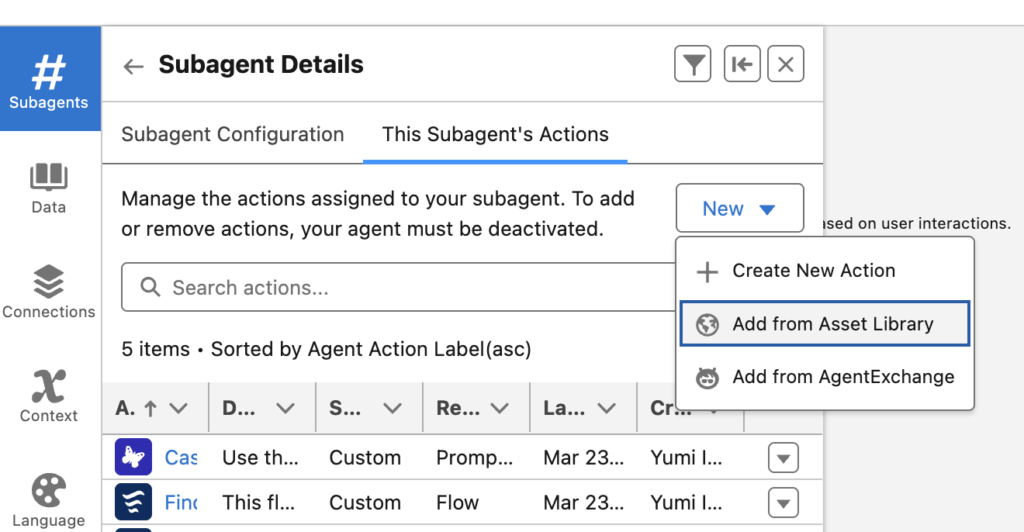
Note: Salesforce has recently renamed Topics to Subagents.
Common Mistakes to Avoid
- Forgetting to add flow descriptions: The agent action pulls its instructions from the flow description by default. If you leave it blank, you'll need to write everything manually in the action configuration and you might miss important context.
- Locking in a bad interface: Once you create the action, the input/output variables are fixed. Test your flow thoroughly before building the action, and make sure you've captured all the inputs and outputs you'll need.
- Vague action instructions: The Atlas Reasoning Engine relies heavily on your instructions to decide when to trigger an action. If your instructions are generic or overlap with other actions, the agent may use the wrong one or none at all.
- Not checking Require Input: If an input is required for your flow to run correctly, mark it as required. Otherwise the agent may try to execute the flow with a blank value and fail silently.
Leave a Reply