
In certain cases, a flow must progress automatically, without requiring user interaction. There are custom Flow components available that enable automatic Flow navigation when certain conditions within the flow are met. However, there are many situations where key actions or updates occur outside of the flow, and sometimes even outside of Salesforce. These events may include receiving a platform event, an API response, an external system update, or a record change. In such scenarios, it is often necessary for the flow to navigate to the next or previous screen automatically.
The Auto Flow Navigation component enables this capability by allowing the flow to progress automatically when a platform event is received. This makes it possible to navigate in response to triggers that occur outside the flow or even outside Salesforce.
How to Use the Component
1- Install the package using the installation links below.
2- Create a screen flow and add the "Auto Flow Navigation" screen component to a flow screen.
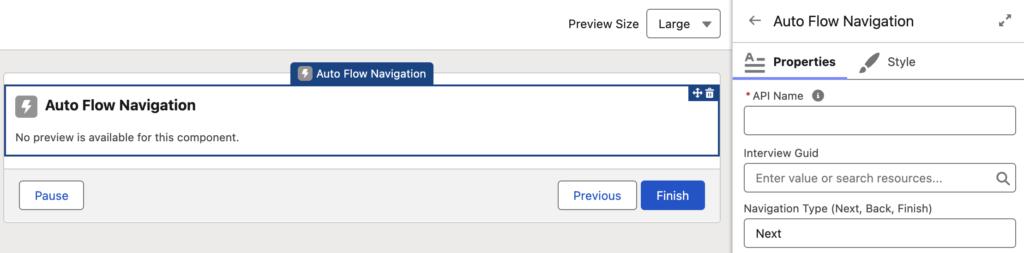
3- This component has 2 configuration parameters.
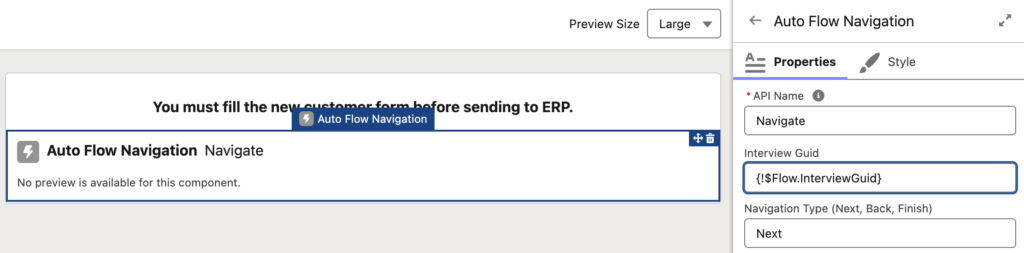
- Interview Guid: This component allows the flow to navigate when a platform event (Auto_Flow_Navigation__e) is received. Since multiple users can use the component simultaneously, the platform event must know which flow interview to navigate. To achieve this, you should pass a value to match and navigate the correct flow interview. It is recommended to use the Interview Guid ({!$Flow.InterviewGuid}), but any unique value can be used.
- Navigation Type: Supported navigation types are Next, Back, and Finish. Ensure that the selected navigation type is valid. For example, if there are more screens after the current screen, you cannot use the Finish navigation type.
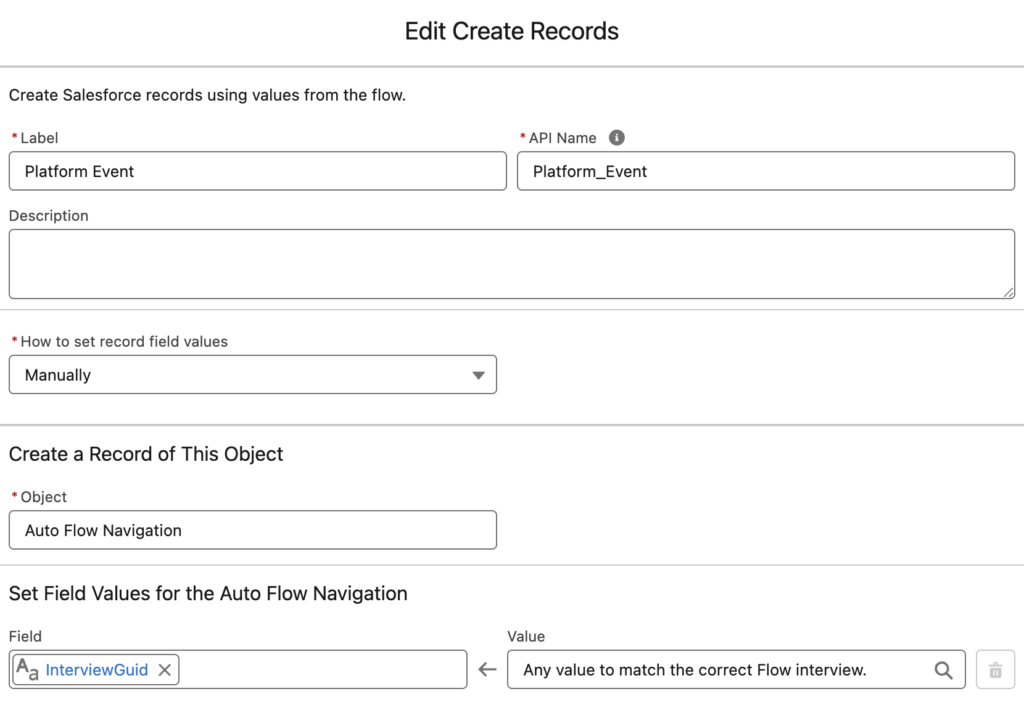
4- Publish the Auto_Flow_Navigation__e platform event to trigger flow navigation. If the changes occur within Salesforce, use a Record-Triggered Flow with a Create Records element to publish the event. Otherwise, if the changes occur outside Salesforce, publish the Auto_Flow_Navigation__e event from the external system.
Auto Flow Navigation Example
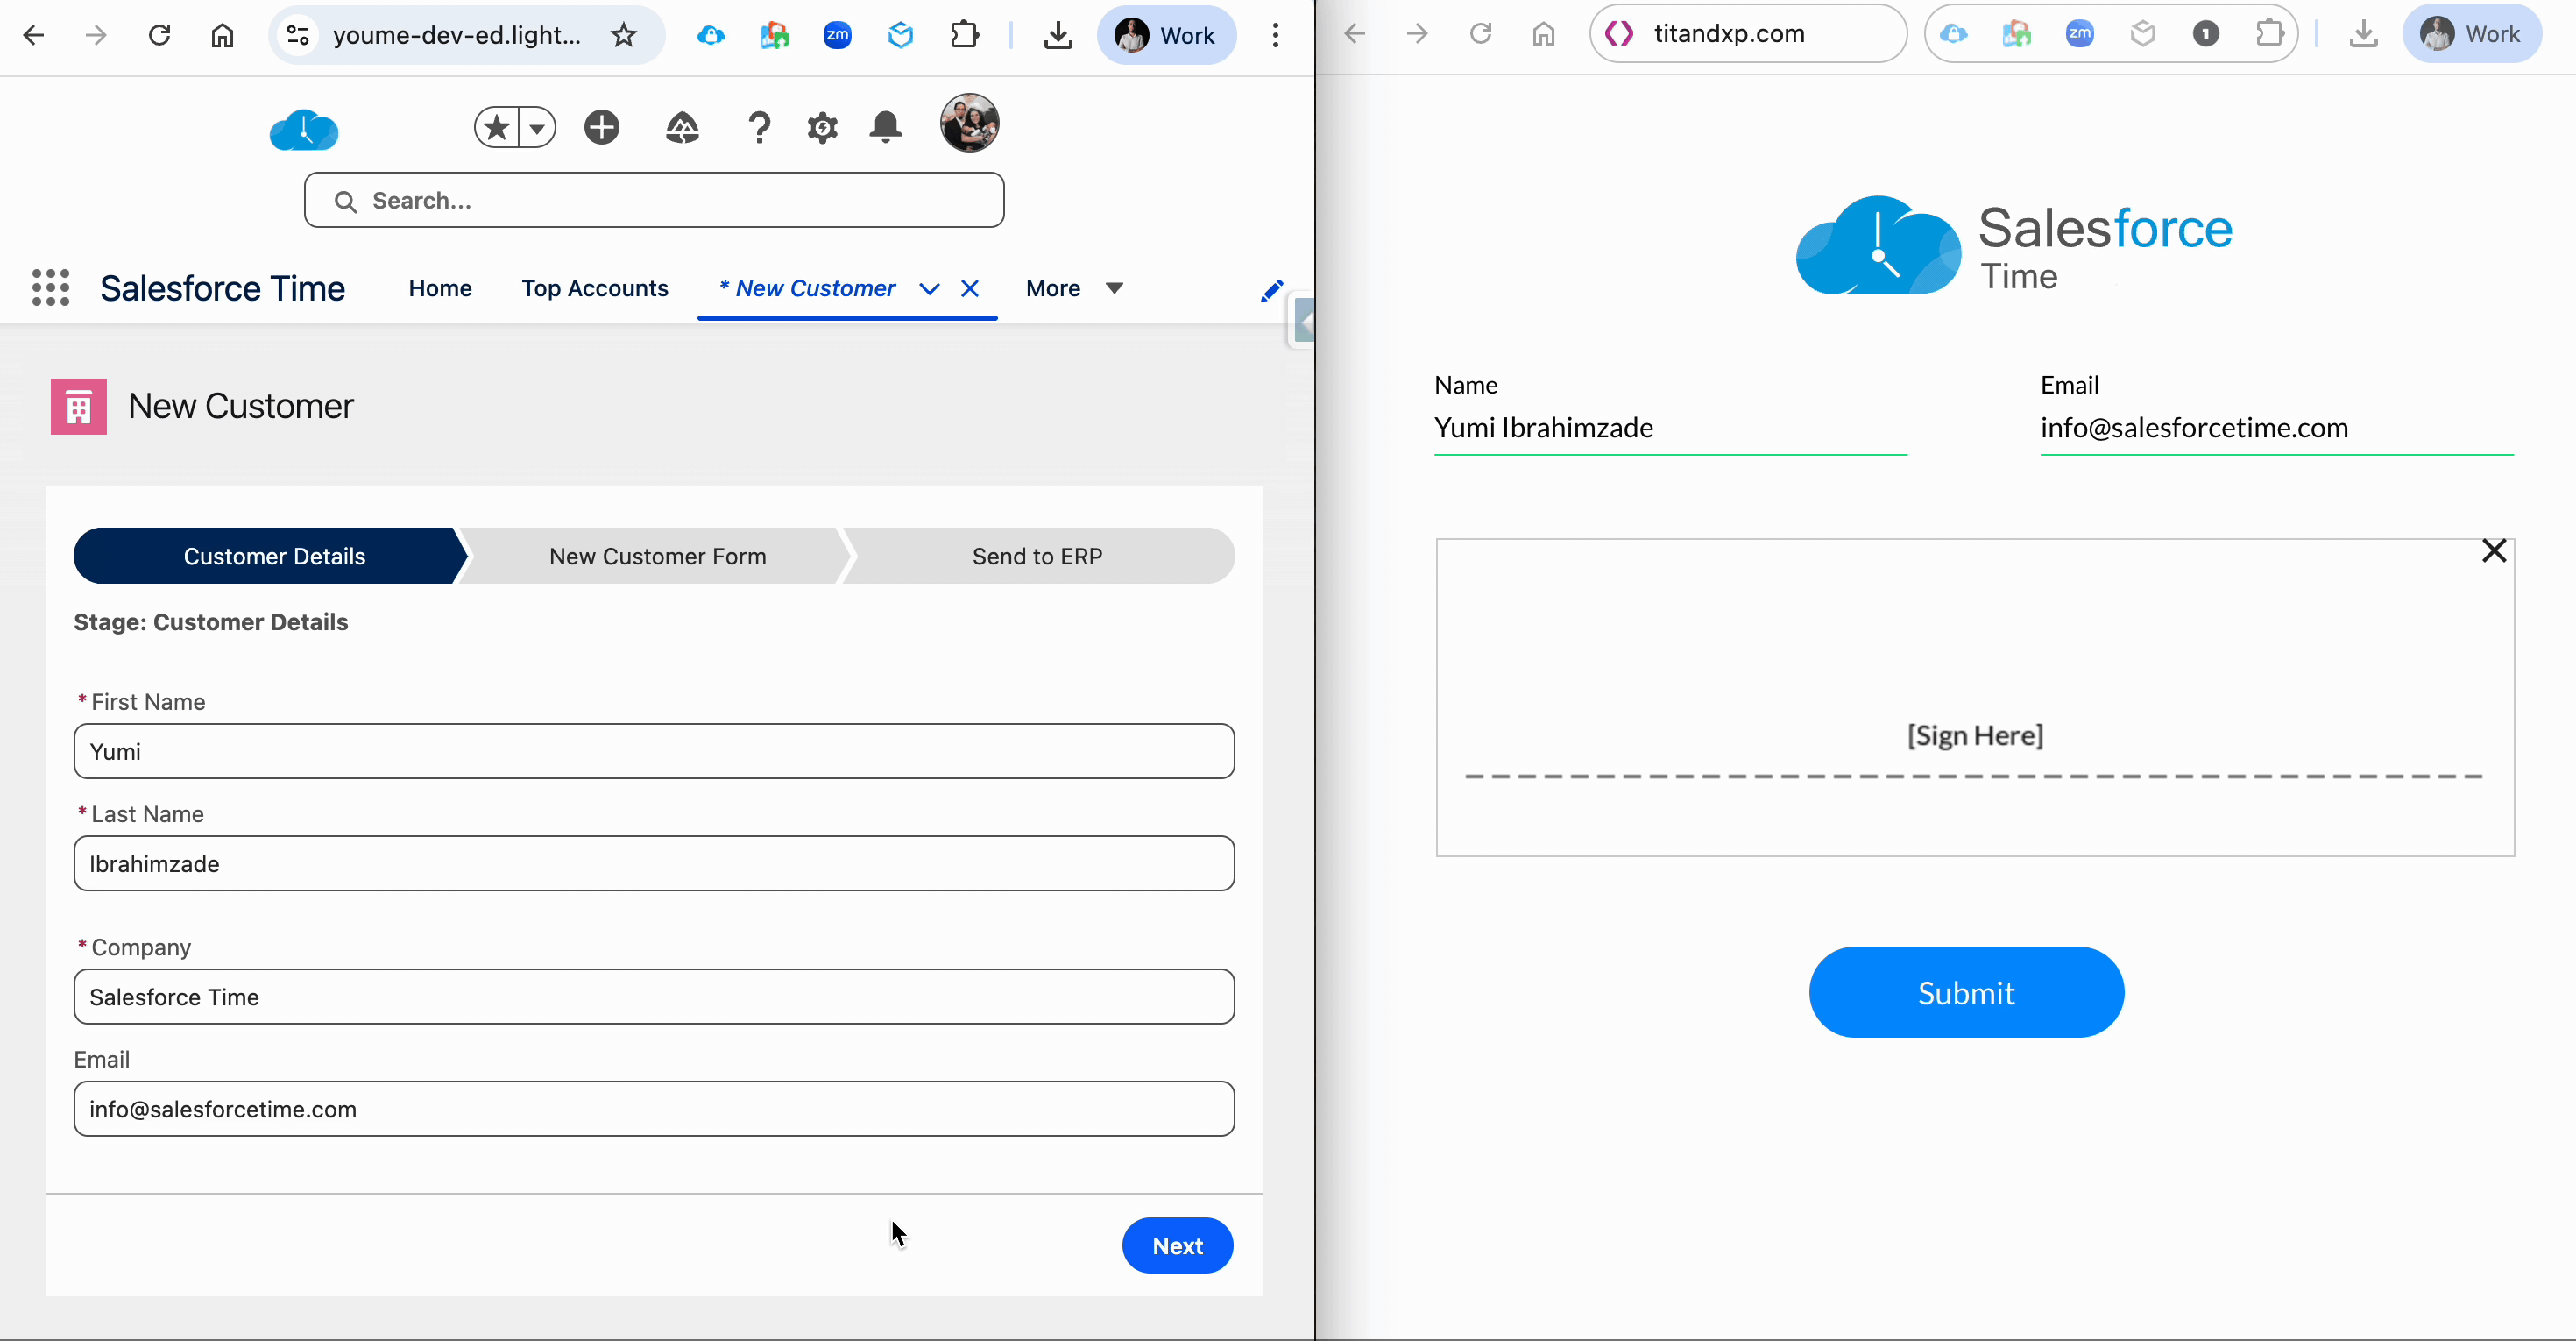
Let’s say you have a Screen Flow designed to create a new customer. After the user enters the customer details, they must complete and sign a Titan form, which exists outside of Salesforce. The flow should only continue once the form has been submitted. In this scenario, Titan publishes a Platform Event upon submission. The Auto Flow Navigate component listens for this event and automatically advances the flow once the form is complete.
Here’s how the entire process works: in this example, the screen on the right is a Titan form. When the user signs and submits the form, the Screen Flow automatically navigates to the next screen. Notice that there isn’t even a Next button. The transition happens seamlessly as soon as the form is submitted.
Installation Links
Use this link to install in production or developer edition environments.
Use this link to install in sandbox environments.
Leave a Reply