
A favicon is the small icon that appears in the browser tab next to your site name. It also shows up in bookmarks and saved shortcuts. It's a tiny detail, but it makes your Experience site look more professional. It helps users recognize it quickly when they have multiple tabs open, and strengthens your branding with a consistent logo everywhere your site appears.
Here is how to add a favicon to your Experience site (formerly called a Community).
Editing the Head Markup of Experience Site
To add a favicon to an Experience site, you need to add markup to the <head> section. You can do this from Experience Builder: go to Settings, open Advanced, and click Edit Head Markup.
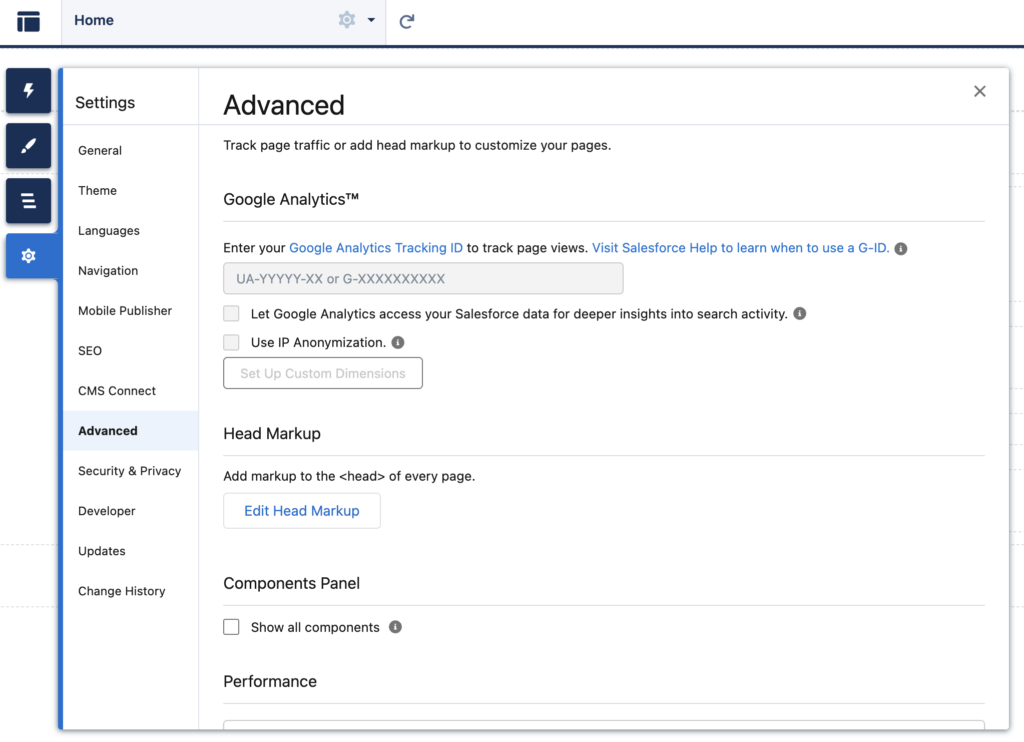
Then, paste the snippet below to add a favicon to your Experience Cloud site. Make sure to replace the image URL with the actual URL of the image you want to use as the favicon.
<link rel="icon" type="image/png" href="image URL">Using an External Image as Favicon
You can use an external image as a favicon, meaning the image isn't hosted in your Salesforce environment. In that case, just replace the image URL with the URL of your image. However, you must add that domain to Trusted URLs in Salesforce Setup so the browser is allowed to load it.
<link rel="icon" type="image/png" href="https://salesforcetime.com/wp-content/uploads/2026/01/SalesforceTime-Icon.png">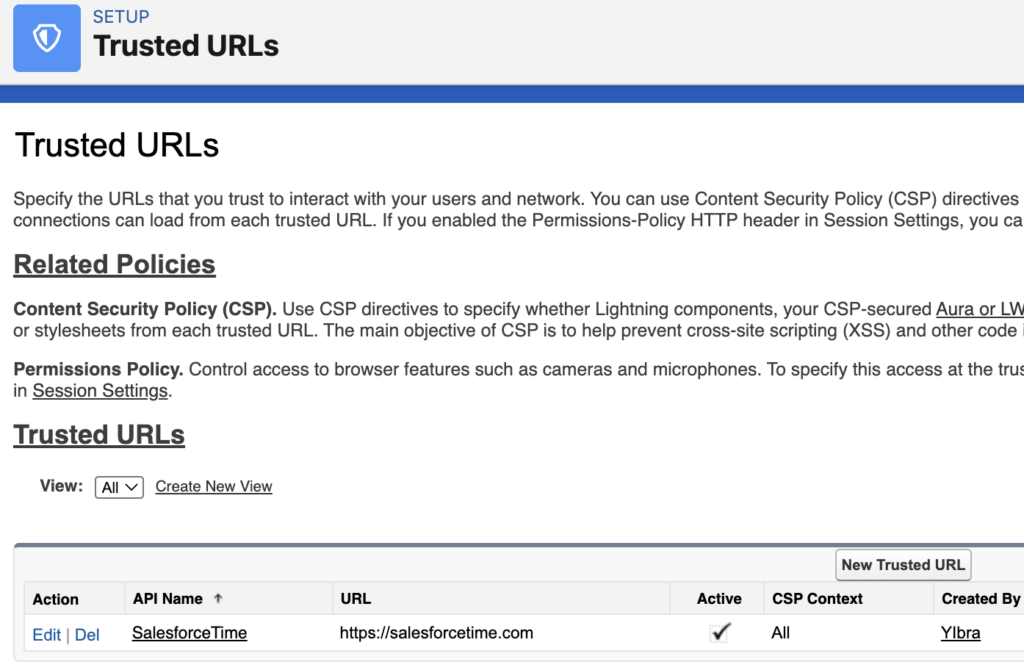
Using a Static Resource as Favicon
You can also use an image hosted in your Salesforce environment. A simple and reliable approach is to upload the image as a Static Resource in Salesforce Setup.
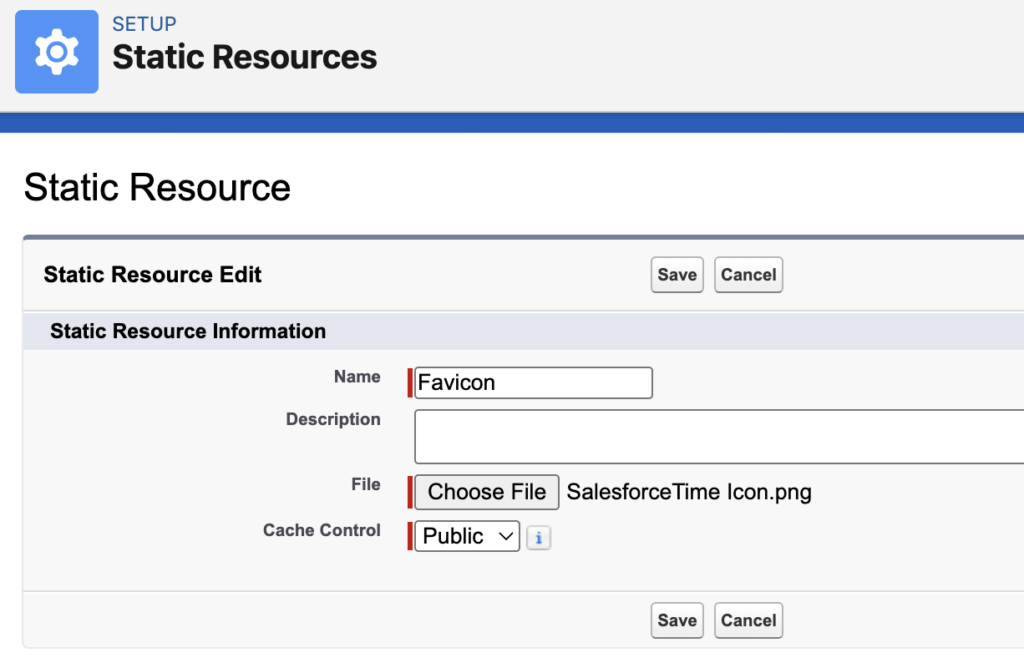
In that case, use a snippet in this format:
<link rel="icon" type="image/png" href="/sfsites/c/resource/StaticResourceName">In this example, the final snippet looks like this:
<link rel="icon" type="image/png" href="/sfsites/c/resource/Favicon">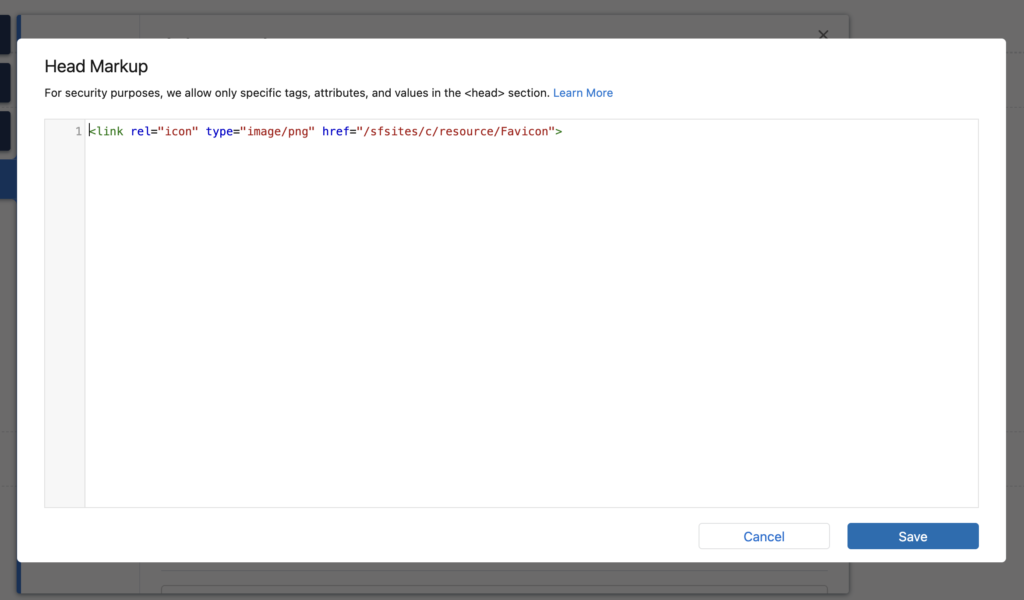
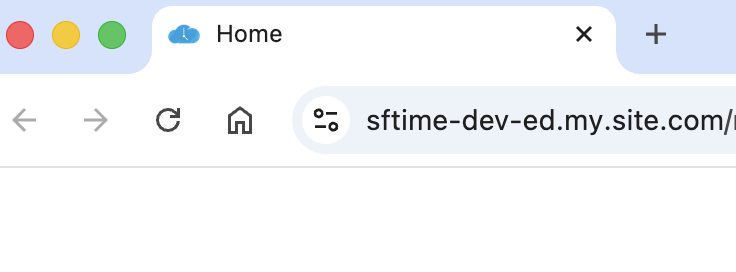
After you publish the Experience site, the favicon will appear in the browser tab.
Leave a Reply